 Log In


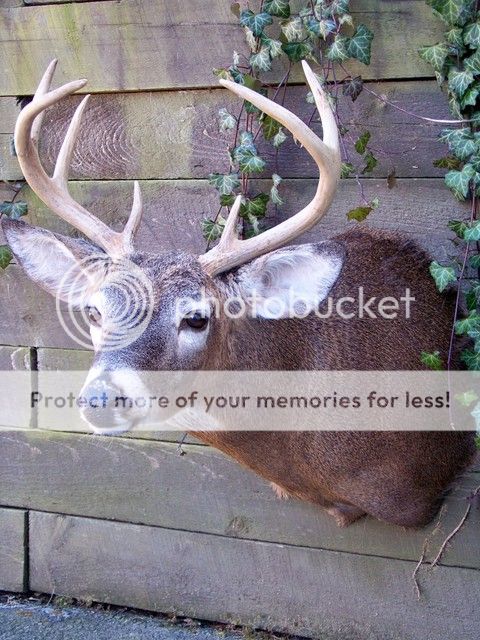
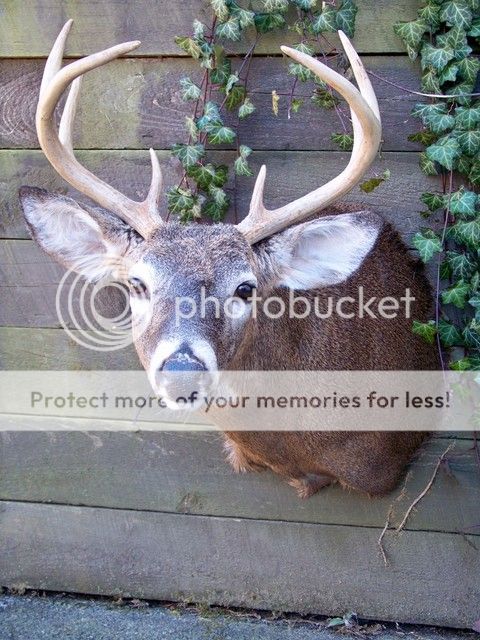
I am not a beginner, just learning new things and looking for some opinions on my “new” process so I can tweak it where it is needed.The deer was not quite level on the wall when I took the photos, his ears are even but they don’t appear that way. I changed my eye set and nose detail ( the inner detail you can’t see I couldn’t get a good shot of it). Also the first deer I have done using Meder Liquid Lens , I usually use the Meder IQ. Your comments are welcome on eveything about the deer and some help on the finishing is more then welcome( I know I can use some work on it). This deer is not a show piece, straight up commercial and already out the door with a very pleased customer. I am however,looking for help on my whitetail work to advance my skills to do better at the shows and increase my quality on commercial as well. If you stop learning it is time to get out of the game. I have many people to thank for getting me this far and hopefully more to thank after I post this. Responses are welcome here or in a PM. Thanks in advance!
Had one more to add each post only allows 4 so here it is. Thanks Again!
Alright woodstock, these are the most noticable things I see.
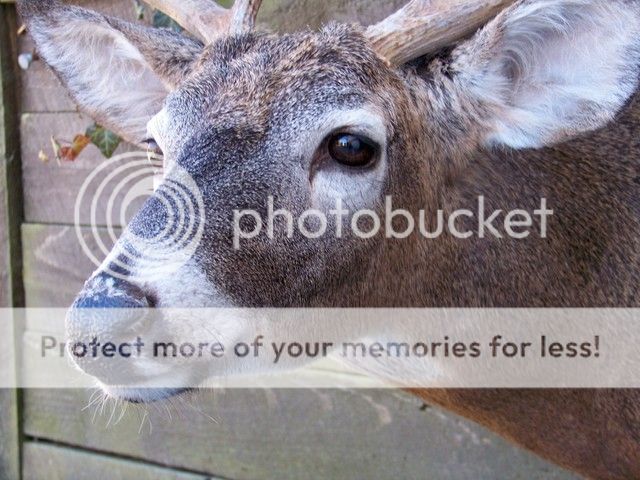
1- You need to soften up your finish work. The epoxy in the lacramel crease area looks rough.
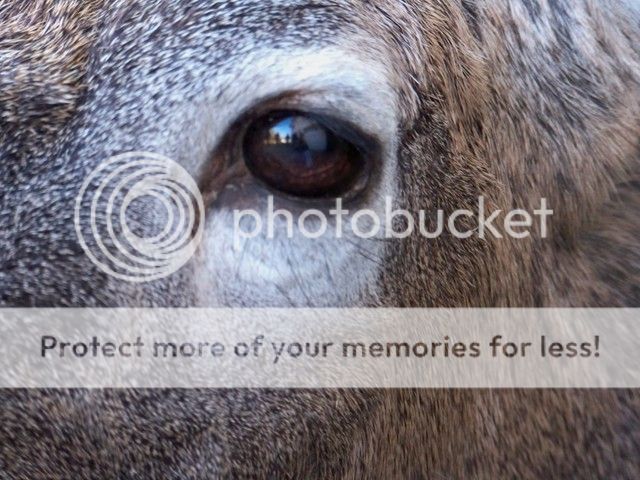
2- Shrinkage around the lower lid.
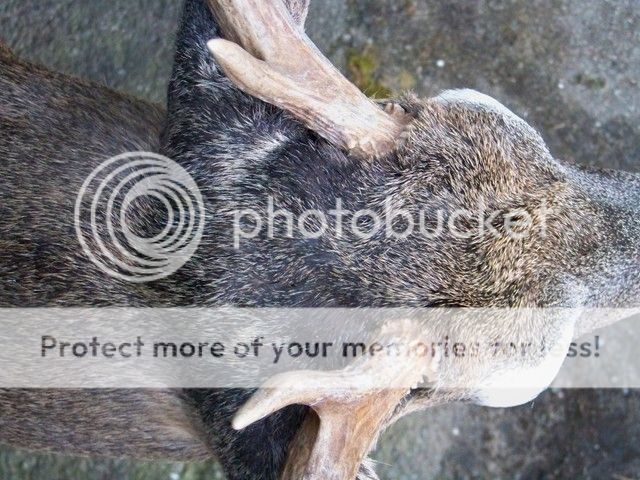
3- Hair patterns in ear brushed opposite of their natural position.
4- Though the hair is wavy on the forehead area, the centerline of the facial hair doesn’t look straight.
5- The forehead skin is also pulled farther to his left. Notice the amount of white above the eye compared to the right side.
6- Pull the eyelashes forward so they cover the entire eye.
7- Not sure by the pic, but the right armpit hair looks out of place compared to the left.
Hope that helps.
Page, thanks for the input. I have not been able to nail down the finish work in that area, the eye lashes do actually cover the entire eye ,I don’t know why they don’t seem to show well in the pics. Pattern in the ears, searched thru some photos and I see what you mean, hair should cover the ear canal and mine is brushed more outward. I cannot say that I really noticed that before.I’ll be needing to pay more attention to protecting the canal from top to bottom which is what the hair is for.The hair on his right side arm pit got pushed out from behind the form when I hung him and attempted to straighten him out, I didn’t think to tuck it back behind the form before I took the pics. The difference in the white shows up in the top view of the deer’s head too, I tried to keep the white under his eye even to each other and noticed his right side seemed slightly larger and showed more over his eye and it does appear I could have pulled his forehead skin a little more to his right to center it where the hair starts to get wavy.With the white being slightly different in size would most people leave it be or make it symmetrical? If you are to make it symmetrical do you just tuck more of it under the brow hair(which there would have been more of it had I moved his forehead to the right a little) and brush the brow hair outward over the eye? Any suggestions on softening the eye work? Every little bit helps,it’s the little details that seem to get me the most, pay attention to one and lose another some where else. I’ll have to start a check sheet to follow on each mount.Thanks Again
For the finish work, get one of Gene’s nose tools. Use it to thin your edges by pulling the epoxy out from the center. Apply decent pressure. Then with a small shader brush, blend the epoxy into the skin. You shouldn’t see where the 2 meet. Do NOT use water to blend with. It will cause your skin to rehydrate and crack your finish work later as it re-dries. I use acetone. If your using liners, they me be to tight. There are 4 ridges in the ear with a line of hair on them. Make sure you split them and peel the cartilage out. This will make your ear open up more so you have extra skin to work with. Lay the hair lines on the ridges of your liner and brush them UP. Now the hair at the top of the ear goes inward like you saw in your pics. The skin on his forehead needs to be pulled to the right be (squishing) it together, not folding it. Then brush the forehead hair outward. This would have made the white pattern smaller for the right eye, and larger for the left. And yes, work the skin till they are symmetrical. You have a nice looking deer, but the little things like you said will make it POP.


