Building a Profitable Taxidermy Business — Part 1 of 5
A professional series on structure, pricing, systems, and long-term sustainability in the taxidermy industry.
Taxidermy is both art and trade. In this series, we explore what it actually takes to build a profitable, sustainable taxidermy business in today’s market.
The Hard Truth About Making Money in Taxidermy
Why Some Shops Struggle — and How to Build a Profitable Studio
Spend enough time around the taxidermy industry and you’ll hear a common refrain:
“There’s no money in taxidermy.”
It’s repeated so often that many accept it as fact.
But the truth is more nuanced.
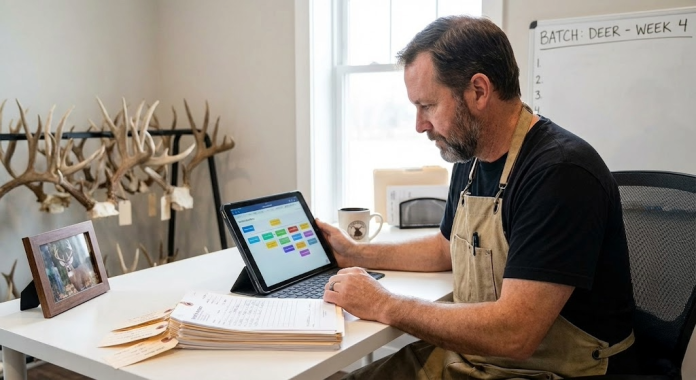
Taxidermy is demanding work. It requires skill, artistic judgment, technical precision, and long hours. Margins can be tight. Turnaround times are long. Costs continue to rise.
However, the idea that you cannot make money in taxidermy simply isn’t accurate.
You can.
But only if you treat it as a business — not just a craft.
Passion Is Not a Business Model
Taxidermy attracts passionate people. Most of us got into it because we love wildlife, hunting, and preserving meaningful memories.
Passion is essential. It drives quality.
But passion alone does not create profitability.
A sustainable taxidermy studio requires:
-
Accurate pricing structures
-
Overhead management
-
Clear policies
-
Consistent workflow systems
-
Professional communication
-
Financial discipline
Without those elements, even highly skilled work can struggle financially.
The difference between a hobby operation and a professional studio is not talent — it’s structure.
The Pricing Problem
One of the most common statements you’ll hear from shop owners is:
“I didn’t charge enough, but at least I got the job.”
That mindset is one of the biggest barriers to profitability in this industry.
Landing a job is not the same as running a healthy business.
If pricing does not account for:
-
Labor hours
-
Materials
-
Tanning
-
Freight
-
Overhead
-
Equipment
-
Shop space
-
Insurance
-
And a fair wage for the owner
Then volume will not solve the issue — it will magnify it.
Working more hours at underpriced rates only accelerates burnout.
The Discount Trap
Another challenge within the industry is unnecessary discounting.
In many skilled trades and professional services, pricing reflects expertise and cost structure. Yet in taxidermy, it is common to see:
-
Informal discounts
-
Free upgrades
-
“Throwing in” bases
-
Price reductions for multiple animals without clear margin analysis
Discounting without strategy erodes profitability and, over time, lowers perceived value.
Quality taxidermy is detailed, labor-intensive work. It deserves to be priced accordingly.
Rising Costs, Rising Expectations
The economic landscape has changed.
-
Materials cost more.
-
Freight costs more.
-
Utilities cost more.
-
Customer expectations are higher than ever.
Clients today expect professional communication, consistent timelines, and high-quality finishes.
To meet those expectations sustainably, pricing and business practices must evolve as well.
Studios that adapt and operate with clear business systems are positioned to thrive. Those that rely solely on passion often struggle.
What It Actually Takes to Be Profitable
A successful taxidermy business requires more than mounting ability.
It requires:
1. Knowing Your Numbers
Every shop owner should understand:
-
Their cost per mount
-
Average labor time per piece
-
Monthly overhead
-
Target profit margin
Without this clarity, pricing becomes guesswork.
2. Charging With Confidence
Pricing should reflect:
-
Skill level
-
Quality standards
-
True operating costs
-
Brand positioning
Confidence in pricing communicates professionalism. Uncertainty invites negotiation.
3. Setting Clear Policies
Deposits, timelines, communication standards, and pickup policies should be clearly defined and consistently enforced.
Structure builds trust.
4. Positioning for Quality — Not Price
Competing on price attracts price-focused clients.
Competing on quality, reputation, and professionalism attracts long-term clients who value the work.
Not every customer is the right fit — and that is acceptable.
The Industry Is Evolving
Taxidermy is both art and trade. It preserves once-in-a-lifetime memories and represents significant emotional value to hunters and families.
To sustain that value long term, the industry must continue to mature in its business practices.
Professional studios that:
-
Operate with structure
-
Price appropriately
-
Invest in systems
-
Maintain high standards
Will continue to grow and serve their clients well.
Final Thoughts
Taxidermy is not easy money.
It requires discipline, skill, and resilience.
But it can be a profitable and sustainable business when approached intentionally.
The key is understanding this:
It is not just about mounting animals.
It is about building a business that supports the craft.
When passion is paired with structure, professionalism, and sound pricing, taxidermy becomes more than a trade — it becomes a viable career.
Next in the Series:
Part 2: Pricing for Profit — Why Knowing Your Numbers Changes Everything.