Organizing Your Taxidermy Shop: Creating an Efficient, Professional Work Layout
A well-organized taxidermy shop isn’t just about looking clean—it directly affects your speed, quality, safety, and profitability. Whether you’re mounting one deer a year or running a full-time studio, the way your tools and workspaces are laid out can make the difference between smooth workflow and constant frustration.
This guide breaks down how to organize your taxidermy shop for efficiency, cleanliness, and long-term success.
Why Shop Organization Matters in Taxidermy
Taxidermy involves sharp tools, chemicals, delicate hides, and detailed craftsmanship. Poor organization leads to:
-
Lost time searching for tools
-
Cross-contamination between dirty and clean work
-
Increased mistakes and damaged hides
-
Physical strain and fatigue
An organized shop allows you to work faster, stay cleaner, and produce more consistent, professional mounts.
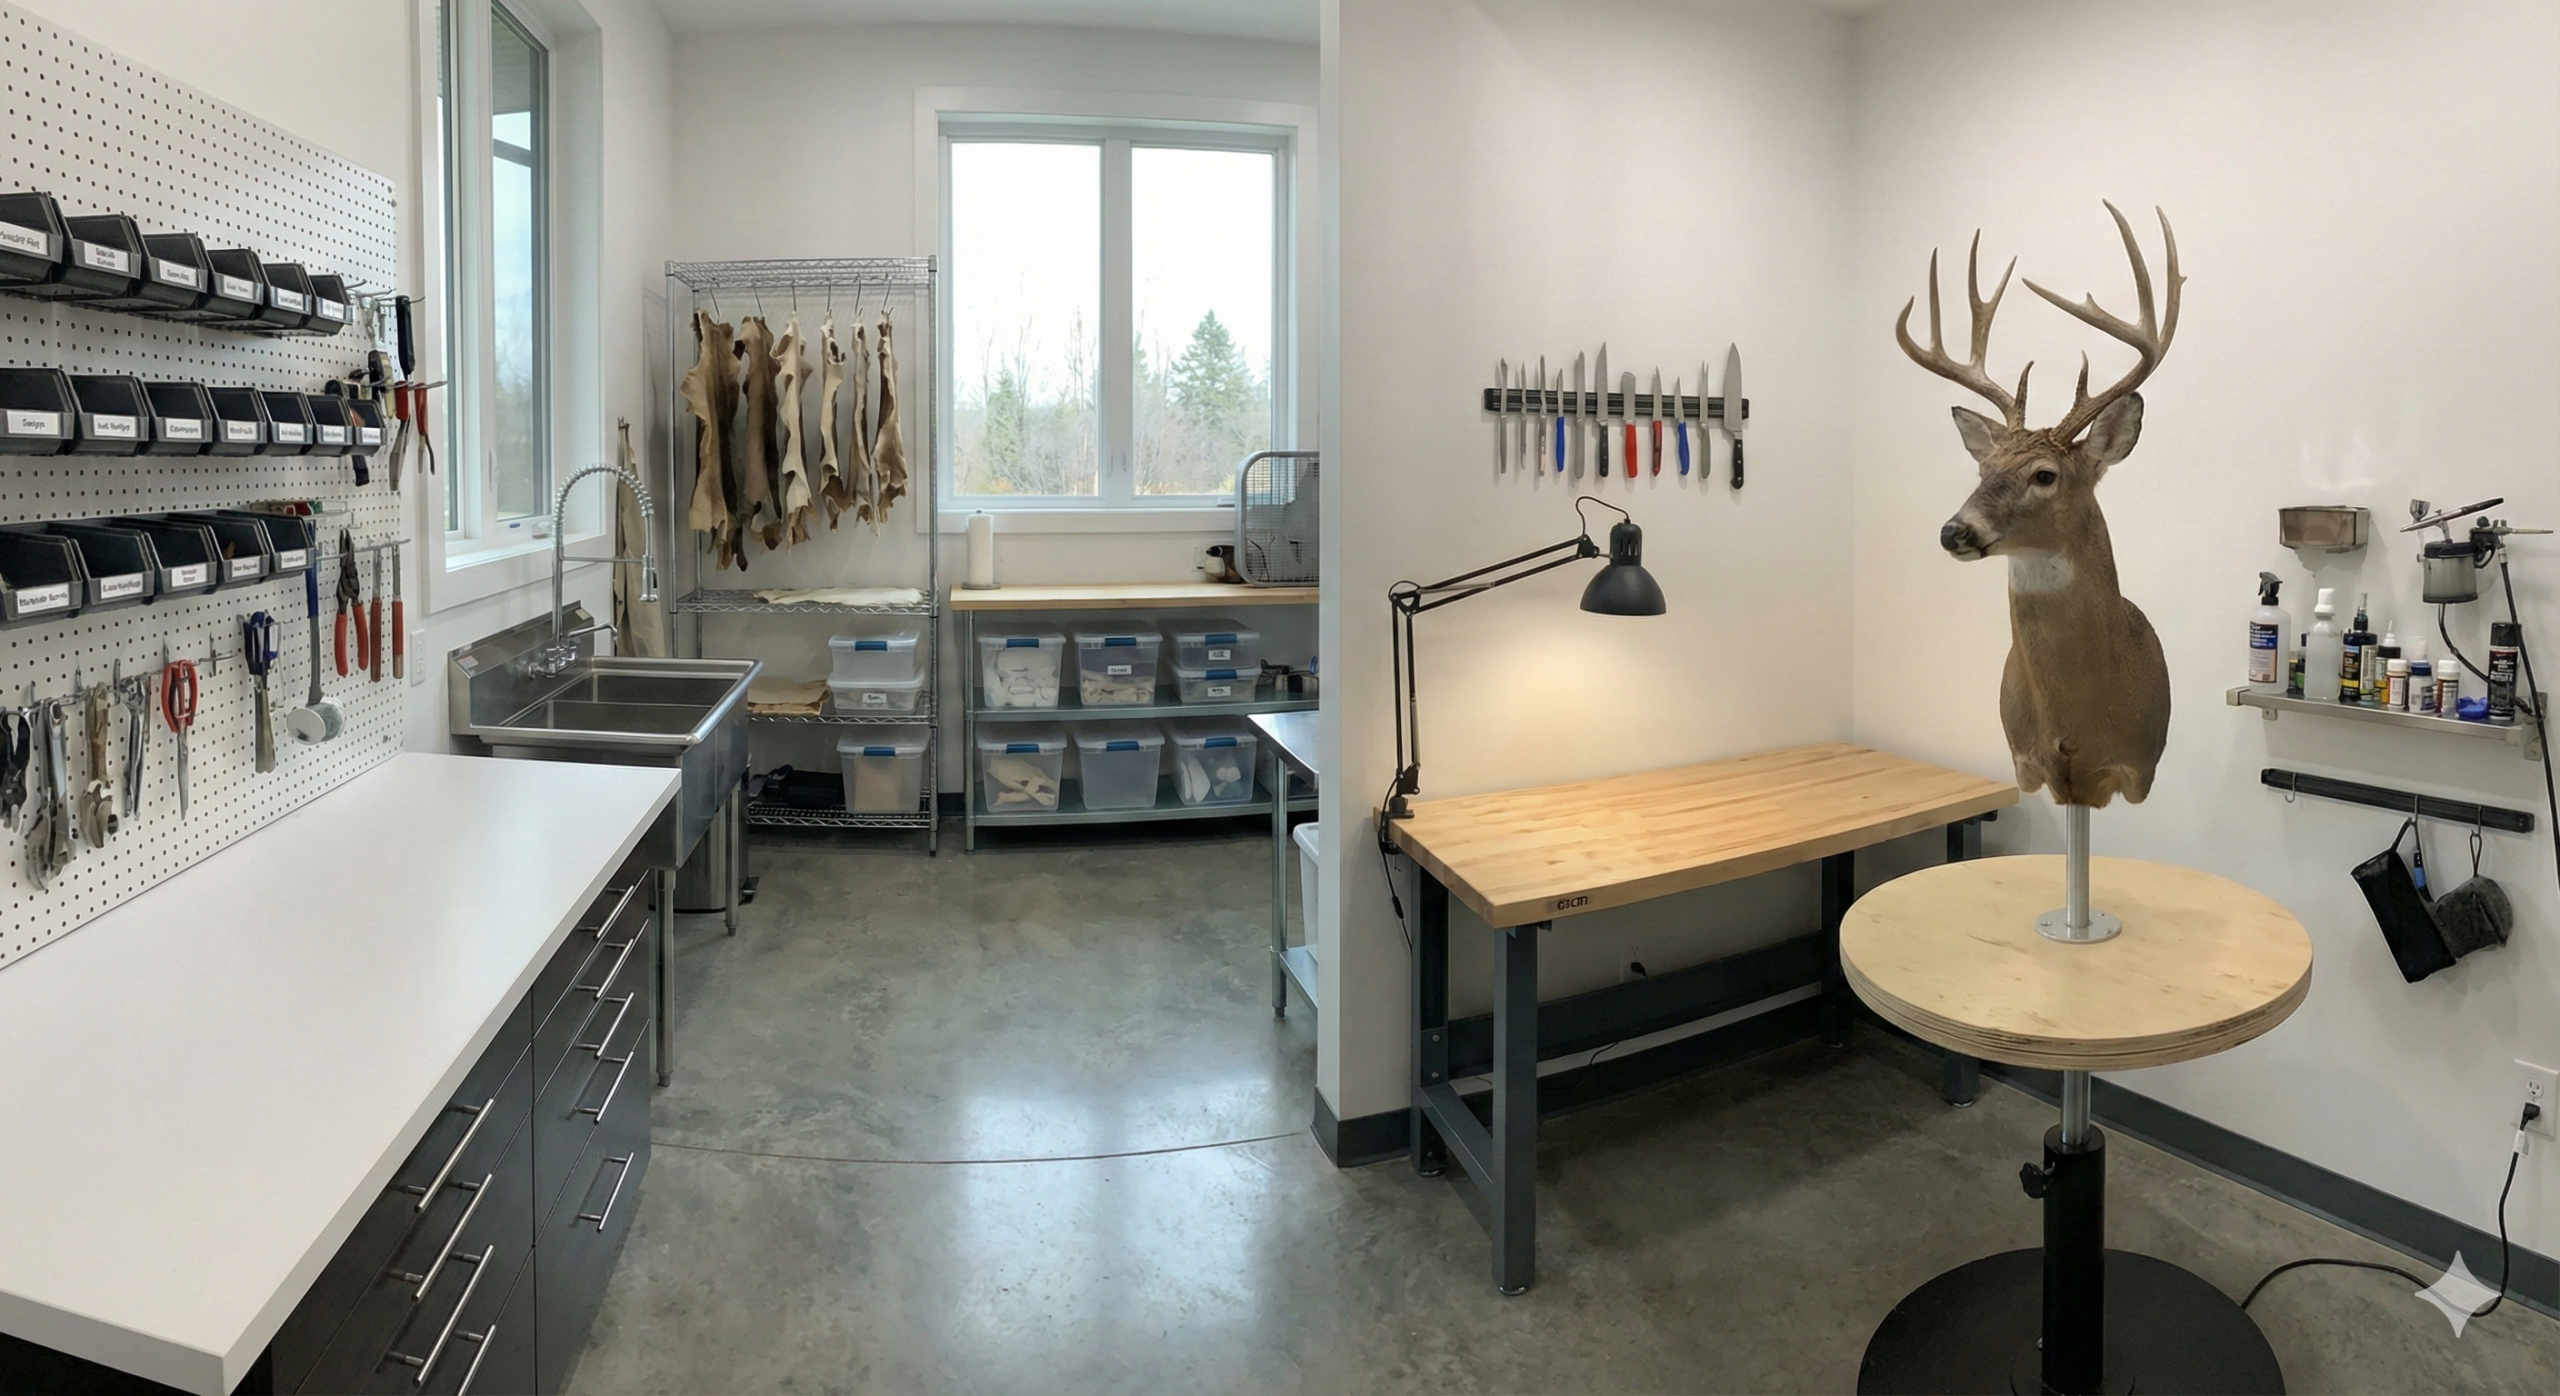
Start With Defined Work Zones
The foundation of an efficient shop is separating tasks into dedicated areas. This prevents the “wet” mess of skinning from ever touching the “dry” finishing area and protects your final product.
Common Taxidermy Work Zones
Skinning & Fleshing Area
Messy, wet, and high-contamination. This area should have easy-to-sanitize floors, walls, and surfaces.
Tanning & Chemical Area
A controlled, well-ventilated space for degreasing, pickling, and chemical application.
Mounting & Form Work Area
Clean, organized, and detail-focused. This is where accuracy and consistency matter most.
Finishing & Grooming Area
A dedicated “clean room” feel for airbrushing, grooming, and final detail work.
Tool Storage & Prep Area
A centralized location for daily-use tools that allows you to reset and prepare equipment between mounts without cluttering your primary workbench.
Plan for Seasonal Workload Surges
During peak seasons, organization matters even more. Design your shop so extra capes, forms, and unfinished mounts can be staged without disrupting workflow. Temporary shelving, rolling carts, and clearly labeled overflow storage help prevent bottlenecks and rushed mistakes when volume spikes.
Precision Lighting and Digital Record-Keeping
Efficiency isn’t just physical—it’s visual and administrative.
Color-Correct Lighting
In your finishing and grooming area, invest in CRI 90+ (Color Rendering Index) lighting. Standard shop lights can distort colors, leading to painting errors that only show up when the client takes the mount into natural light.
Digital Organization
Keep a dedicated space—or a wall-mounted tablet—for record-keeping. Organized digital logs for federal and state permits, intake tags, and client notes ensure compliance without shuffling through paperwork during an inspection.
Organize Tools by Frequency of Use
One of the most common mistakes in a taxidermy shop is storing all tools together regardless of how often they’re used.
Daily-Use Tools (Within Arm’s Reach)
Scalpels, modeling/tucking tools, needles, and measuring tools. Use magnetic strips or pegboards mounted at eye level.
Occasional-Use Tools (Nearby)
Power tools, specialty jigs, and airbrush equipment stored within easy reach but off primary work surfaces.
Rare-Use Tools (Labeled Storage)
Seasonal tools or backup equipment stored in clearly labeled bins or cabinets.
Inventory Protection: Pest Control & Storage
Organization in a taxidermy shop is also about defense. Raw capes and finished mounts are high-value targets for insects and rodents.
Freezer Organization
Keep a written or digital inventory of each freezer’s contents. Organized tracking saves time, minimizes door-open time, and prevents specimens from being overlooked or improperly thawed.
Regular Inspections
Keep storage areas off the floor to make sweeping and inspection easier and to quickly spot signs of beetles or moths.
Safety and Chemical Control
Taxidermy chemicals require careful storage for both personal safety and professional liability protection.
Flammables
Store solvents, paints, and adhesives in a dedicated metal flammable-storage cabinet.
Fire Safety
Establish a strict protocol for oily rag disposal. Use a UL-listed oily waste can to prevent spontaneous combustion.
Ventilation
Ensure chemical and painting zones have active exhaust systems that pull fumes away from your breathing zone.
Design Workbenches for Comfort and Efficiency
Your workbench should work for you, not against you.
Ideal Height
Set benches at a height that prevents slouching and reduces fatigue during long mounting sessions.
Surface Material
Use non-porous, easy-to-sanitize materials such as stainless steel or heavy-duty HDPE for prep areas.
Task Lighting
Install dedicated LED task lights directly over mounting stands and detail work areas.
Establish a Clean-As-You-Go System
The most organized shops aren’t spotless because of big cleanups—they stay clean through consistent habits.
-
Put tools back immediately after use
-
Wipe benches between tasks
-
End each day with a 10-minute reset
Final Thoughts
You don’t need a massive shop or expensive cabinetry to be organized—just intentional layout, smart storage, and consistent habits. Invest time in organizing your shop now, and it will pay dividends in efficiency, craftsmanship, and professionalism for years to come.
Even if clients never see your workspace, organization shows in cleaner mounts, consistent detail work, and predictable turnaround times.
The 10-Minute Reset: Quick Wins
Before you turn off the lights tonight, do these three things:
-
Clear your primary mounting bench so you can start fresh tomorrow.
-
Re-index or sharpen your most-used scalpels and knives.
-
Take out the “wet” trash to prevent odors and pests overnight.
Your morning self will thank you.


