Building a Successful Workflow in Your Taxidermy Shop Part 1
Systems for the One-Person Operation
Most taxidermy shops are one-person operations.
That means you’re not just the taxidermist — you’re also the sales department, production manager, customer service rep, bookkeeper, and shipping coordinator. When you wear every hat, workflow isn’t optional. It’s survival.
Talent will get customers in the door.
Systems are what keep your shop profitable, predictable, and sustainable.
Let’s walk through the full workflow of a modern taxidermy shop — from intake to delivery — and explore how batching, pricing, and production planning affect both efficiency and cash flow.
Workflow Starts at Intake — Not at the Fleshing Wheel
Your production system begins the moment a customer walks through the door.
A clean intake process prevents mistakes, protects margins, and reduces stress months later when that mount is on your stand.
A professional intake system should include:
-
A detailed written work order (species, pose, base selection, special requests)
-
Clear, documented pricing
-
A deposit policy (50% minimum is common and wise)
-
Durable tagging with a unique ID number
-
Photo documentation at drop-off
-
Clear timeline expectations
Sloppy intake leads to sloppy production.
Miscommunication at the front end turns into remakes, discounts, and uncomfortable phone calls at the back end.
The more structured your intake system, the smoother your workflow becomes downstream.
Fleshing In-House vs. Subbing Out: A Strategic Decision
Few decisions impact workflow more than how you handle fleshing and prep work.
Keeping It In-House
Advantages:
-
Full quality control
-
Lower long-term per-piece cost
-
Immediate turnaround when needed
Challenges:
-
Equipment investment
-
Space and cleanliness management
-
Significant time commitment
Subbing It Out
Advantages:
-
Frees up production time
-
Cleaner, simpler shop flow
-
Allows focus on mounting and finishing
Challenges:
-
Higher per-piece cost
-
Dependence on outside schedules
-
Less control over shaving quality
The real question isn’t cost per cape — it’s value of your time.
If you can mount a deer in 6–8 hours and generate $900–$1,200 in revenue, but you spend those same hours fleshing to “save” $100, you may be trading high-value hours for low-value ones.
As a one-person shop, your time is your most limited resource. Allocate it carefully.
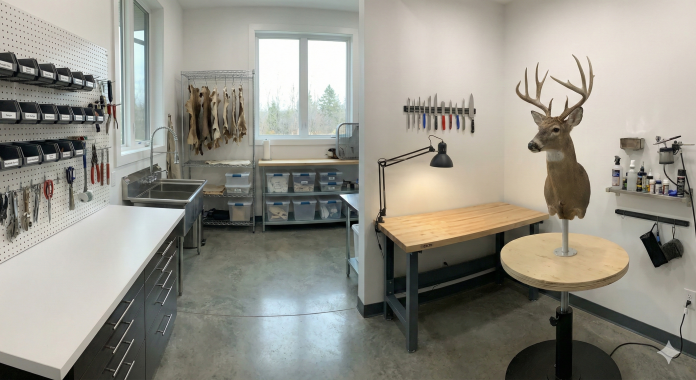
Designing a Physical Production Flow
Even a small shop benefits from defined production zones.
The ideal workflow moves in one direction:
Intake → Freezer → Fleshing → Tanning → Mounting → Drying → Finishing → Delivery
When mounts move backward or cross paths repeatedly, inefficiency creeps in.
Define clear areas for:
-
Wet work
-
Mounting
-
Drying
-
Finishing and painting
-
Ready-for-pickup storage
Reducing physical movement reduces mental fatigue. When your space flows, your production follows.
How Many Mounts Should You Complete Each Week?
Many taxidermists operate reactively — mounting when they feel motivated and finishing when they feel pressured.
A better approach is simple math.
Step 1: Determine Your Annual Revenue Goal
Example: $150,000 gross production.
Step 2: Determine Your Average Ticket
Example: $900 per mount.
Step 3: Calculate Required Volume
$150,000 ÷ $900 = 167 mounts per year.
Step 4: Break It Down Weekly
167 mounts ÷ 48 working weeks ≈ 3–4 mounts per week.
That means you must consistently start or finish three to four mounts every week to hit that revenue target.
Consistency is more important than intensity.
Cash Flow: Spikes vs. Steady Income
How you structure production directly affects your cash flow rhythm.
Batch Completion
Finishing 15–20 mounts at once creates large cash influxes. This can feel productive — and it is — but it also creates long stretches with little incoming revenue.
Rolling Completion
Finishing 3–4 mounts weekly creates predictable income and smoother financial planning.
Neither method is wrong. They simply create different financial patterns.
Many successful shops use a hybrid system:
-
Batch similar mounts for efficiency.
-
Release finished work in controlled waves for steady income.
The Power of Batching Similar Species
Switching species costs time.
Going from deer to turkey to fish and back to deer creates constant setup changes — different tools, paint systems, forms, and mental processes.
Instead, consider themed production blocks:
-
“Deer Weeks”
-
“Bird Weeks”
-
Half-week batching cycles
Even grouping 5–8 similar mounts significantly increases efficiency. Less setup. More momentum. Stronger focus.
Batching doesn’t just save time — it reduces decision fatigue.
Habitat Work: Where Profit Is Won or Lost
One of the biggest workflow slowdowns happens at the finishing stage — especially with elaborate habitat work.
A simple driftwood base with cattails may take one to two hours.
An elaborate mud-and-water marsh scene can take eight or more.
The difference isn’t artistic — it’s economic.
Clients today expect higher-end habitat than ever before. Social media has elevated standards. Customers see custom scenes online and want the same.
That’s not a problem — unless you fail to price accordingly.
Smart Structure:
-
Offer a clean, attractive standard base either included in your mount price or at a set price.
-
Offer habitat upgrades with clear tiered pricing.
If a habitat scene adds eight hours, those eight hours must be built into the price. Otherwise, your effective hourly rate collapses.
High-end work is profitable — but only when priced correctly.
Managing Work in Progress (WIP)
Too many unfinished mounts create mental clutter and shop congestion.
Too few create downtime.
A practical guideline:
Keep 2–3 weeks of mounting capacity in active production.
If you mount four per week, maintain eight to twelve in progress — not forty.
Excess WIP ties up:
-
Space
-
Mental energy
-
Deposits without final payments
-
Shop clarity
Controlled production equals controlled stress.
Mounting for Efficiency vs. Mounting for Lifestyle
Ultimately, workflow decisions shape your quality of life.
Do you prefer:
-
Large financial spikes?
-
Or steady weekly income?
Do you thrive in intense production bursts?
Or do you prefer balanced weekly output?
There is no universal right answer — only intentional structure.
Many shops benefit from simple recurring systems:
-
“Finish Fridays”
-
Scheduled delivery days
-
Weekly billing routines
Structure reduces anxiety. Predictability increases profit.
Final Thoughts: Systems Create Freedom
A stressful shop and a profitable shop often look identical from the outside.
The difference isn’t talent.
It’s workflow.
When you know:
-
How many mounts must be completed weekly
-
When to batch
-
When to sub work
-
How to price habitat upgrades
-
How much work should be in progress
You regain control.
And when you control the workflow, you control your income — and your sanity.


")