The advantage of painting a largemouth bass fish eye is that you can look at reference and paint accordingly to what your reference is telling you. However commercial fish eyes are just fine for taxidermy and are the industry standard for taxidermy studios across the country. But when painting a largemouth bass fish eye you are able to change pupil sizes along with color variations depending on your fish you are mounting. Having the flexibility and total control of how your fish eye looks is what sets you apart from the rest of the fish taxidermists of the world. Before you can even start you will need to buy Jeff Lumsden’s Still Life Eyes from McKenzie Taxidermy. When buying lenses, buy multiple sizes so you will be stocked up and ready to go no matter what fish is delivered to your taxidermy shop for fish taxidermy. You will never ever have to wait for a fish eye order to come in again, because you will be stocked up on fish eye blanks.
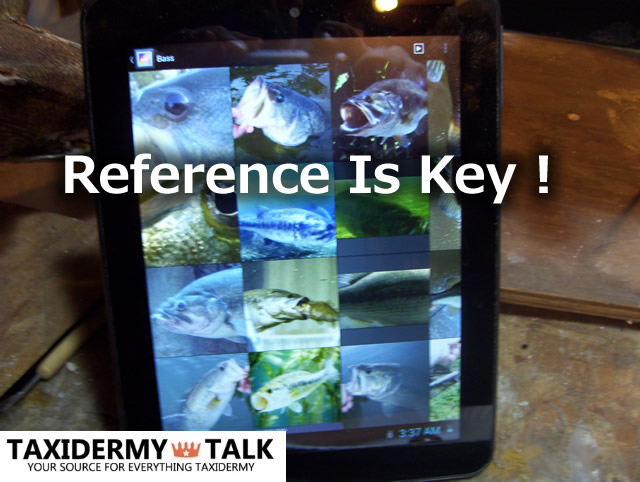
Before we start painting a largemouth bass fish eye go to Google Image search and search for largemouth bass pictures. Look for pictures that focus in on the head and eye. You may have to play around with the search query to find exactly what you’re looking for. When you click on a good reference pic as I have described, Google will show you similar pictures to the one you just clicked on. Click on the view more link below the file name. A new page of Google Images will be shown and most if not all will resemble your original reference picture of choice. Pick out four of the best pictures that give you a good reference of a largemouth bass eye. Download them to your tablet, phone, PC or whatever you are using in the shop to aid you in taxidermy reference pictures. If you have a Wi-Fi printer in the shop or home, print them out and then laminate them. This way you will be set for life, and be able to pull those pics out anytime you paint a largemouth bass eye. Another way to get good reference pictures is to go out and go fishing. Take close up pics of the bass you catch and transfer the pictures to your iPad or tablet.
With all that out of the way and our reference pictures in hand let’s get to painting a largemouth bass eye.
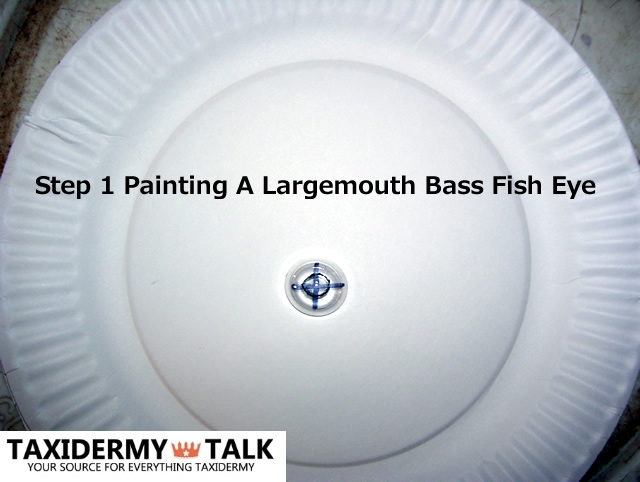
Step 1: Draw a crosshair on the outside of the eye with a thin Sharpie black marker. The crosshairs should cross each other dead center of the eye, which will be the center of our pupil. Next by looking at our reference, draw a pupil shape on the same side of the eye. Pupils in a fish eye are not round. Some are a soft almond shape forward with a soft round curve in the rear. Some are more defined forward. If you’re unhappy with your pupil shape wipe off the marker with some rubbing alcohol and repeat this step until you get it right. Never use any harsh chemicals on the lenses. Alcohol or Windex will be enough. An important step here is not to oversize the pupil. The pupil should be no more then 1/3 in size to relation to the iris.
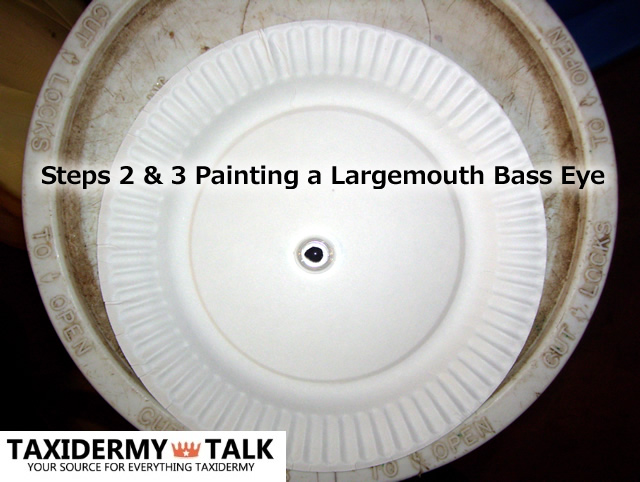
Step 2: We will now take a paint marker and trace the pupil on the inside of the eye. In other words trace over the Sharpie you drew on the outside of the eye, but do this on the inside of the eye. If all looks good then remove the marker from the outside of the eye. Do this by using a paper towel and rubbing alcohol.
Step 3: Go ahead and fill in the rest of the pupil using your paint marker. Again we are painting the inside of the eye. If you go outside of the traced pupil edge with the paint, don’t freak out just yet. Yes our pupil should exhibit a clean and crisp edge all the way around. When the paint is dry you can use a tooth pick to clean up the edge. Or if you prefer you can use a Q-Tip with some alcohol. Either way works. We must have a clean sharp edged pupil before we can go forward. So let’s be sure we are there before going forward.
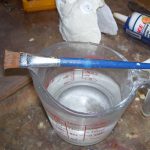
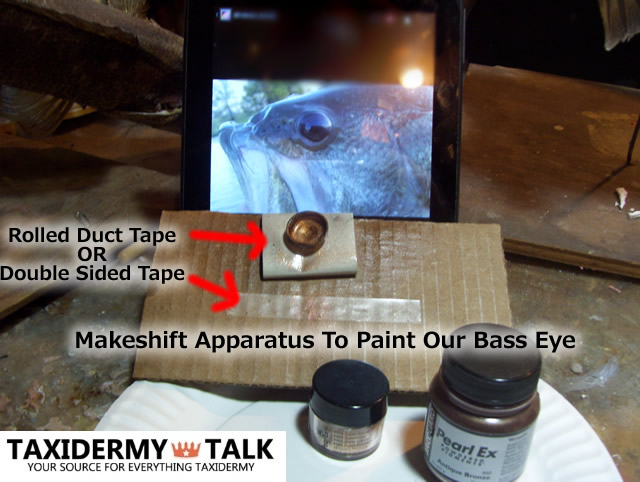
Step 4: Before we move forward, we need to secure our eye so we don’t handle it as we proceed. To do this you can buy some double sided tape, or just use a plain piece of duct tape rolled into a loop. Get a piece of cardboard and stick the tape to it. Now stick your eye to the tape so the inside of the eye is facing up. Next take some sealer, in our case lacquer sealer, and seal down the pupil. We will then dry the sealer with a hair dryer.
Step 5: If we look at our largemouth bass reference pictures we will see that the pupil has a gold ring around it. We will recreate this gold ring by using a gold metallic fine tipped paint pen. Again we are looking for a crisp clean ring around the pupil. The key here is that we want our gold ring to be thin as in our reference pictures. If you have to clean the edge you can do so with a sharp tooth pick, like we did with our pupil. Once complete go ahead and seal it with your lacquer sealer followed with drying.
Now we are at the part where we start to add all of the rest of our color variants and depths. If you look at your references you will know that most largemouth bass eyes vary in color. It may depend on the region where the fish was caught, the water temperature and time of year caught. Every bass eye will have variations and depths of browns, including metallic browns and gold’s. So with that in mind there really is no universal way of painting a largemouth bass eye. The bottom line is, go with your reference that you downloaded. Better yet, ask the angler that caught the fish if they have any close up pics of the fish, particularly the head. This way you are sure to get it right when painting the eye.
From here forward we will be using dry powders to complete our largemouth bass eye. Pearl Ex and Neuberg Ebel powders are what we use here in our taxidermy lab to get the job done. The following procedure that’s about to be offered is not set in stone. It is just a guideline on how we achieve the results we are after in painting a largemouth bass eye. Some taxidermists will actually airbrush a good portion on the eye and do well at accomplishing the same effects.
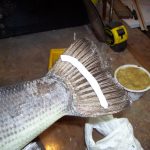
Step 6: Going by our largemouth bass eye reference we have chosen Pearl Ex Antique Bronze #660 as our base color. This is applied dry, straight from the jar with a small artist brush. We will put this color over the pupil and completely inside the base (flat part) of the eye known as the iris. We will once again seal the eye with our lacquer before heading to the next step.
Step 7: By going over the Antique Bronze blotch in some Pearl Ex Super Bronze #664. Don’t overdo this step. We just want to add some depth and charter to the Antique Bronze. To get the full effect of your work remove the eye from the tape, flip the eye over and lay on a white background. If you hold the eye up to a light, it will be transparent and probably not very attractive. But give it a drop back and the eye comes to life. How does it look so far?
The next step will most likely be the last step for most of us. However if your bass eye reference exhibits any of the gold’s or silver that can at times be found in a bass eye don’t hesitate to add them in. For example we have seen some bass eyes show a hint of silver in the lower 1/3 front. However we would have added this color first before the antique bronze. Any gold can be added after the bronze. Just be sure to seal in-between colors.
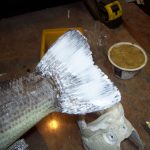
Step 8: We will now shadow the rim of the iris to the edge of the lens by brushing in some Neuberg Ebel Statutory Bronze #47. If your eye is still secure to the tape hold it sideways and rotate while powdering the rim. Seal it down with your lacquer. When done remove the eye from the tape, and place the eye onto a white background. Now watch as your custom painted bass eye comes to life.
Congratulations you have just painted your first bass eye. The featured image at the the top of this page shows our completed bass eye.