
 Drummed ears are probably the number one failure for any new taxidermist who is starting out. It has happened to most of us when starting out, but in this modern day and age of taxidermy, there is absolutely no excuse for anyone developing drummed ears. We have come too far in taxidermy advancements to even worry about drummed ears anymore. But yet we are still seeing it in guys and gals who are starting out on their own.
The number one culprit for drummed ears is improper earliner preparation, followed by improper earliner sizing. Experience a combination of both and you’re guaranteed to get drummed ears after the deer mount dries and if not then within a few months.
There are many brands and styles of earliners on the market. The composition in materials used to manufacture earliners varies. Some are made of plastic and some out of fabric. I must note though I haven’t seen a fabric liner in some time being sold by the suppliers. The thing I liked about the fabric earliners is that little to no preparation was needed for any kind of adhesive to adhere to the liner.

I’m about to show you two little tricks that just may help you out when getting started in taxidermy. This earliner tip is aimed at the self-teaching individuals who are worried they didn’t get the liner sanded or roughed up enough to accept the hide paste. If your hide paste grips the ear skin when drying, but doesn’t get enough grip on the liner, it will pull away and drum during the drying process.
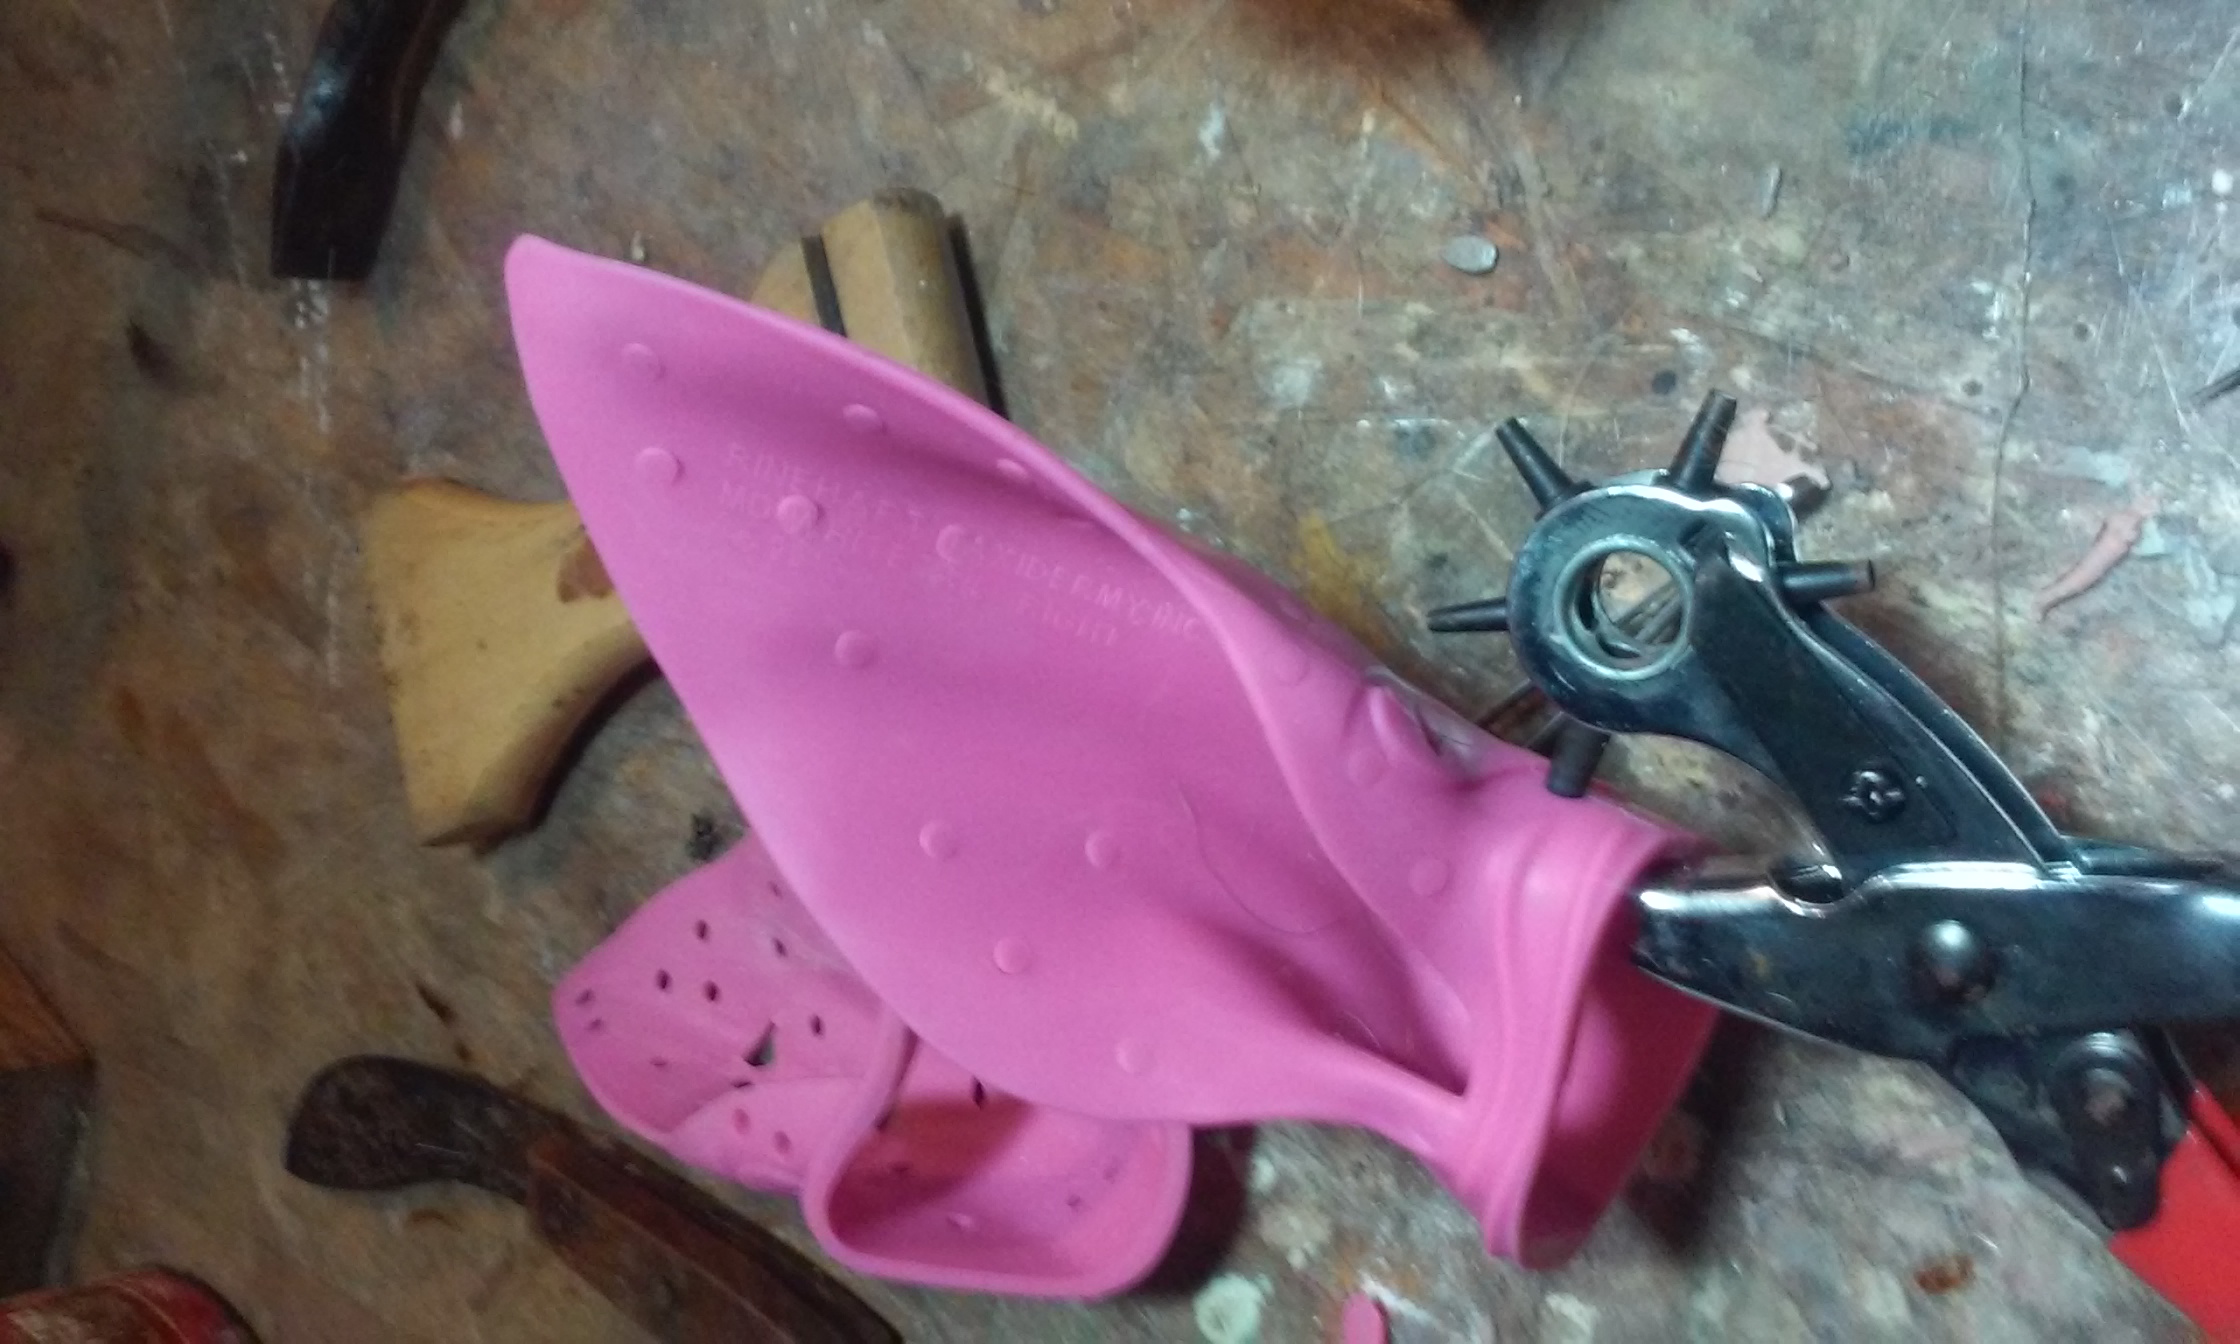
If I’m not going to Bondo an ear I’m inserting a liner and most likely a plastic liner. The particular earliner I most often use today is made of a plastic composite. They are very flexible, they hold memory and can easily be manipulated to accommodate ears back if need be. You can get these liners from T.A.S.C.O Taxidermy Supply in Wisconsin.
The first thing you need to do is size the liner. Chances are your earliner is bigger than is needed. This is the biggest mistake beginners make when using earliners. Your ear skin should never feel snug with a liner inserted. There should be plenty of play and loose skin. It should feel like that your liner is too small for your ear. With that said if you ever have to trim off more than 1/8 of an inch from your liner, order smaller earliners. The earliners I use is one size fits all and I have never had to go beyond the 1/8 inch to get them to fit properly. Don’t worry about all the slack in your skin. The adhesive will fill in the gaps, especially the gaps to the ears edge. This is why we card ears during drying and as the ear dries the edges will pull in tight to the liner and all that excess skin you had to play with will also tighten down. If your liner fits too snug to begin with, then you will run into the chance of that ear drumming while drying.
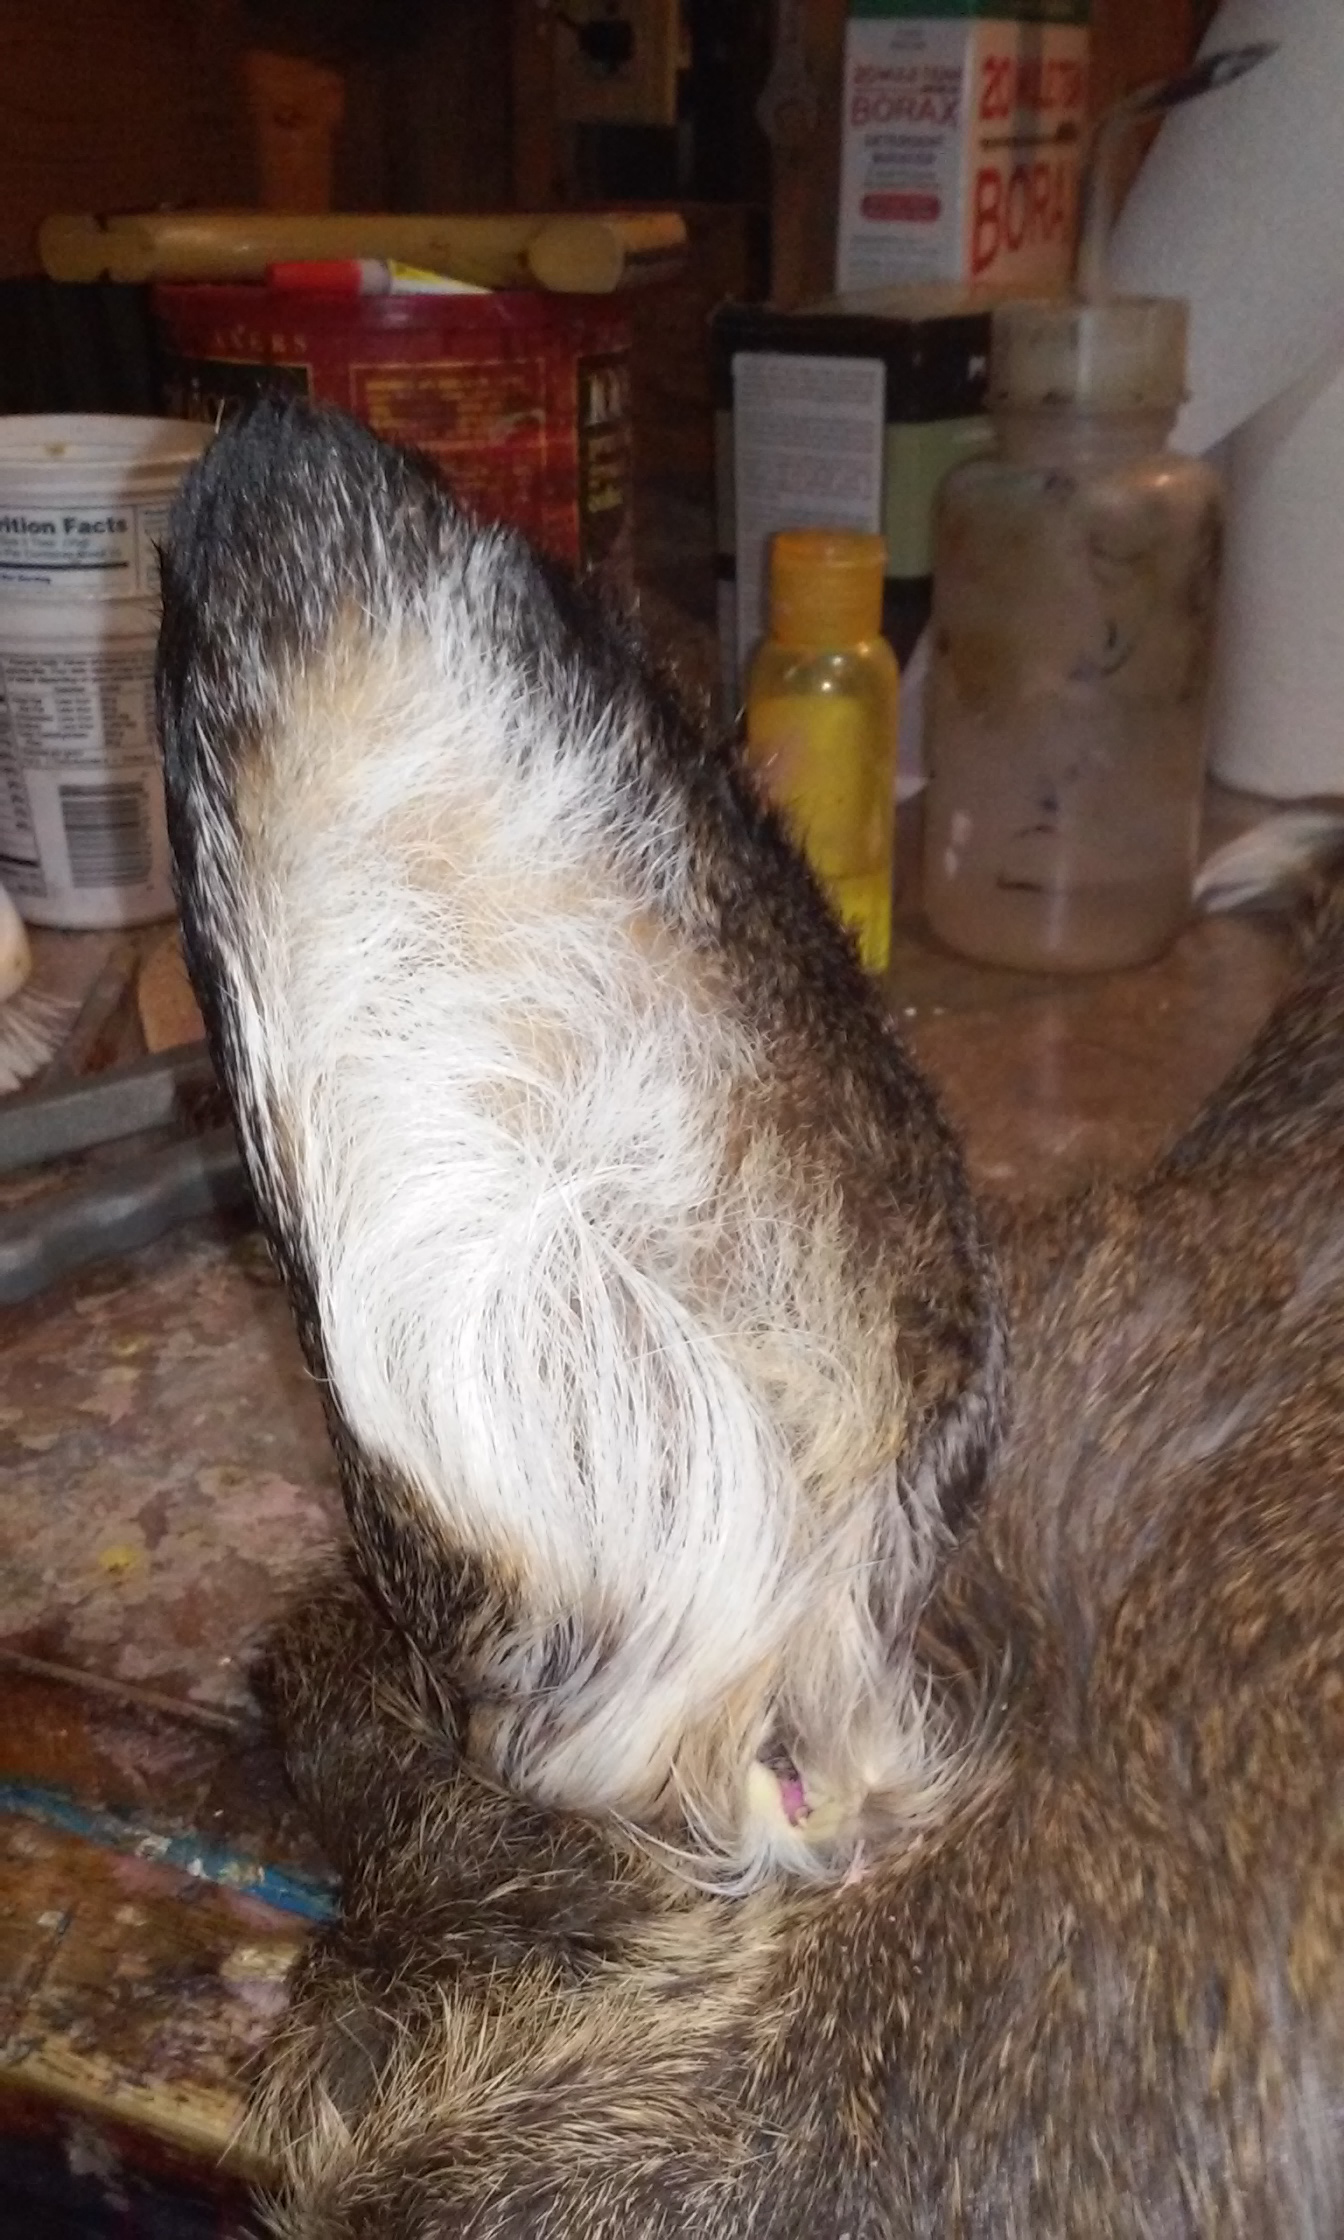
If you have not already, remove the ear cartilage from the ear and make sure you have and spilt the ear all the way to the edge. Do this while the ears are still wet from the tan.
So what adhesive do we use? Is there a magic adhesive for ears? To tell you the truth it does not matter what type or kind of glue you use for your ears, if your earliner is not properly prepared in advanced. This also goes for the ear skin itself. Make sure they too are roughed up with sand paper and that all tanning oils have been removed and the ear skin itself is dry. When I say dry I mean that you can no longer squeeze any moisture from it and the hair side is completely dried using a (on cool setting) hair dryer.
For those who are starting out, learning and don’t want to invest in a tub of high quality taxidermy adhesive, run down to Walmart and grab yourself a small can of plain old Bondo, or better yet Bondo Hair if you can get it. Bondo Hair has fiberglass strands mixed into it making it stronger and most Wally World’s carry it. If you have access to dry saw dust that’s great. Get some of it, about a pound of it. If not then head over to TSC (Tractor Supply) and pick up a bag of Equine Pelletized Bedding for about $6. The pellets are nothing more than pine wood pellets.
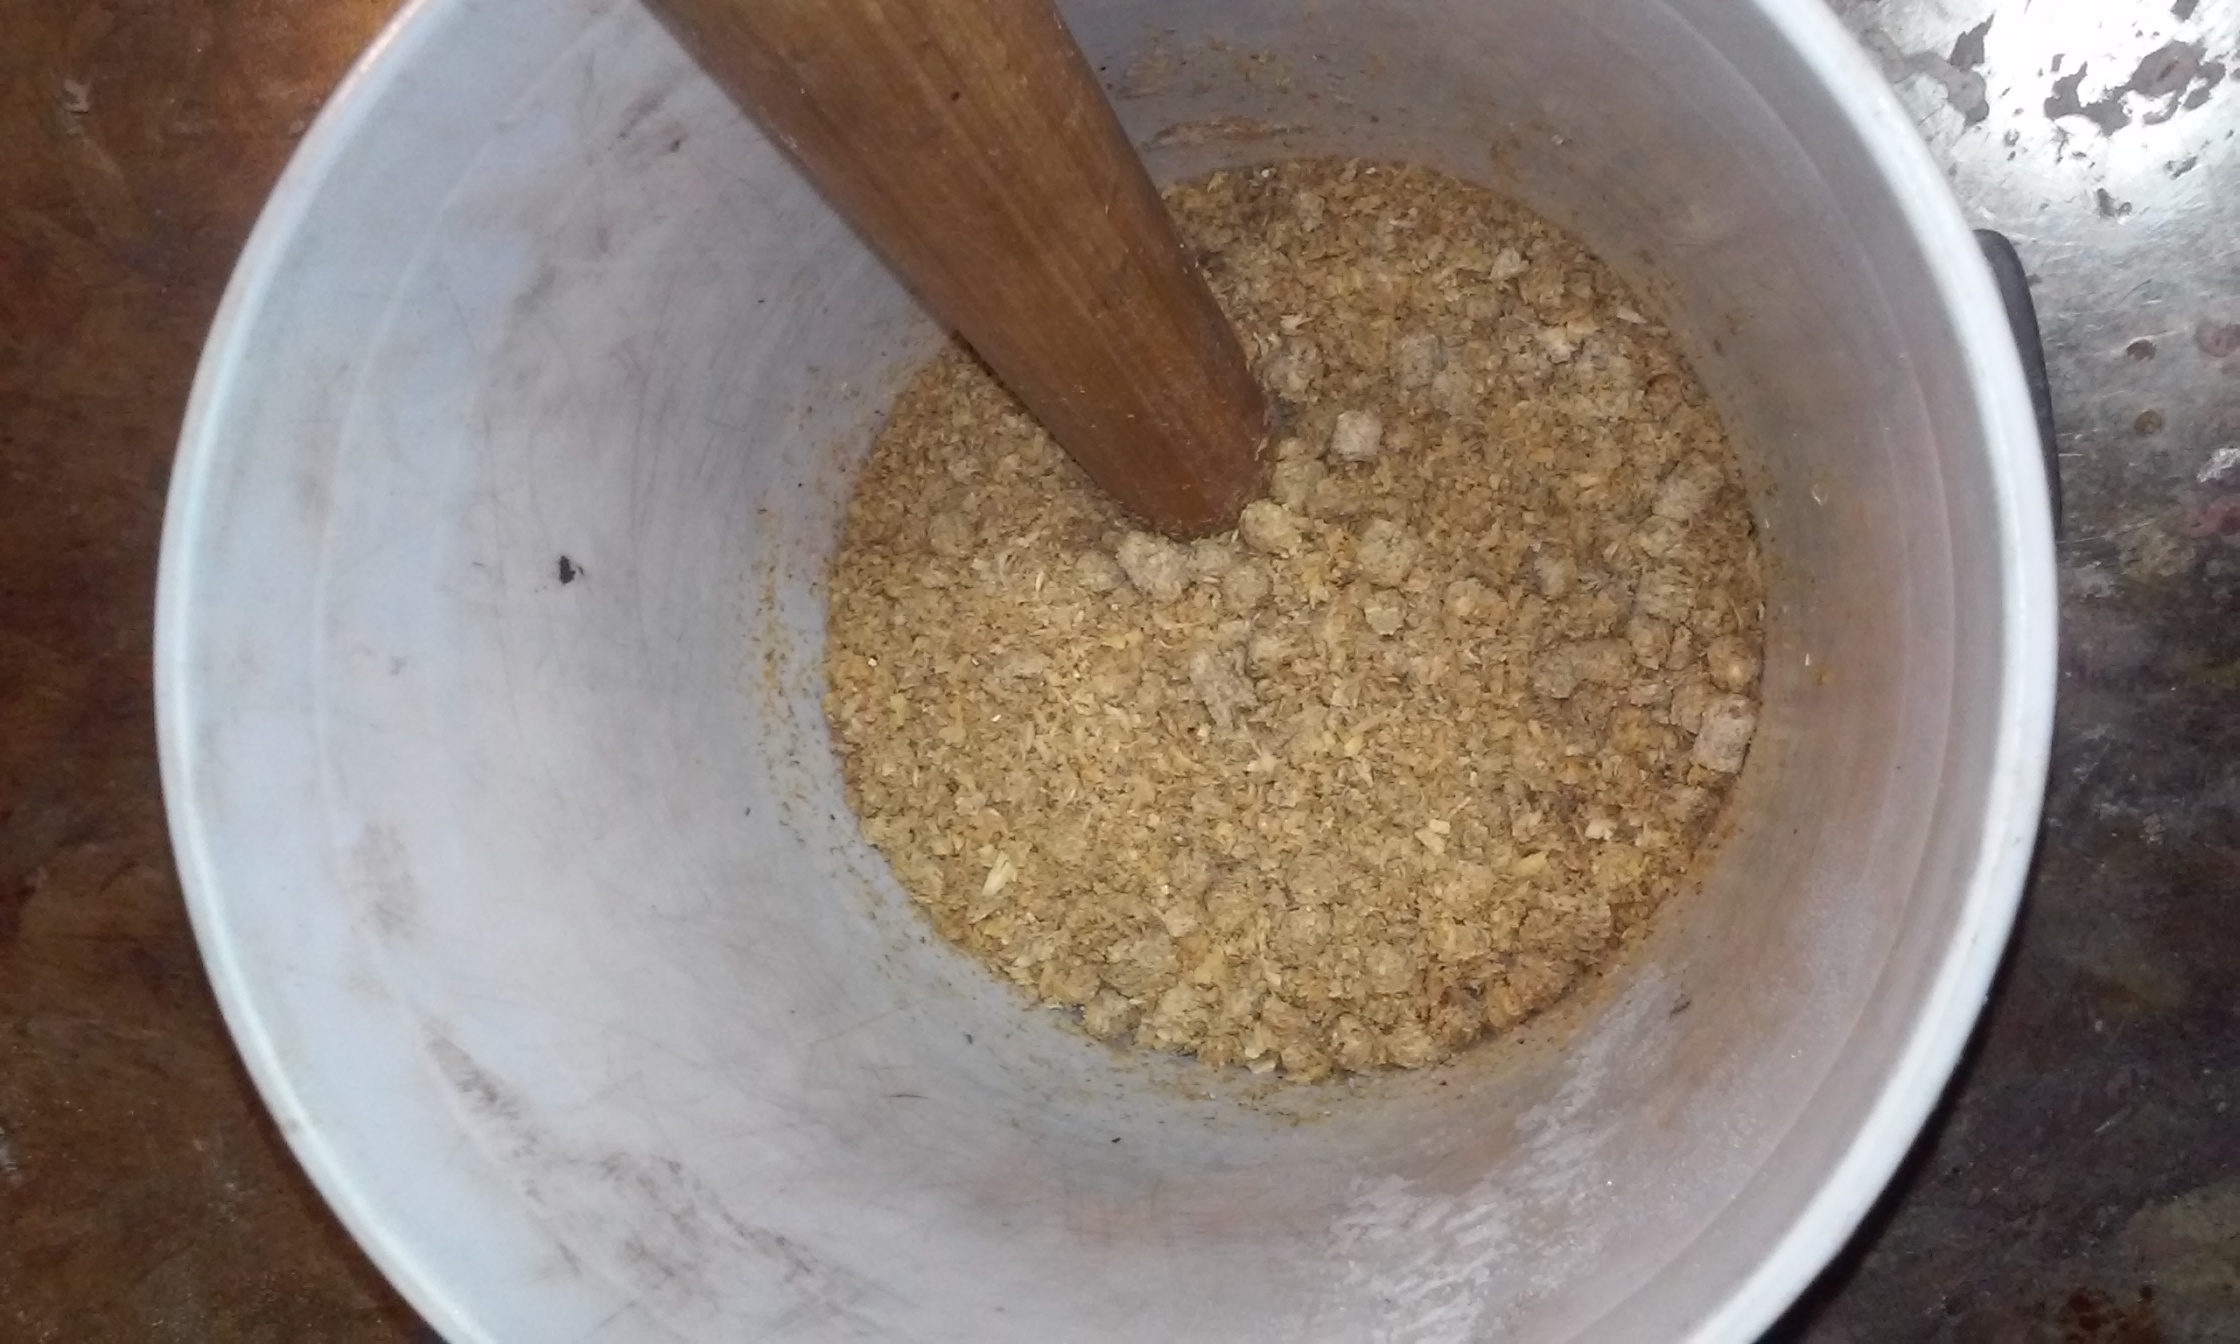
To turn the pine wood pellets into saw dust, throw some in a bucket and dampen really well. Don’t soak them just get them damp. I use a spray bottle filled with clean cool water. When the pellets are good and damp, they should crumble very easily, creating sawdust. Use a blunt object and mash them up. The picture should explain what I do. Remember you don’t want to soak the pellets, just dampen them. A spray bottle works well for this.
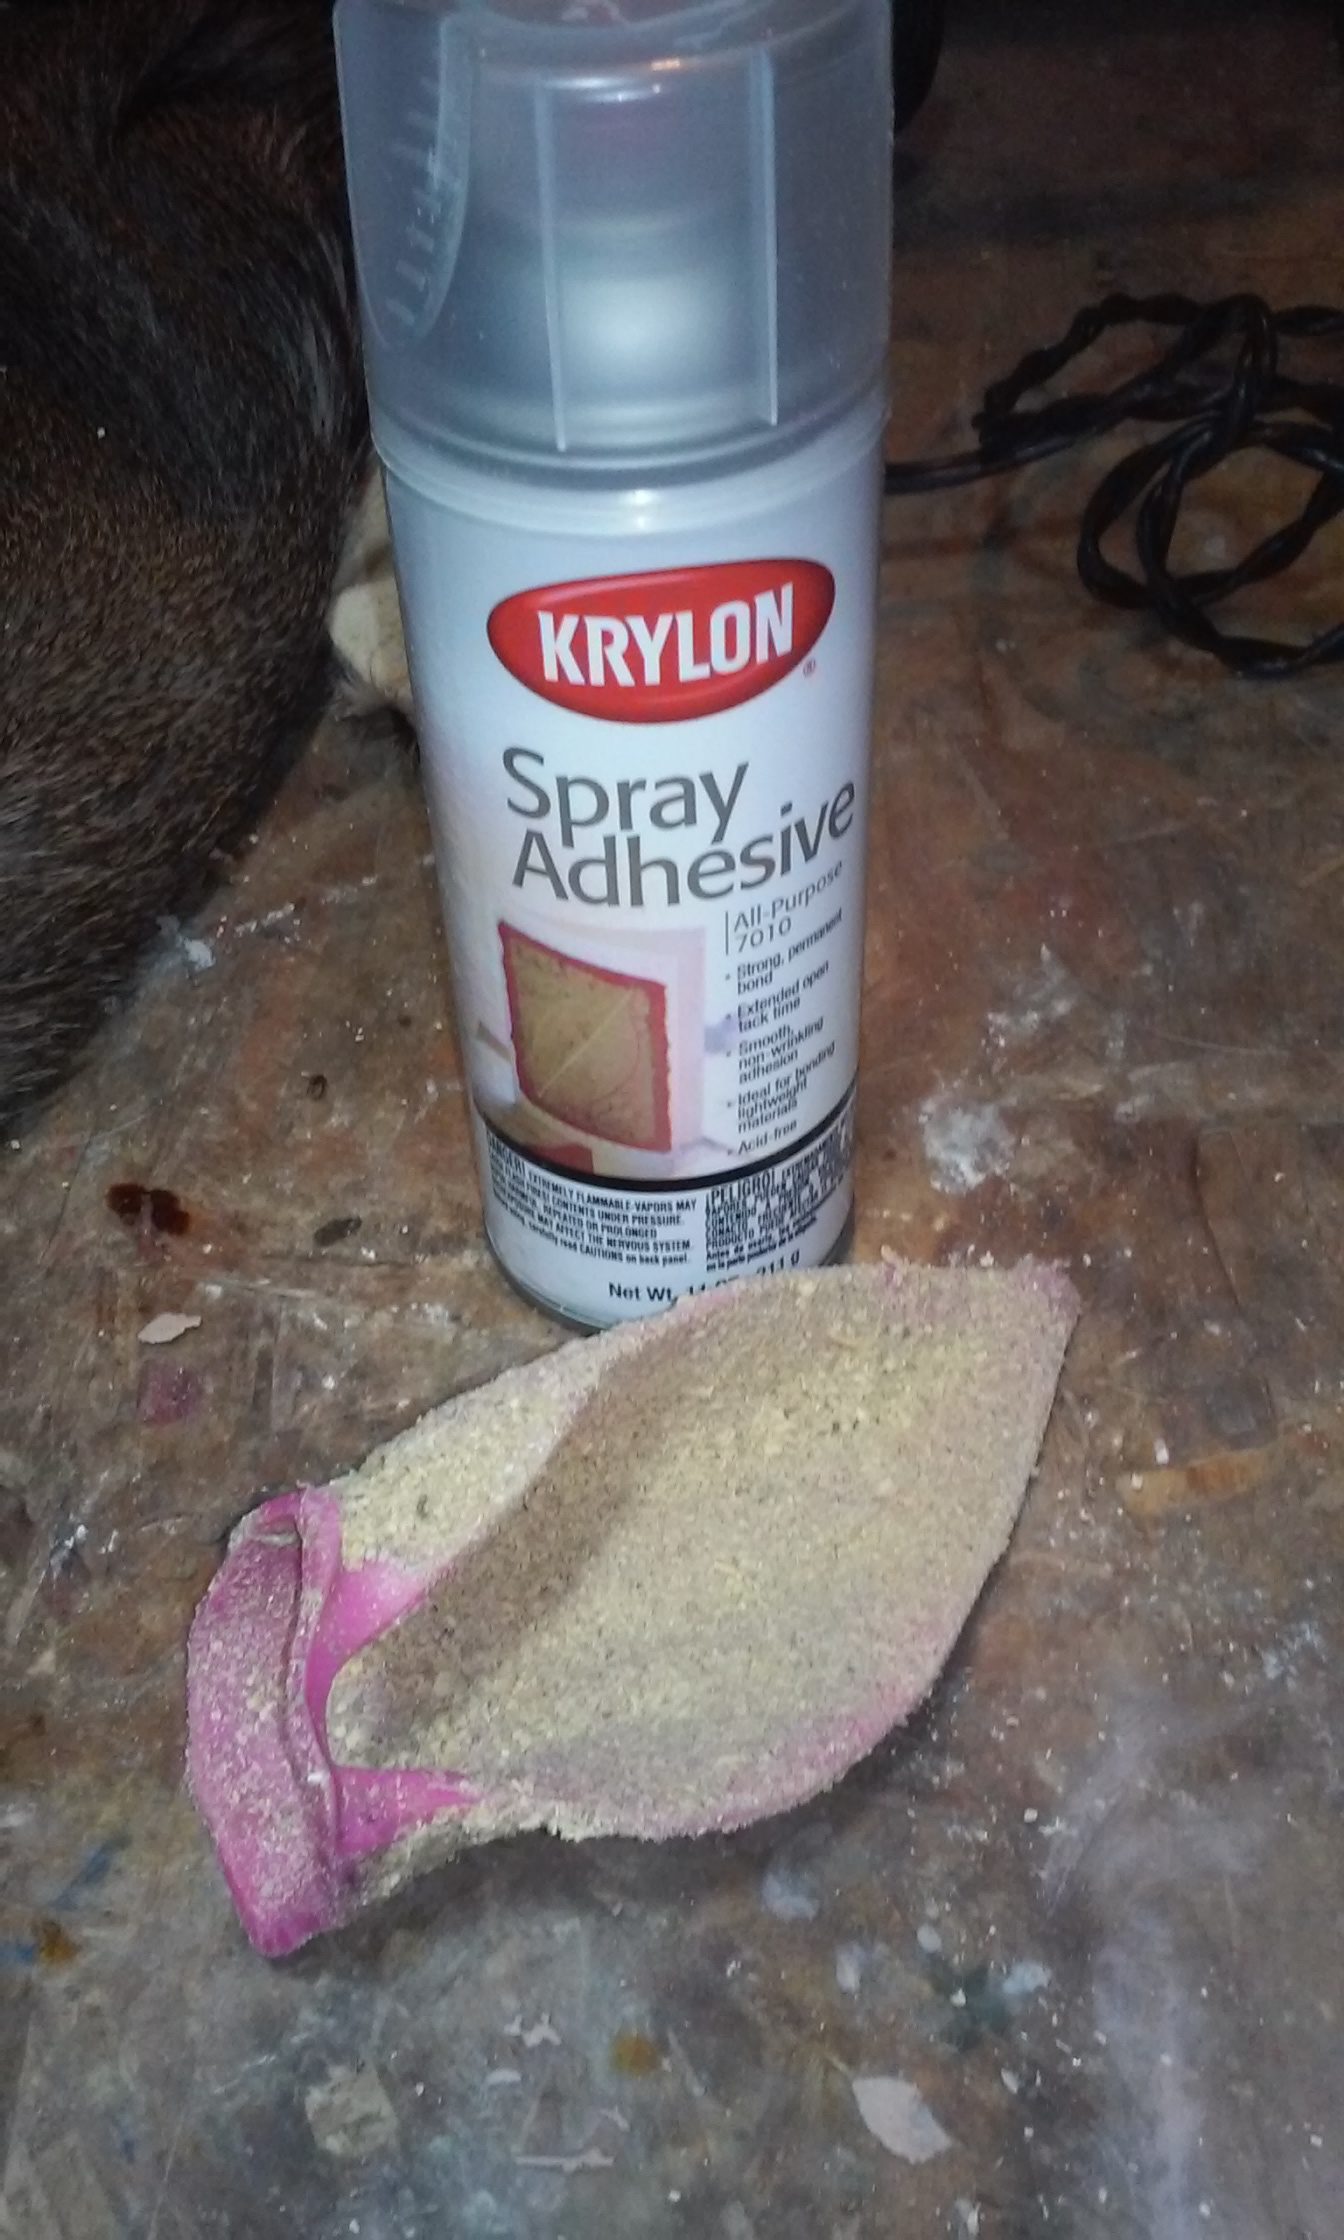
Now that we got all that out of the way let’s get going. We have test fitted our ear, our earliner is properly trimmed and our ear skin is all ready to go. We are going to spray down the earliner with spray adhesive which can be bought anywhere hardware and or paints are sold. Give it a good coating and allow it to set up. It should be very tacky at this point. Take the liner and rub the sawdust into the liner. It should stick to it. Cover both front and back of the liner. Repeat this step several times until you get a good coating of sawdust on the earliner. When all done give the saw dust on the liner a good spray. Allow to dry for 15 minutes or so.
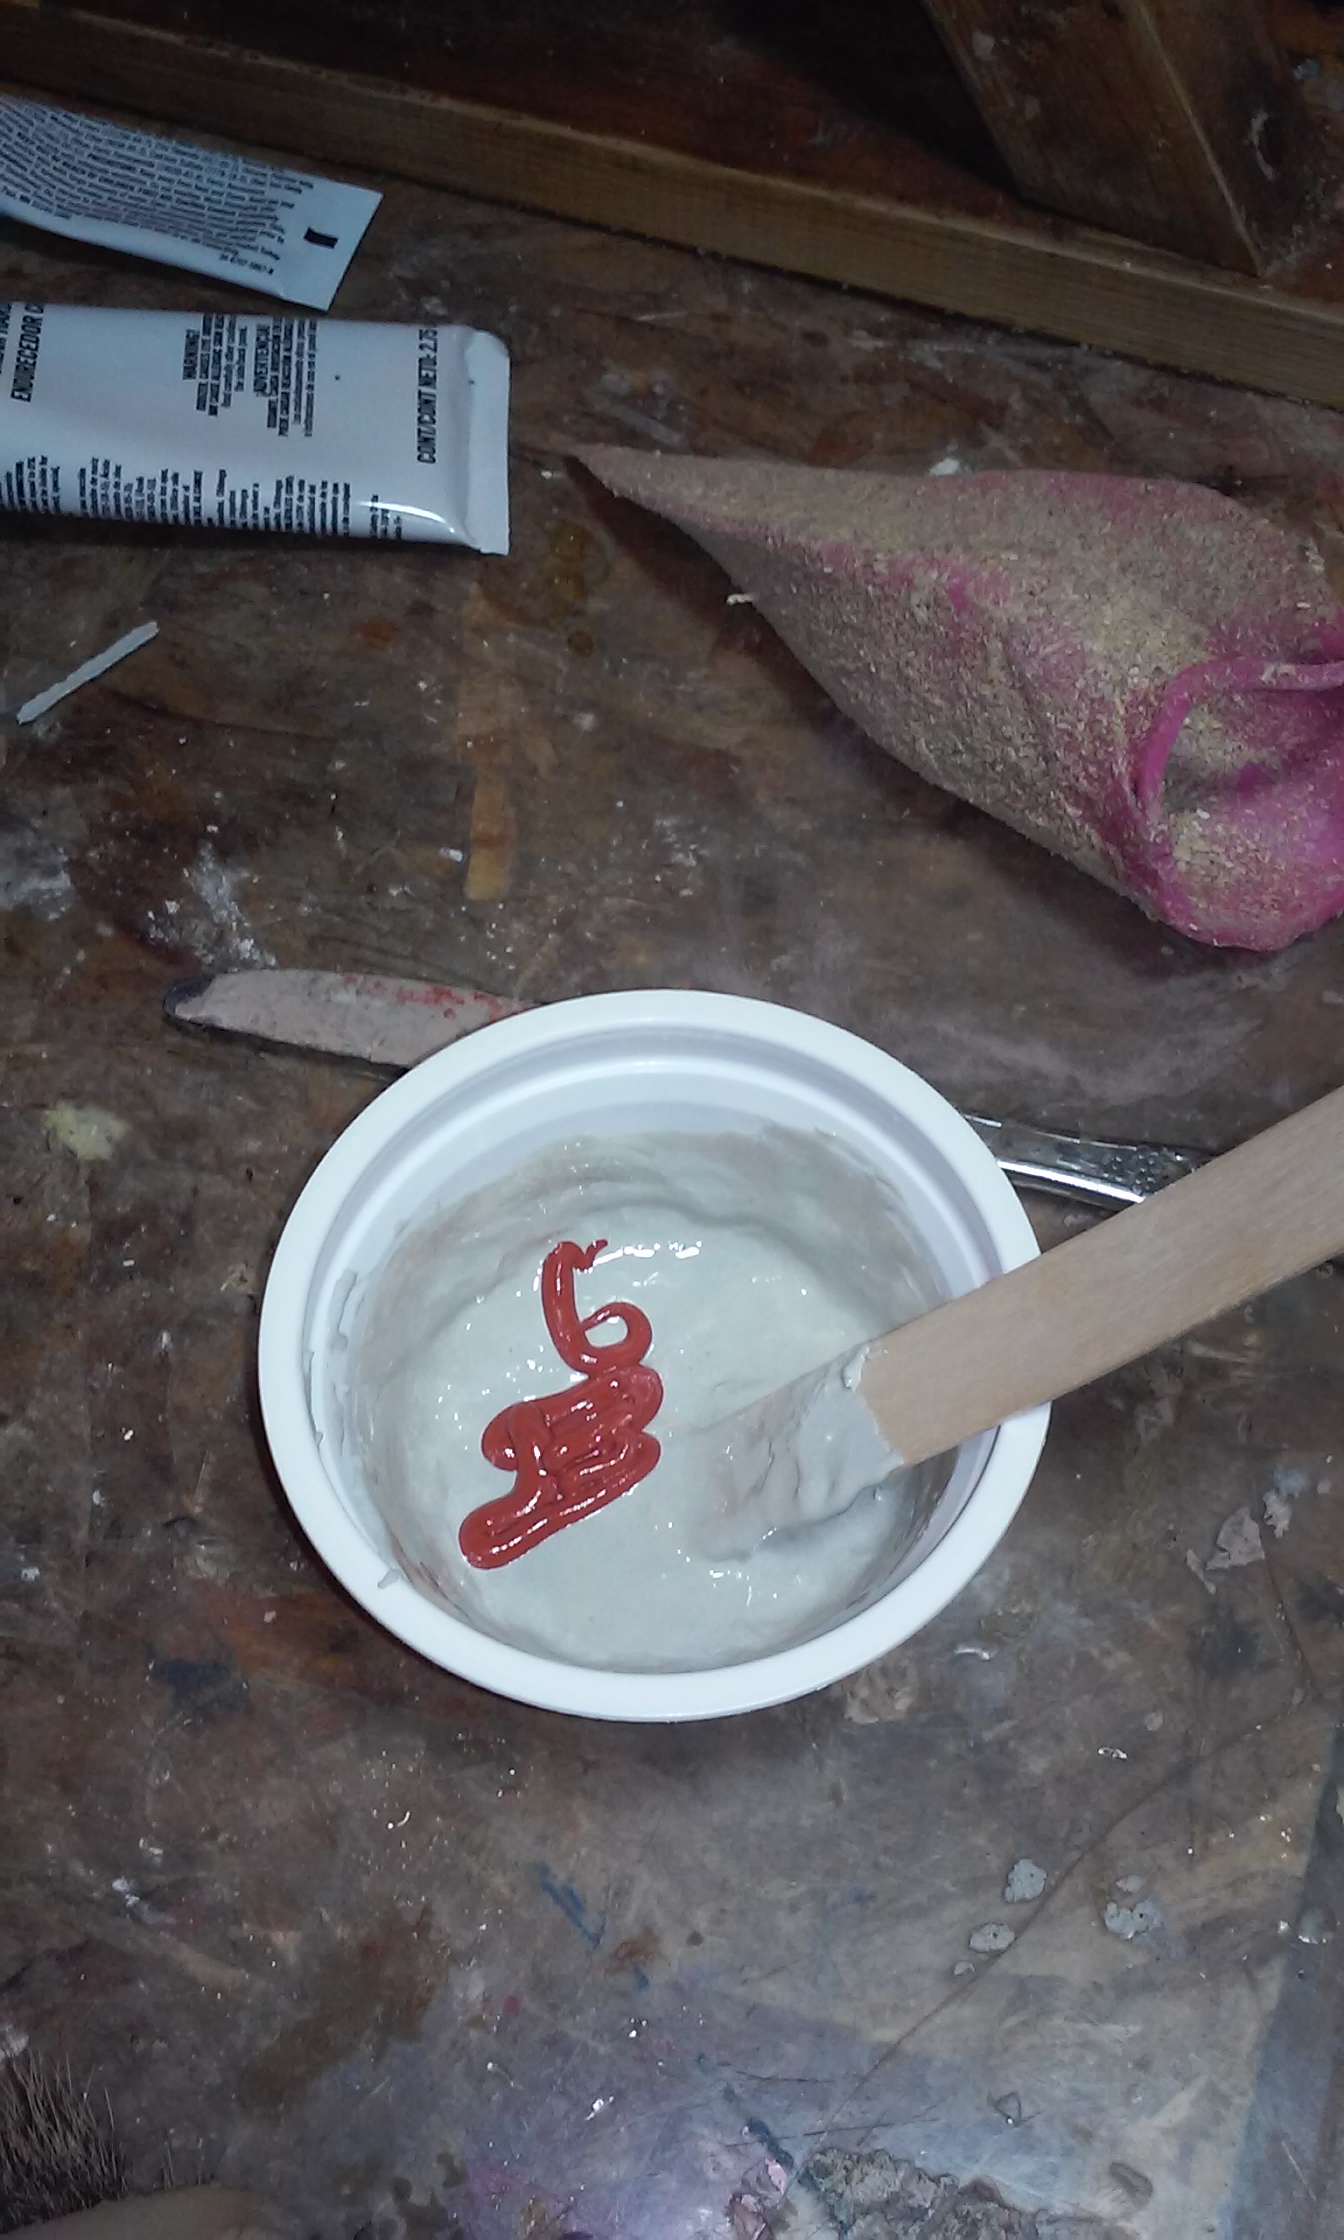
Now it’s time to mix up our Bondo. Mix it a little thin by adding resin to it. We don’t want it lumpy or thick. We are just using the bondo as a substitute adhesive which will grab onto the earliner and ear skin. The saw dust on the liner serves as a rough surface, which is excellent for any adhesive to adhere too. Many will argue that bondo is not an adhesive, but it sure does stick to anything and everything. Next poke a pin hole or two in the tip of the ear. This will allow air to escape. Paint the earliners with your bondo mixture the carefully insert it in to your ear. Taxi the ear skin into place. Make sure your hair patterns are lined up. At this time you will groom the ear until the bondo kicks in and hardens. After you mount up the deer be sure to card the ears.
So now that I have covered the saw dust tip, I’m going to show you another way of doing it if you’re like me and use a high quality taxidermy grade earliner adhesive. I call it the perforated effect because you’re going to do just that. A good tool to use for this is a leather punch. Simply pierce the earliner from ear tip to base, spreading out over the earliner. Again you should have already test fitted your ear and trimmed as necessary beforehand. Apply your adhesive onto the liner front and back. Make sure the glue fills the holes you made. Next poke a pin hole or two in the tip of the ear. This will allow air to escape. Carefully and gently insert the liner into your ear and taxi the skin. Once the skin is in the correct position and all of your hair patterns line up go ahead and put a few staples into the ear and through the liner. If you catch any inner ear hair be sure to pull it out from under the staples. These staples will be removed once the ear is totally dried and set which will be in about a week or two. Now go ahead and groom your ear. Don’t for get to card the ears once you mount up.
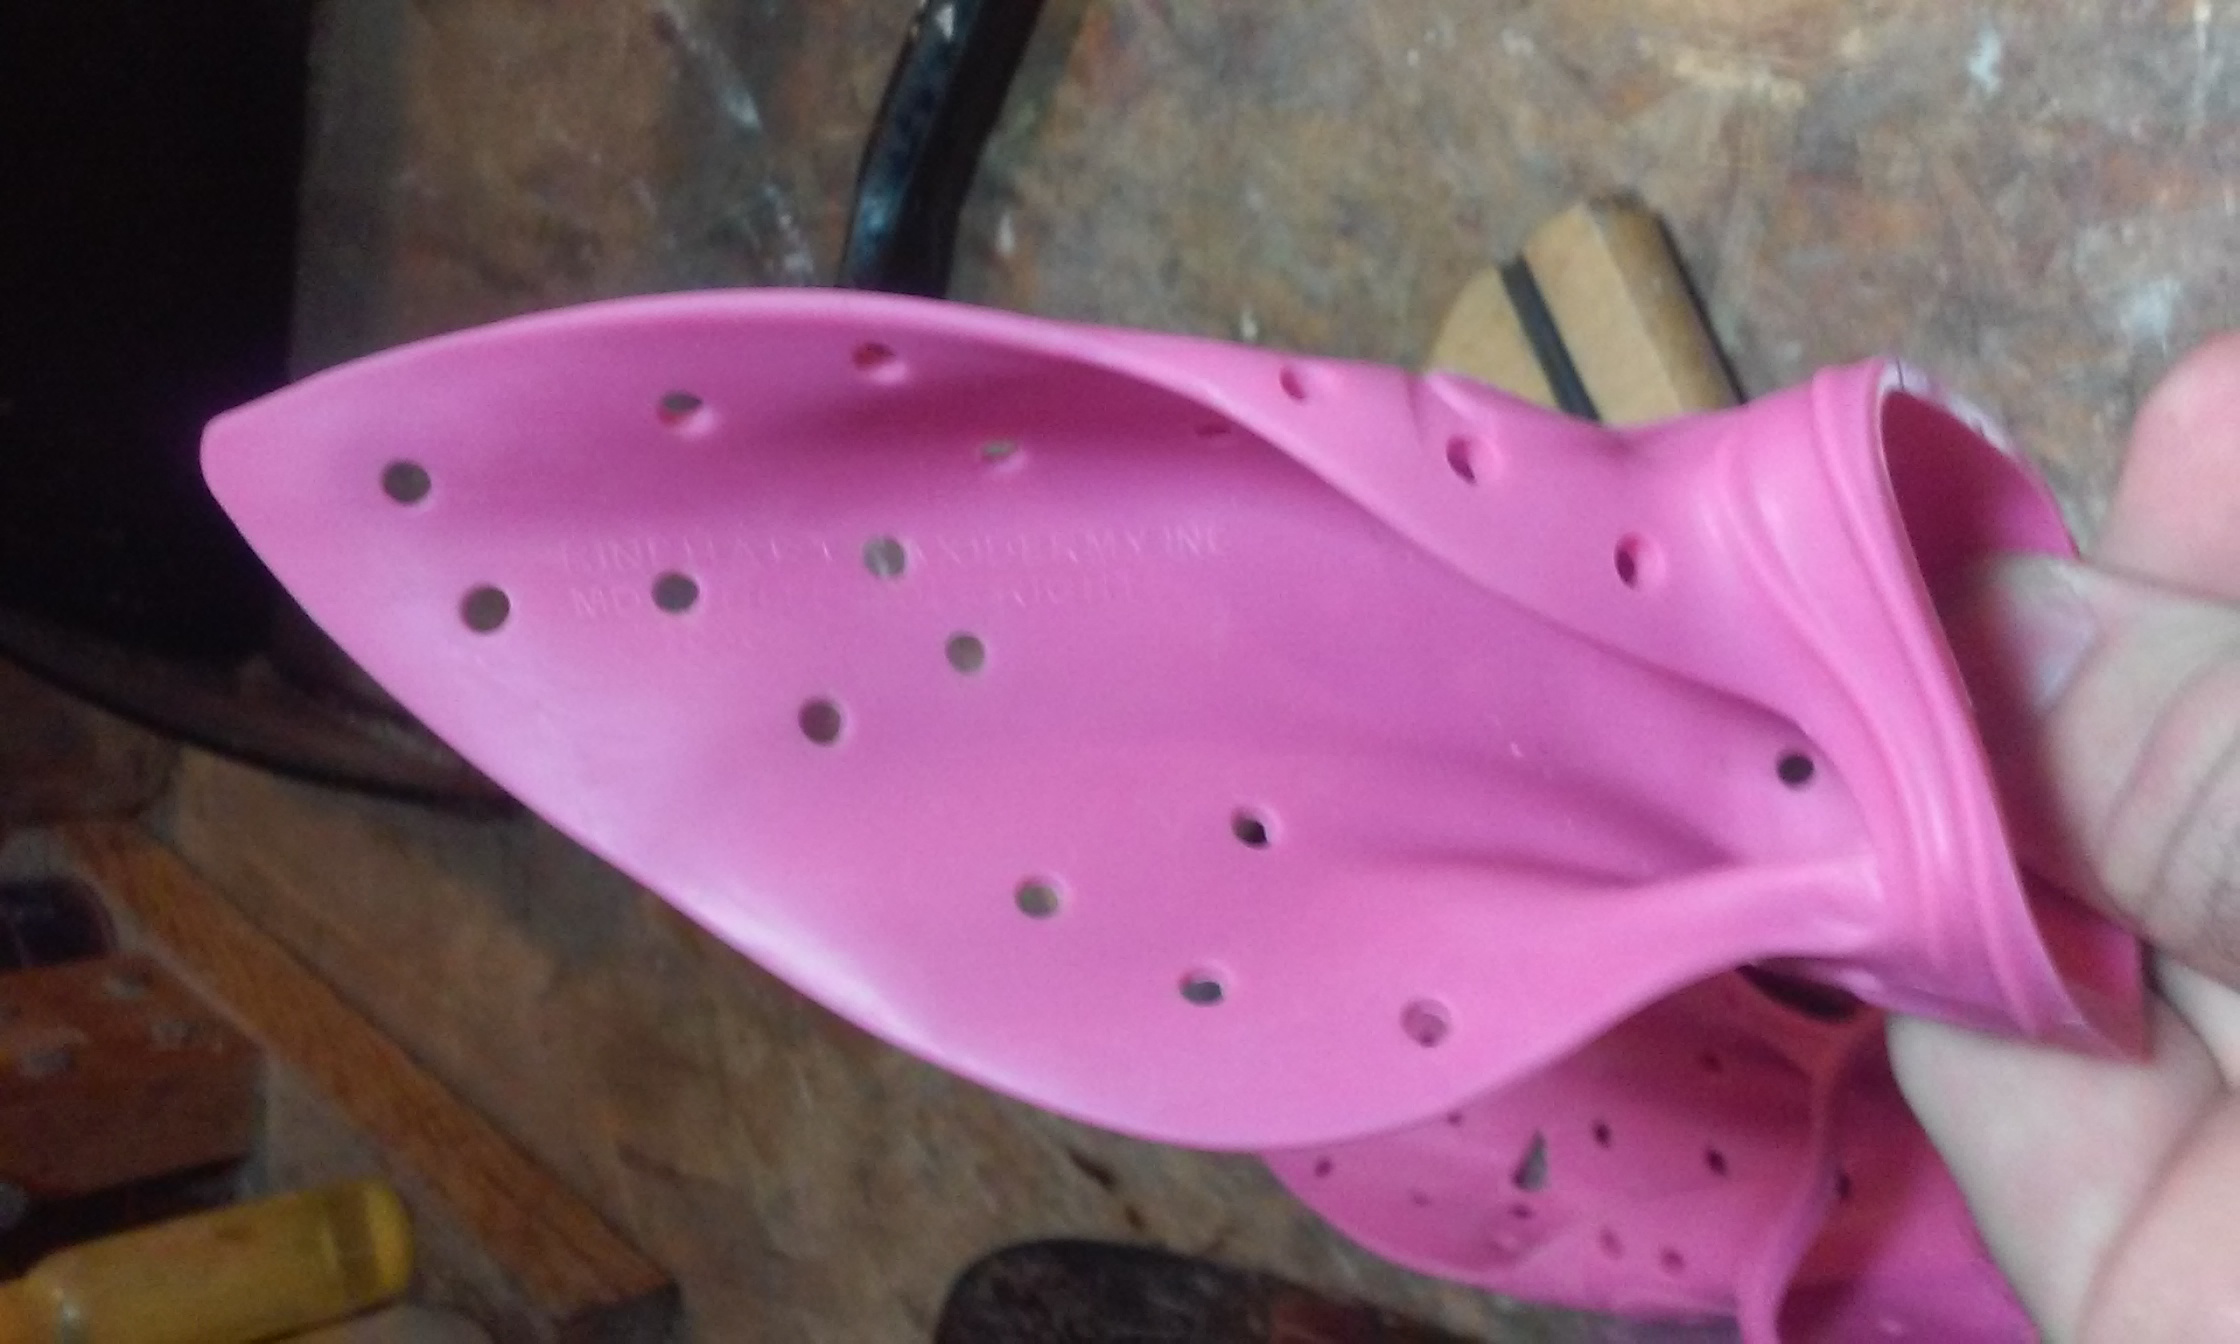
The whole idea behind the perforated earliner is to allow the inner ear glue to meet the back ear glue. Your adhesive will never pull away from the earliner when done like this. The whole concept is to prevent drummed ears. 9 out of 10 times it is the adhesive that separates from the earliner allowing for a drummed ear. If your ear skin is separating from the adhesive, then you are not getting the oils out of the skin and or your ear skin was too wet when you went in to set the liner.


