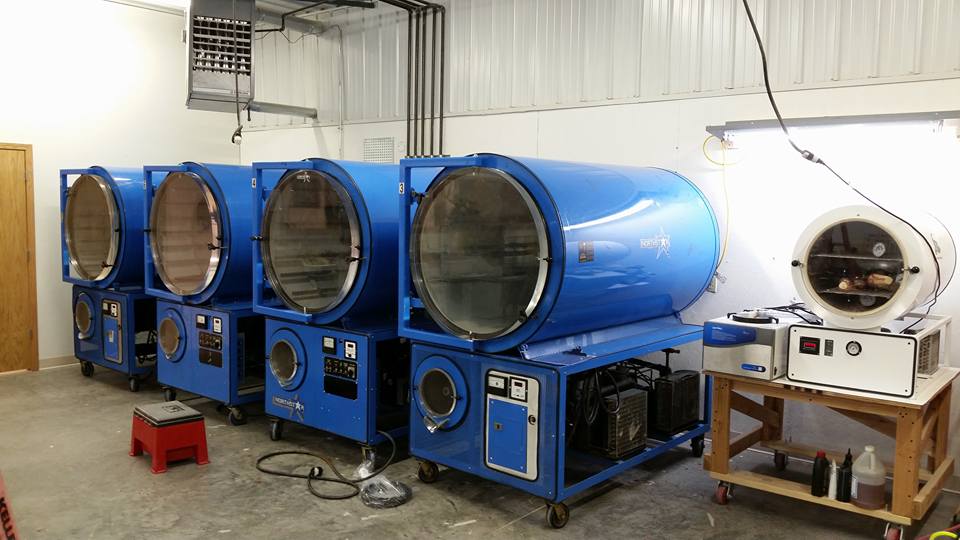
TTN- Stehling’s Taxidermy in Jefferson, WI has substantially expanded it’s freeze drying services to taxidermists and sportsmen. The Stehling’s purchased four more 36″ x 72″ commercial dryers to keep up with demand . They now have five commercial dryers . ” These new machines allow us to handle an even larger volume of freeze dry work and maintain consistent quality with a fast delivery time” said Aaron Stehling, co owner of Stehling’s Taxidermy. ” We have been getting requests to add services to our freeze dry offering” said Aaron, ” We now offer freeze drying services for mammals, velvet antlers, fish, reptiles,and turkey heads”.
The Stehling’s Freeze Dryers
According to Mr Stehling, this expansion means more savings and convenience for their wholesale taxidermist clients ” You can now combine wholesale shipments of specimens for conventional mounting and freeze drying. The finished product can be shipped back in the same box, saving you money on shipping both ways”.
If you are interested in more information on Stehling’s Taxidermy’ s wholesale services, please visit their web site www.stehlingstaxidermy.com or call 920.674.3724
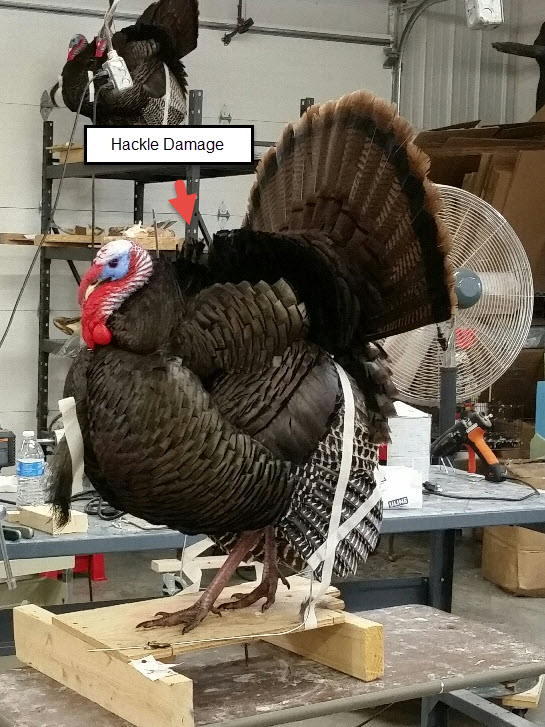
If you mount any number of turkeys a year, chances are you run into birds with shot damage. Sometimes it can be hidden, but quite often repairs need to be made.
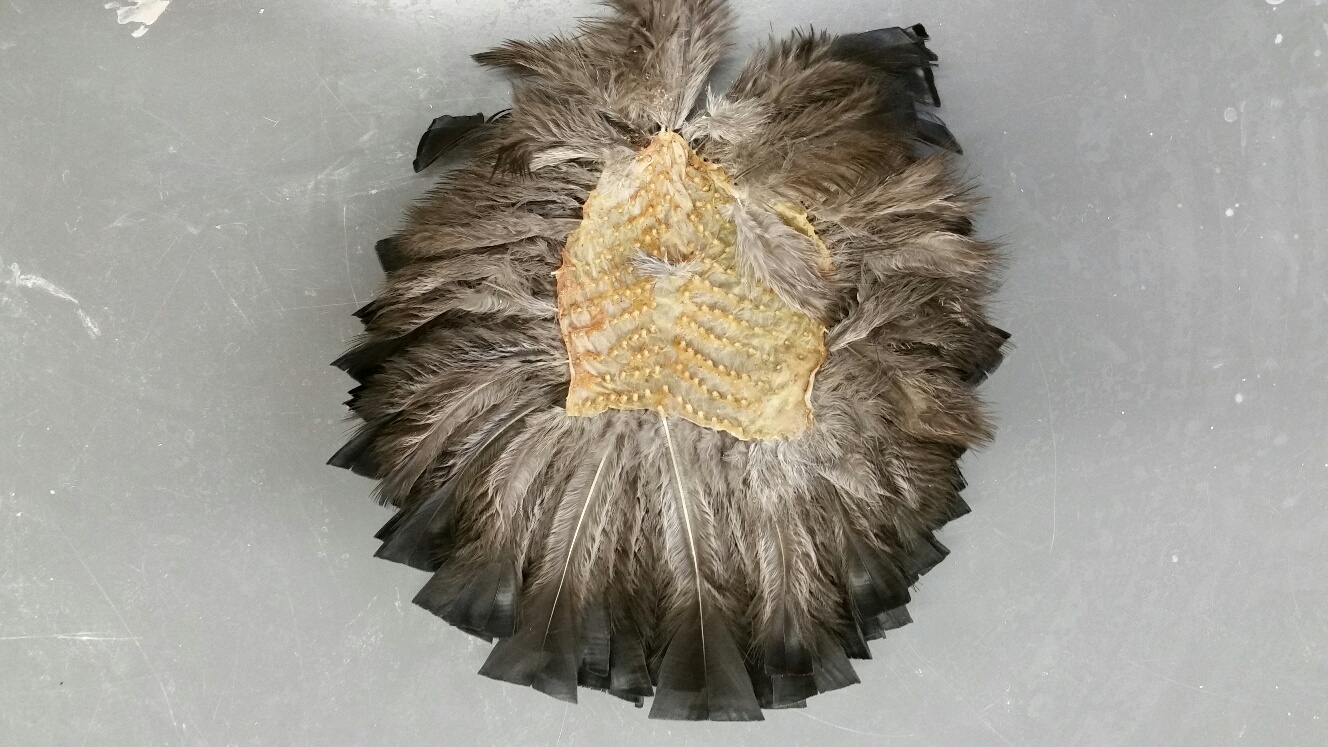
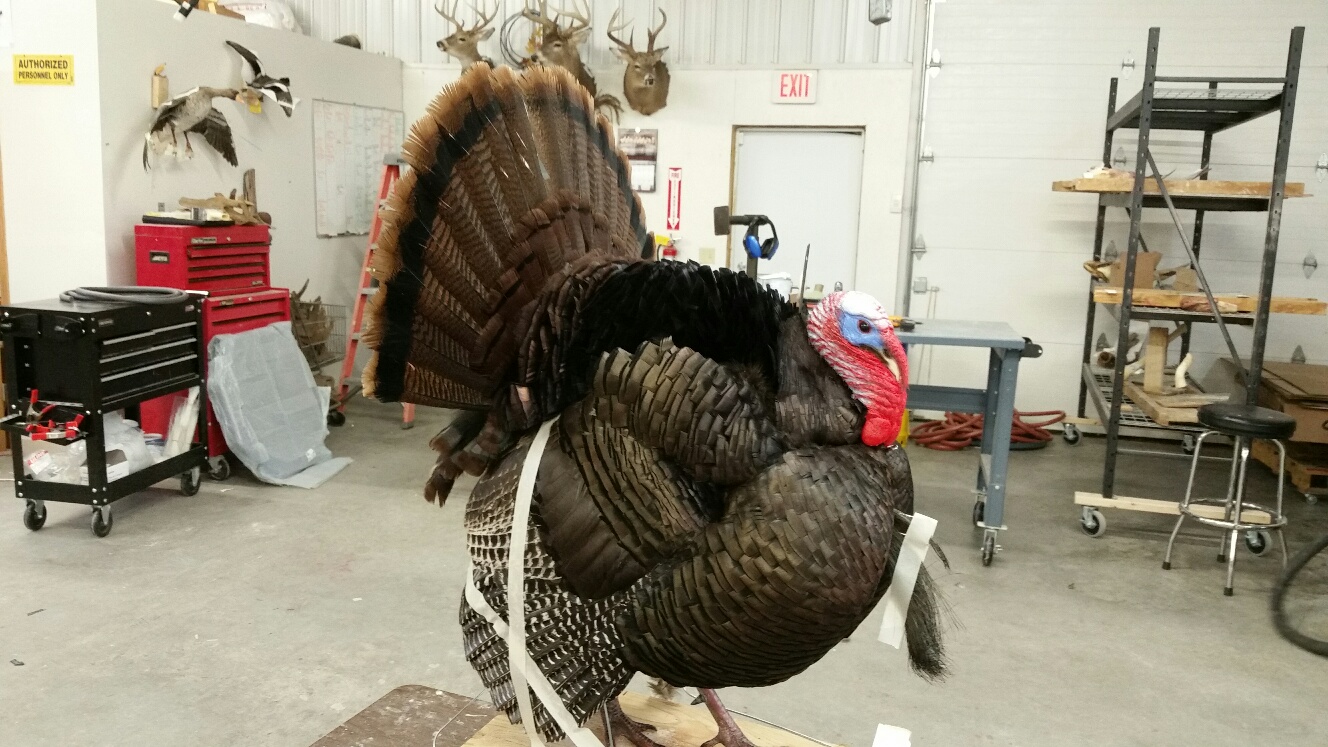
I prefer to make my feather repairs after the bird is mounted and drying. As you can see from this picture, the otherwise nice mount has some hackle feather damage right behind the head. The feathers took the full shotgun blast and were broken and mangled badly.
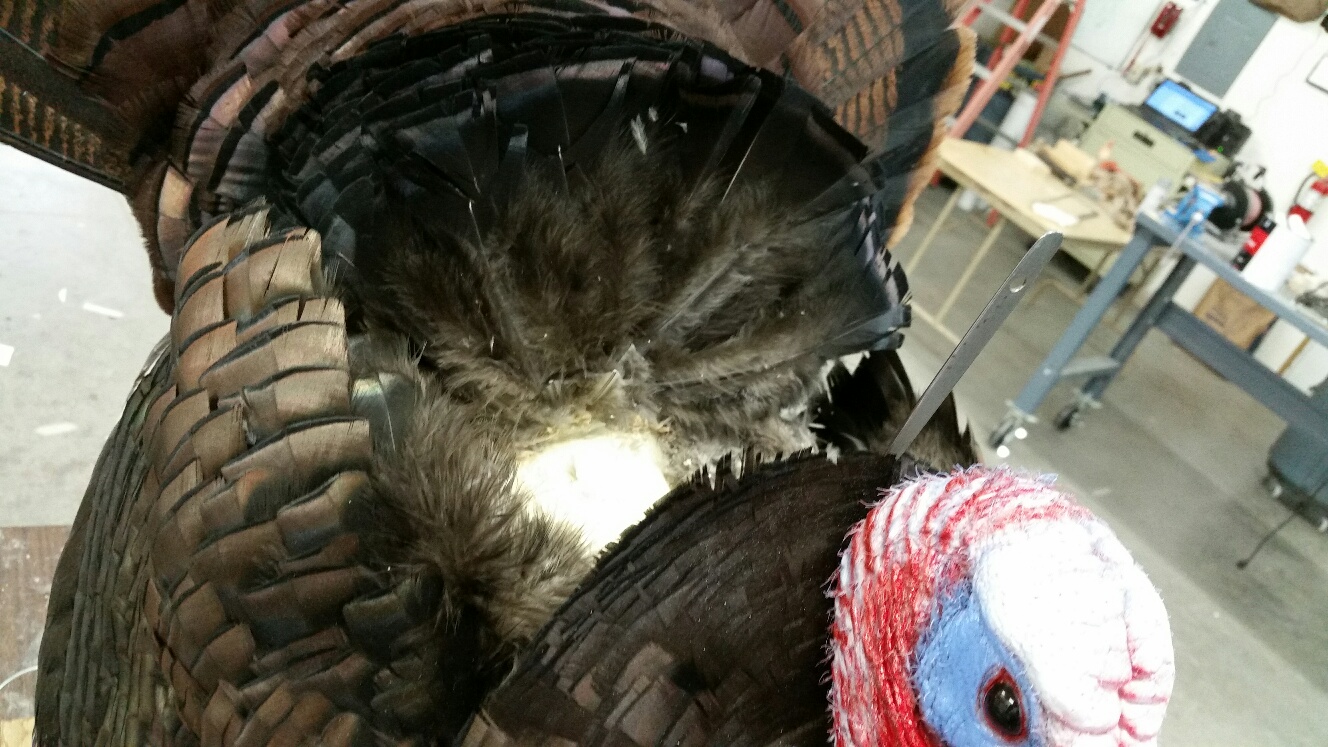
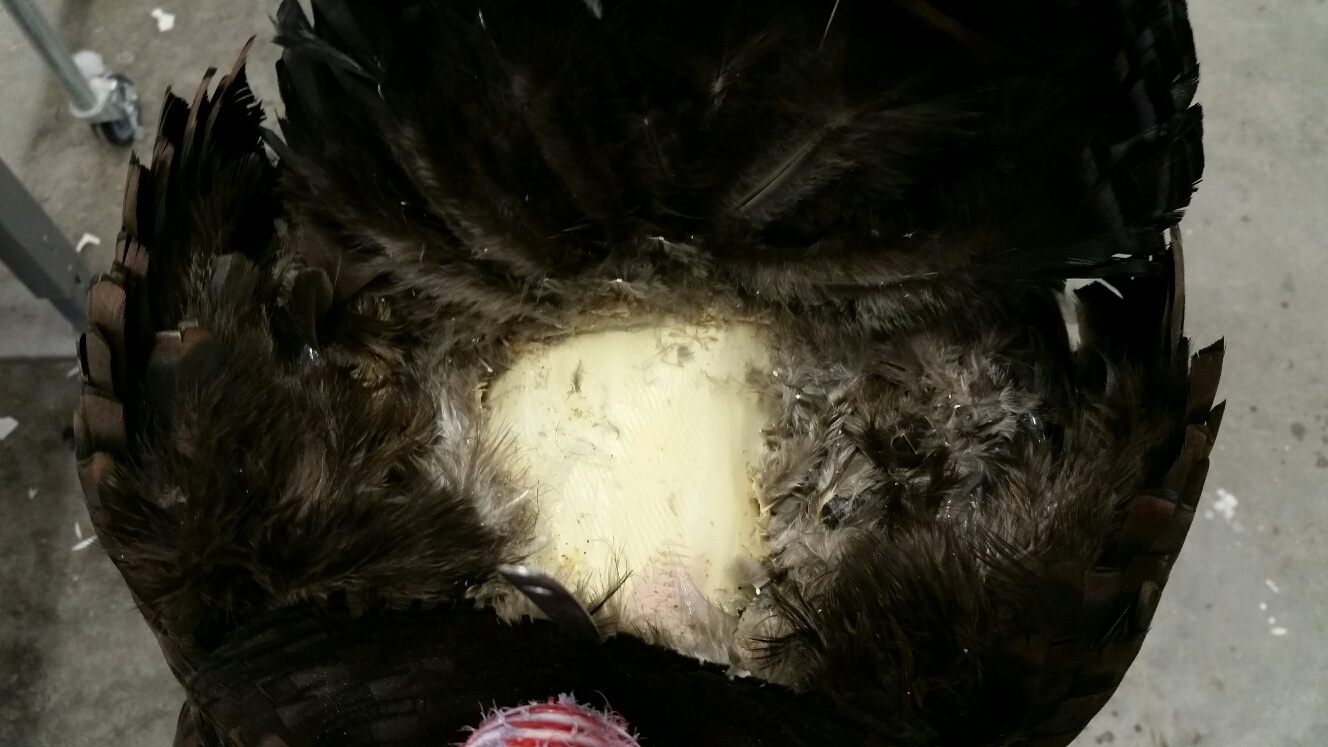
The first step is to remove the damaged feather area. I use a scalpel to cut the damaged skin and feathers tracks out in one piece.
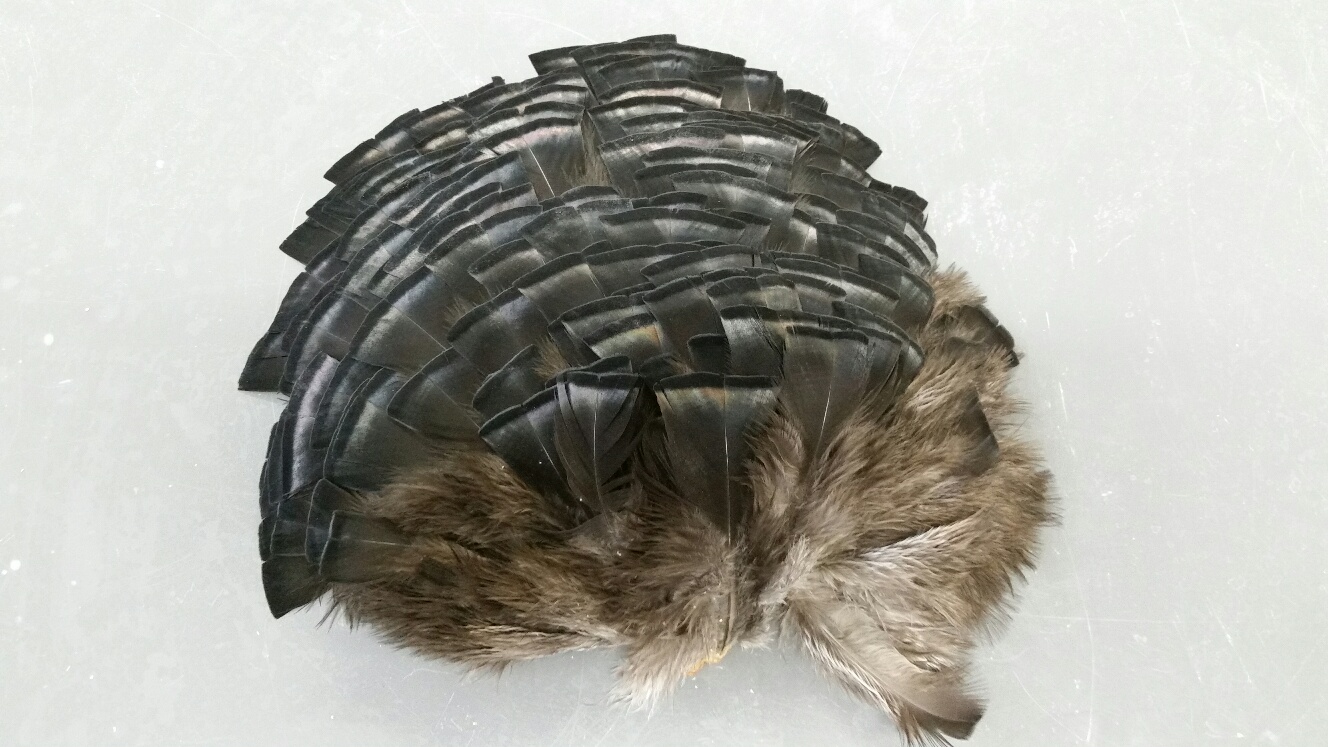
I than have to take good hackle feathers from one of my parts skins. I cut out the feathers I need and wash and dry them.
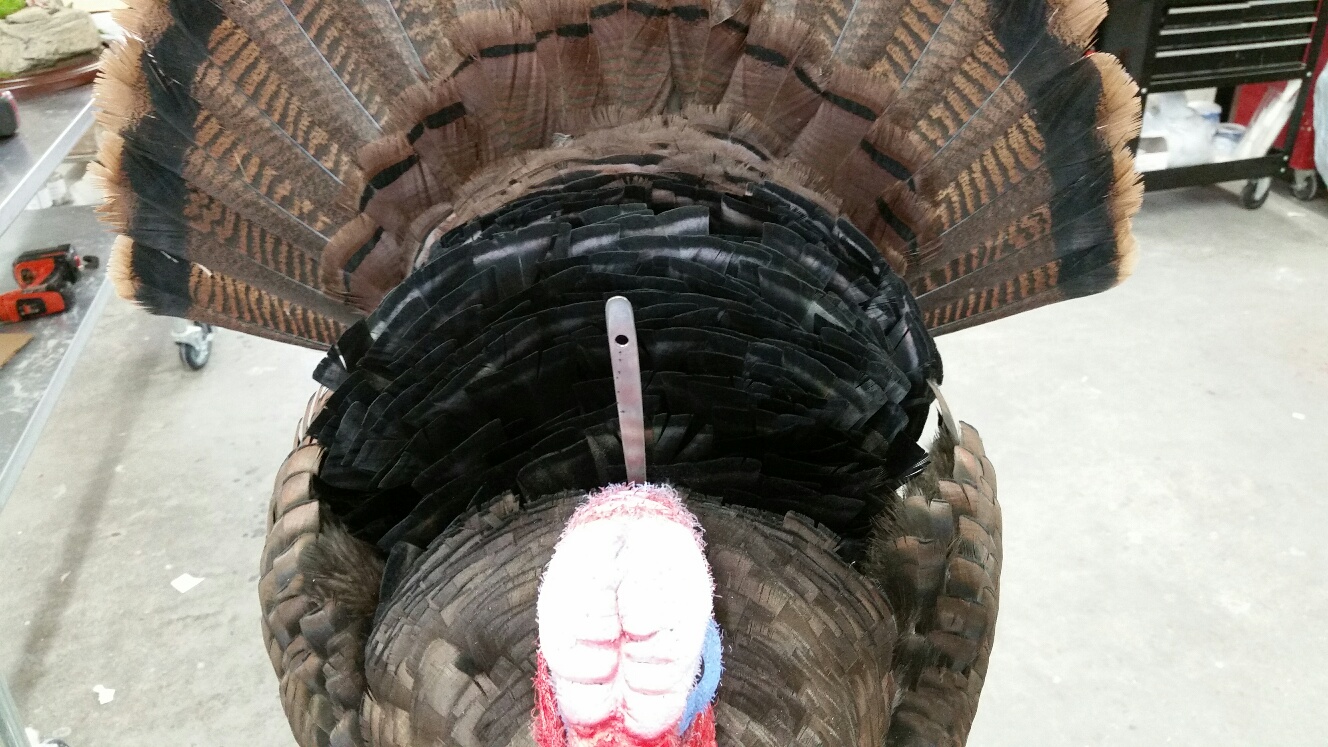
I test fit, than lay down a thin layer of silicone caulking. This holds the feathers in place and gives you control of them for grooming.The new feather track is dropped in place and groomed to match the existing feathers.
Google Chrome recently released their new requirements for website security. Starting in January 2017 all websites that collect user information will be required to use ssl secured https instead of http. Any website that does not follow the new guidelines could be flagged as being “not secure” in the website address bar. See Pic:
What is the difference between http and https?
HTTPS URLs begin with “https://mywebsite.com” whereas HTTP URLs begin with “http://mywebsite.com”
HTTP is not encrypted and is vulnerable to man-in-the-middle and eavesdropping attacks, which can let attackers gain access to website accounts and sensitive information, and modify webpages to inject malware or advertisements. HTTPS is designed to withstand such attacks and is considered secure against them.
What types of websites will need ssl “https” protection?
Websites that have or run the following applications should have https protection.
Ecommerce websites
Websites with Login zones (client login as well as admin logins zones)
Websites with Contact Forms or other forms that collect user information
Websites that offer downloads
What are the benefits to switching to https?
There are numerous benefits to switching from http to https including:
A more secure website that is less vulnerable to attacks and protects your users information.
Google looks favorable on websites that use https and will tent to rank them higher in search results.
Your clients will feel more comfortable using your website
It is good website/internet practice.
Is there a cost to getting an ssl certificate for my website and switching to https?
Yes, an ssl certificate would have to be purchased and put onto your website to make it secure. Depending on the type of encryption needed, the can cost between $60-$200 per year.
Most website just need the basic ssl for $60 per year.
There is also an initial fee for wrapping the new ssl onto your website. The price for this will vary depending on the size of your website and how much content or “urls’ need to be changed from “http” to secure “https”.
Is it mandatory that I secure my website?
Our answer to that would be yes. All website should be secure. However, if you run a basic website that does not collect user information and you are not concerned about your users seeing a not secure warning in their address bar then you would not need to get https protection. Though we would Highly recommend that you do.
All of our clients will be receiving emails over the next week with more information. If you have questions feel free to contact us : 920-723-1224
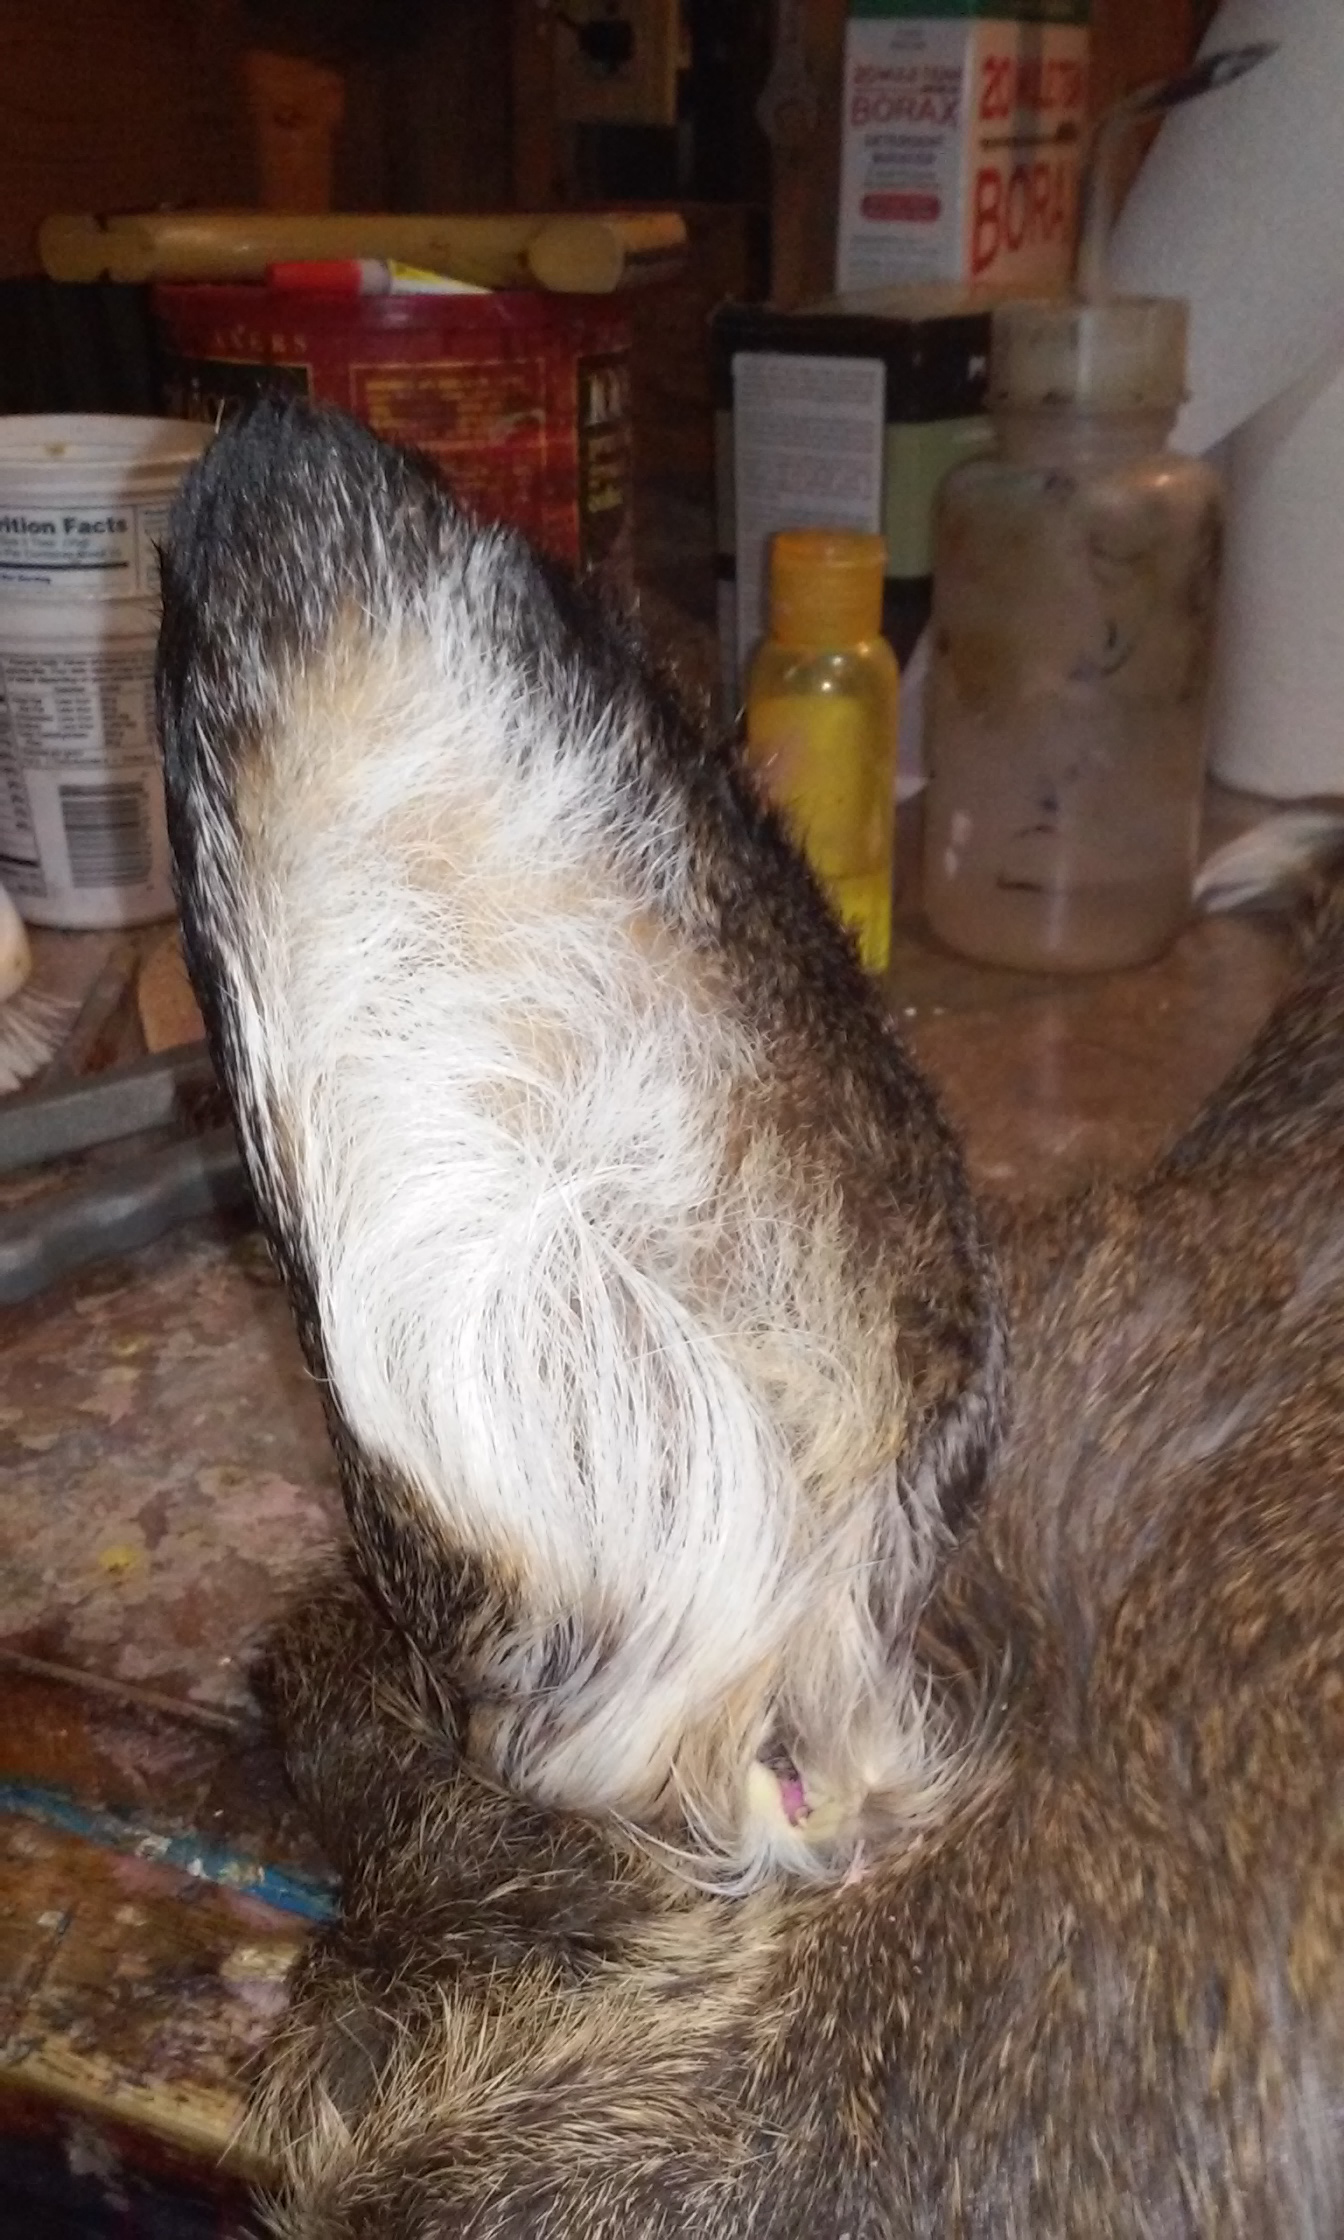
Drummed ears are probably the number one failure for any new taxidermist who is starting out. It has happened to most of us when starting out, but in this modern day and age of taxidermy, there is absolutely no excuse for anyone developing drummed ears. We have come too far in taxidermy advancements to even worry about drummed ears anymore. But yet we are still seeing it in guys and gals who are starting out on their own.
The number one culprit for drummed ears is improper earliner preparation, followed by improper earliner sizing. Experience a combination of both and you’re guaranteed to get drummed ears after the deer mount dries and if not then within a few months.
There are many brands and styles of earliners on the market. The composition in materials used to manufacture earliners varies. Some are made of plastic and some out of fabric. I must note though I haven’t seen a fabric liner in some time being sold by the suppliers. The thing I liked about the fabric earliners is that little to no preparation was needed for any kind of adhesive to adhere to the liner.
Old fabric earliner from back in the day
I’m about to show you two little tricks that just may help you out when getting started in taxidermy. This earliner tip is aimed at the self-teaching individuals who are worried they didn’t get the liner sanded or roughed up enough to accept the hide paste. If your hide paste grips the ear skin when drying, but doesn’t get enough grip on the liner, it will pull away and drum during the drying process.
If I’m not going to Bondo an ear I’m inserting a liner and most likely a plastic liner. The particular earliner I most often use today is made of a plastic composite. They are very flexible, they hold memory and can easily be manipulated to accommodate ears back if need be. You can get these liners from T.A.S.C.O Taxidermy Supply in Wisconsin.
The first thing you need to do is size the liner. Chances are your earliner is bigger than is needed. This is the biggest mistake beginners make when using earliners. Your ear skin should never feel snug with a liner inserted. There should be plenty of play and loose skin. It should feel like that your liner is too small for your ear. With that said if you ever have to trim off more than 1/8 of an inch from your liner, order smaller earliners. The earliners I use is one size fits all and I have never had to go beyond the 1/8 inch to get them to fit properly. Don’t worry about all the slack in your skin. The adhesive will fill in the gaps, especially the gaps to the ears edge. This is why we card ears during drying and as the ear dries the edges will pull in tight to the liner and all that excess skin you had to play with will also tighten down. If your liner fits too snug to begin with, then you will run into the chance of that ear drumming while drying.
If you have not already, remove the ear cartilage from the ear and make sure you have and spilt the ear all the way to the edge. Do this while the ears are still wet from the tan.
So what adhesive do we use? Is there a magic adhesive for ears? To tell you the truth it does not matter what type or kind of glue you use for your ears, if your earliner is not properly prepared in advanced. This also goes for the ear skin itself. Make sure they too are roughed up with sand paper and that all tanning oils have been removed and the ear skin itself is dry. When I say dry I mean that you can no longer squeeze any moisture from it and the hair side is completely dried using a (on cool setting) hair dryer.
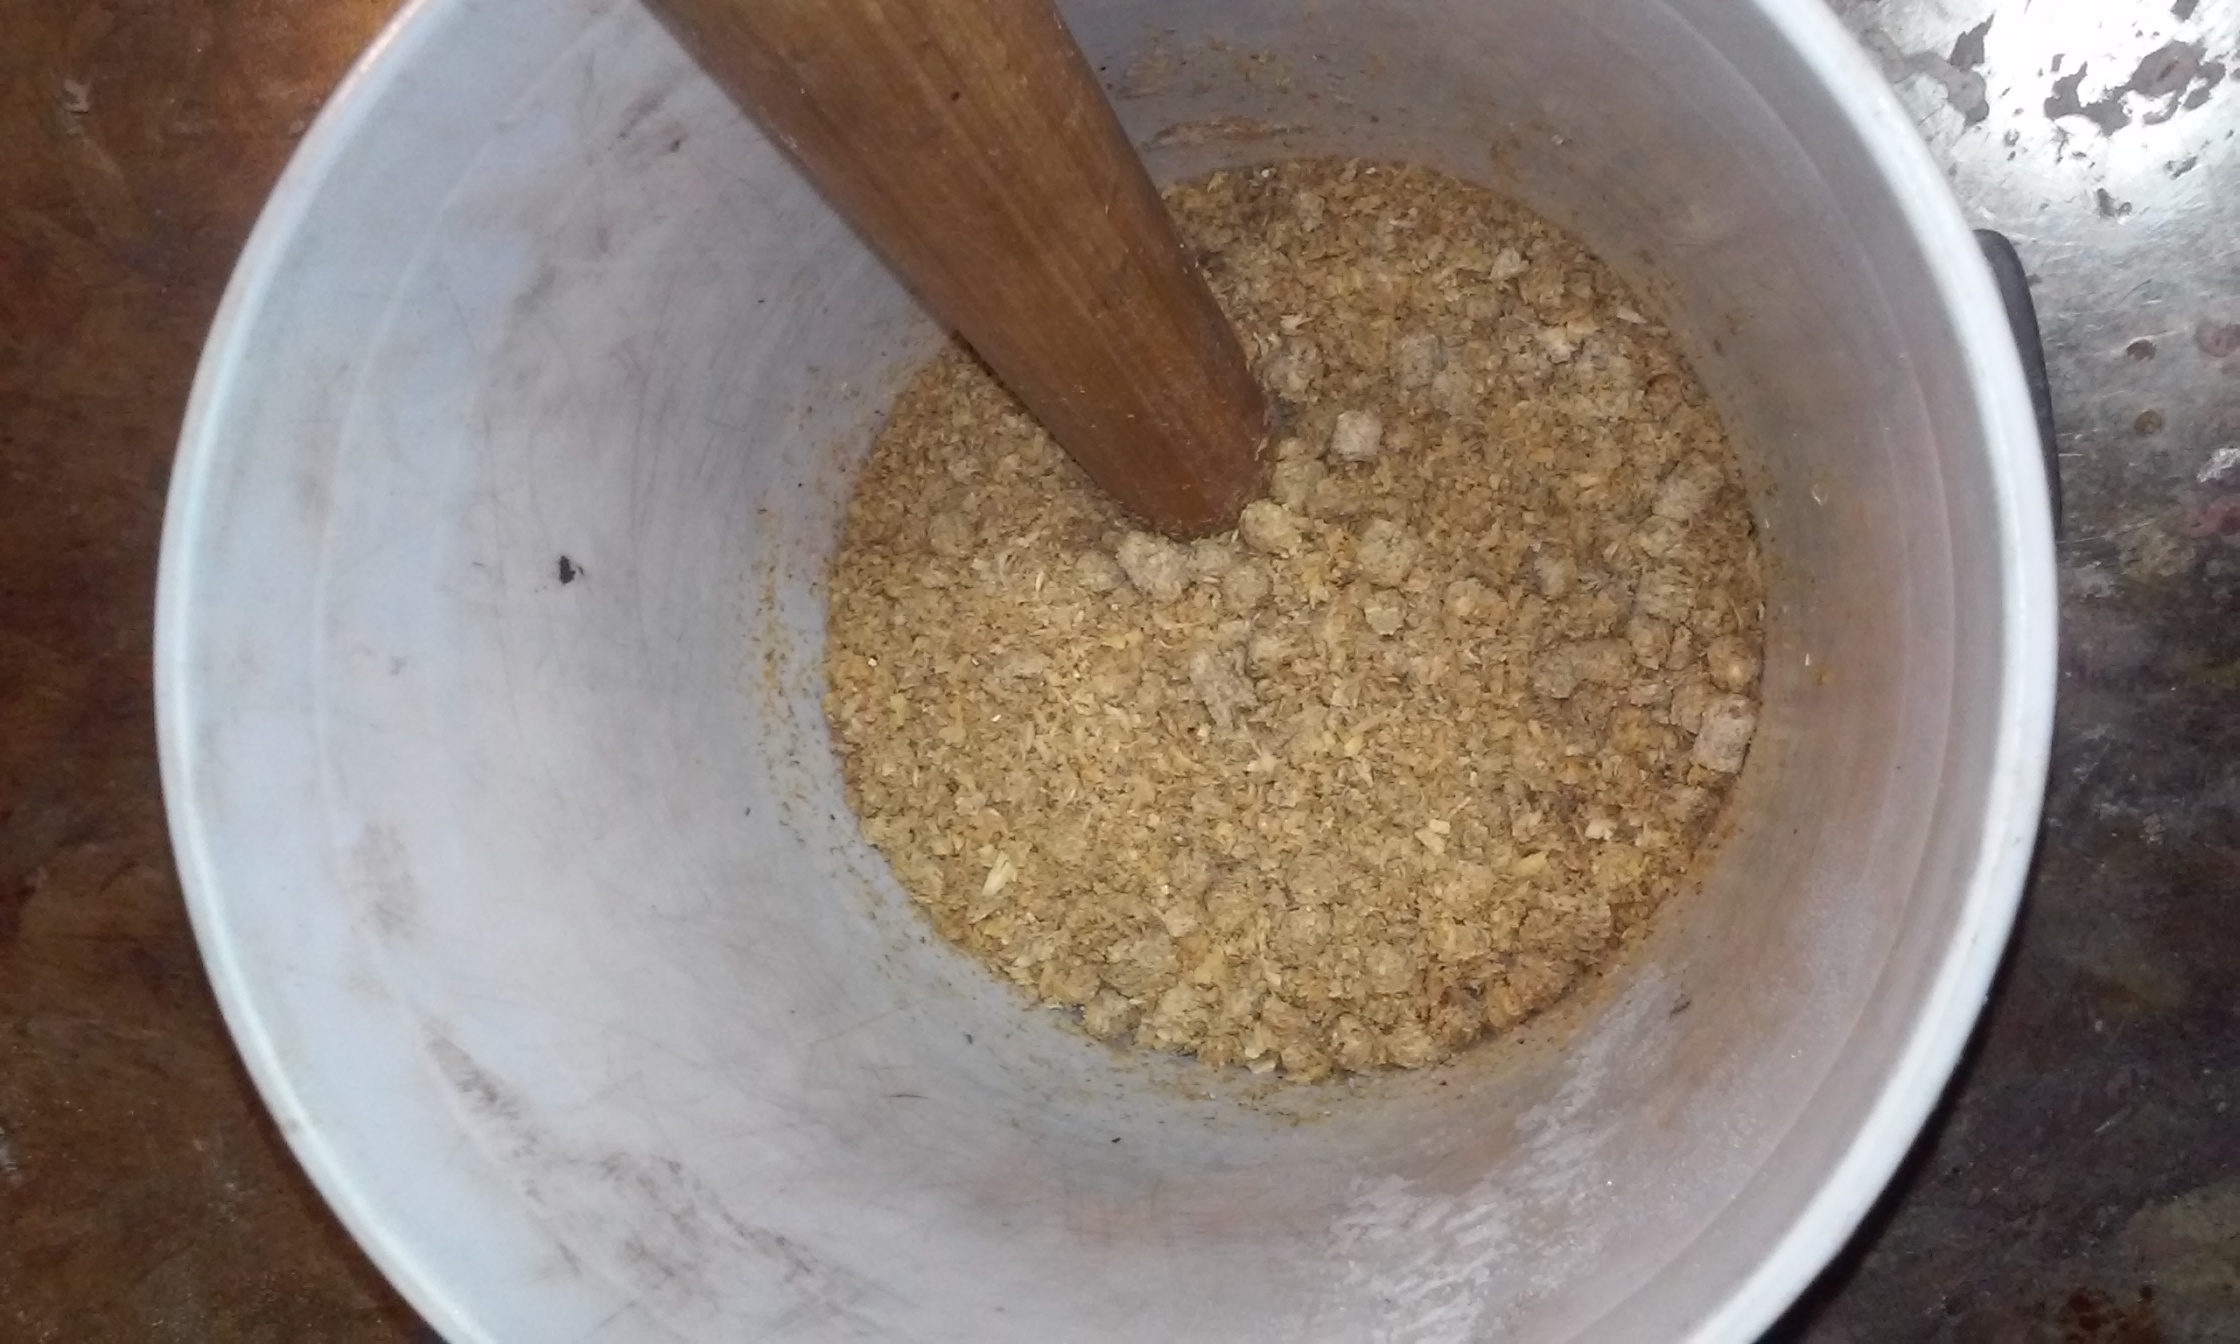
For those who are starting out, learning and don’t want to invest in a tub of high quality taxidermy adhesive, run down to Walmart and grab yourself a small can of plain old Bondo, or better yet Bondo Hair if you can get it. Bondo Hair has fiberglass strands mixed into it making it stronger and most Wally World’s carry it. If you have access to dry saw dust that’s great. Get some of it, about a pound of it. If not then head over to TSC (Tractor Supply) and pick up a bag of Equine Pelletized Bedding for about $6. The pellets are nothing more than pine wood pellets.
Crushing some wood pellets to make saw dust
To turn the pine wood pellets into saw dust, throw some in a bucket and dampen really well. Don’t soak them just get them damp. I use a spray bottle filled with clean cool water. When the pellets are good and damp, they should crumble very easily, creating sawdust. Use a blunt object and mash them up. The picture should explain what I do. Remember you don’t want to soak the pellets, just dampen them. A spray bottle works well for this.
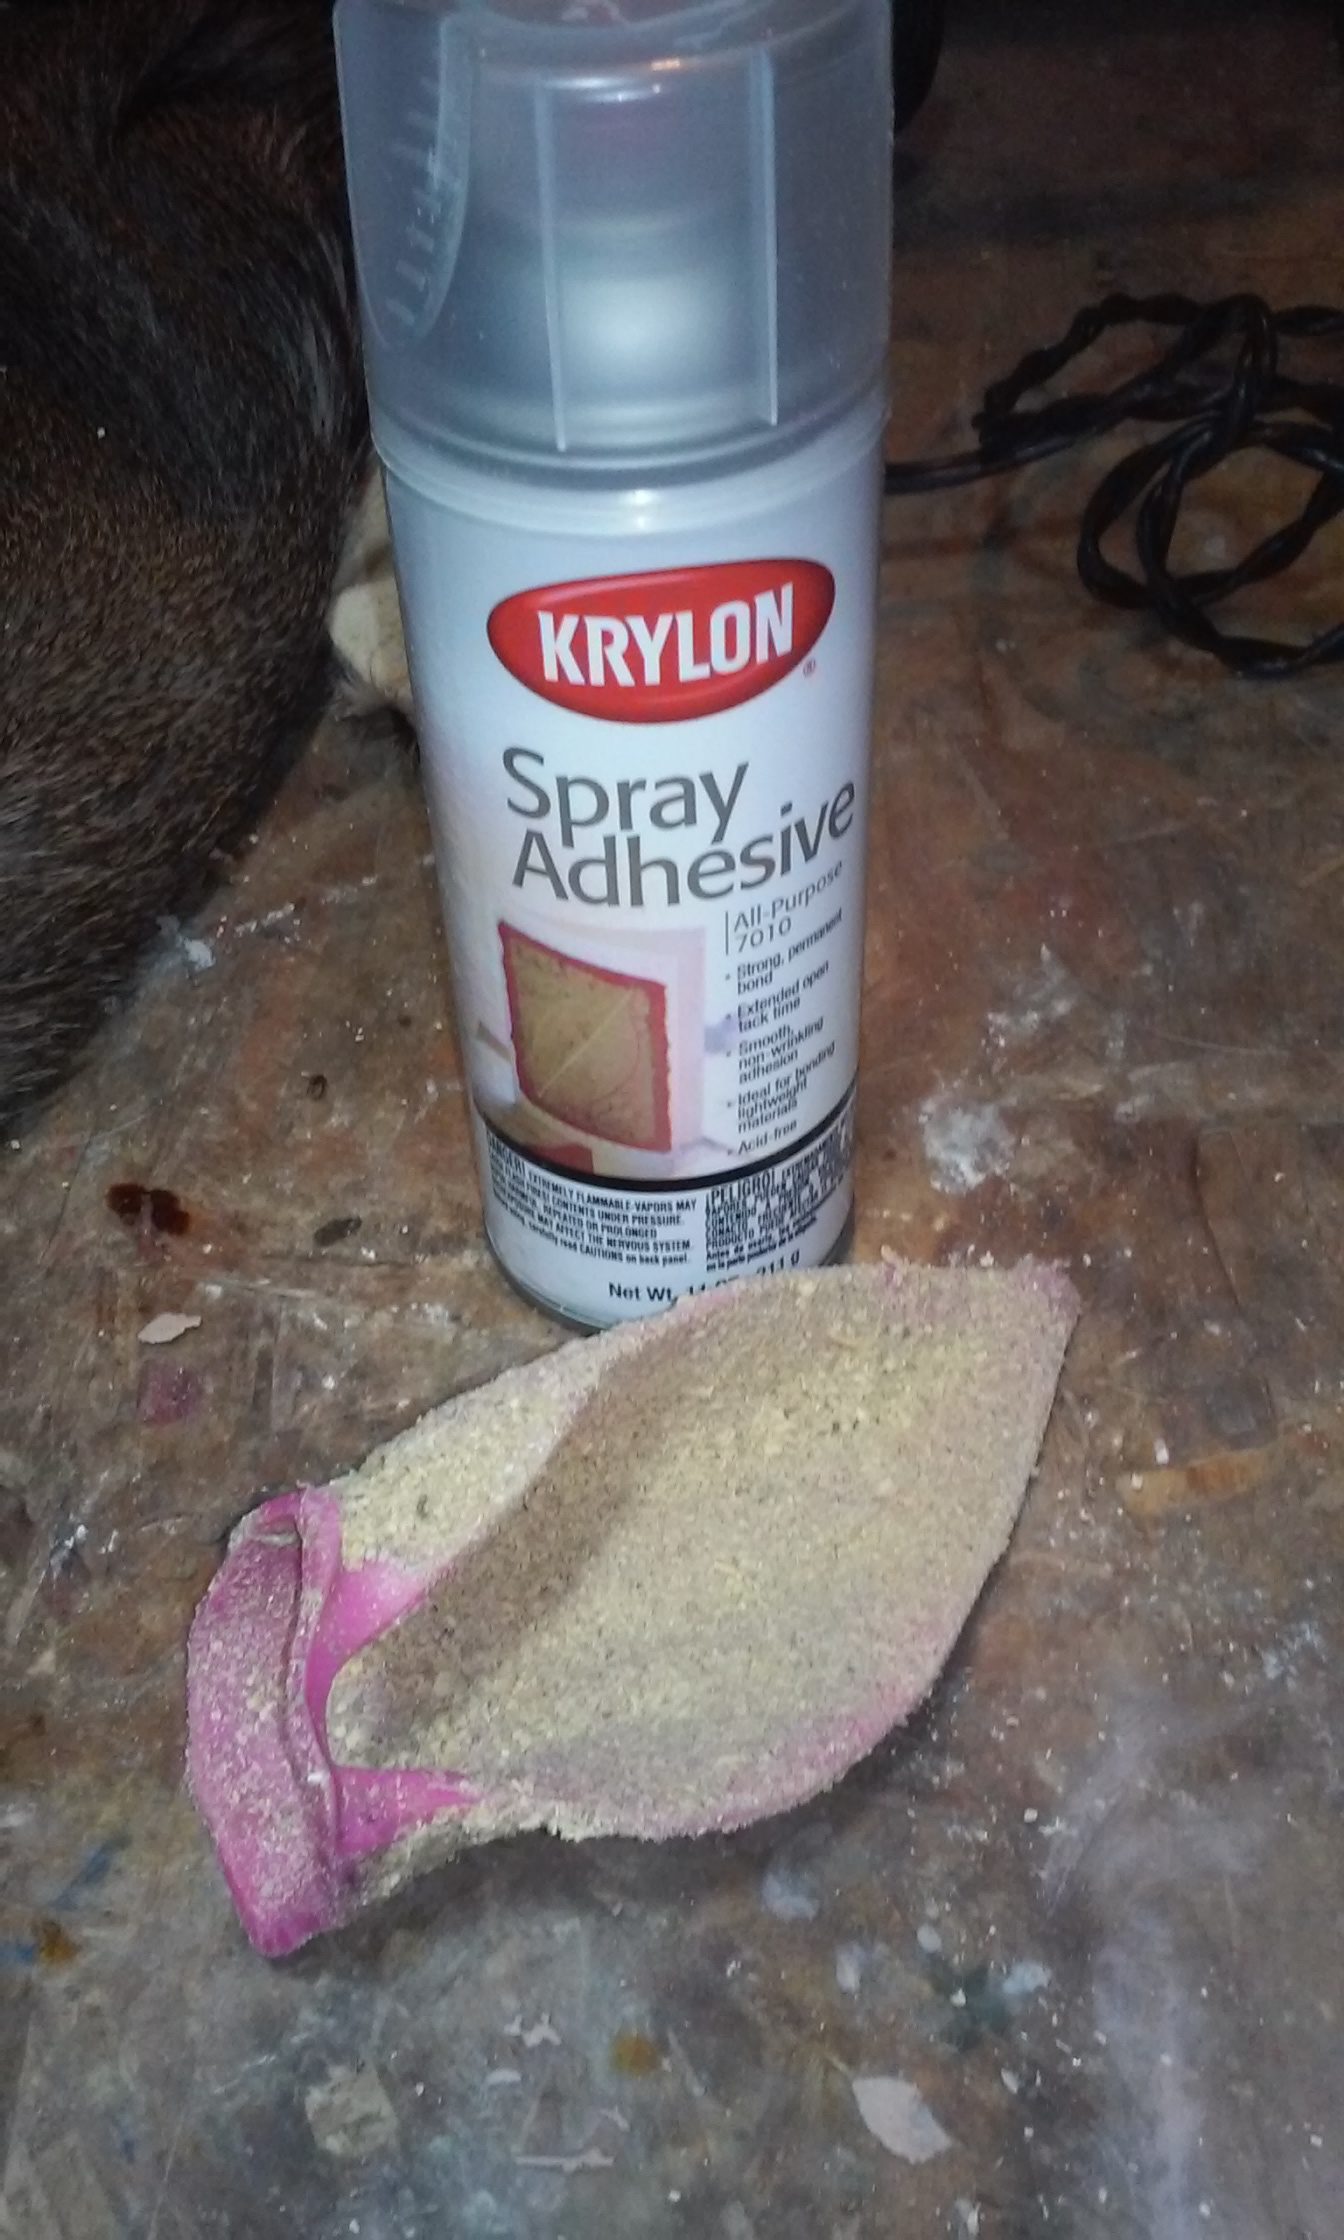
Now that we got all that out of the way let’s get going. We have test fitted our ear, our earliner is properly trimmed and our ear skin is all ready to go. We are going to spray down the earliner with spray adhesive which can be bought anywhere hardware and or paints are sold. Give it a good coating and allow it to set up. It should be very tacky at this point. Take the liner and rub the sawdust into the liner. It should stick to it. Cover both front and back of the liner. Repeat this step several times until you get a good coating of sawdust on the earliner. When all done give the saw dust on the liner a good spray. Allow to dry for 15 minutes or so.
These earliners are ready to go
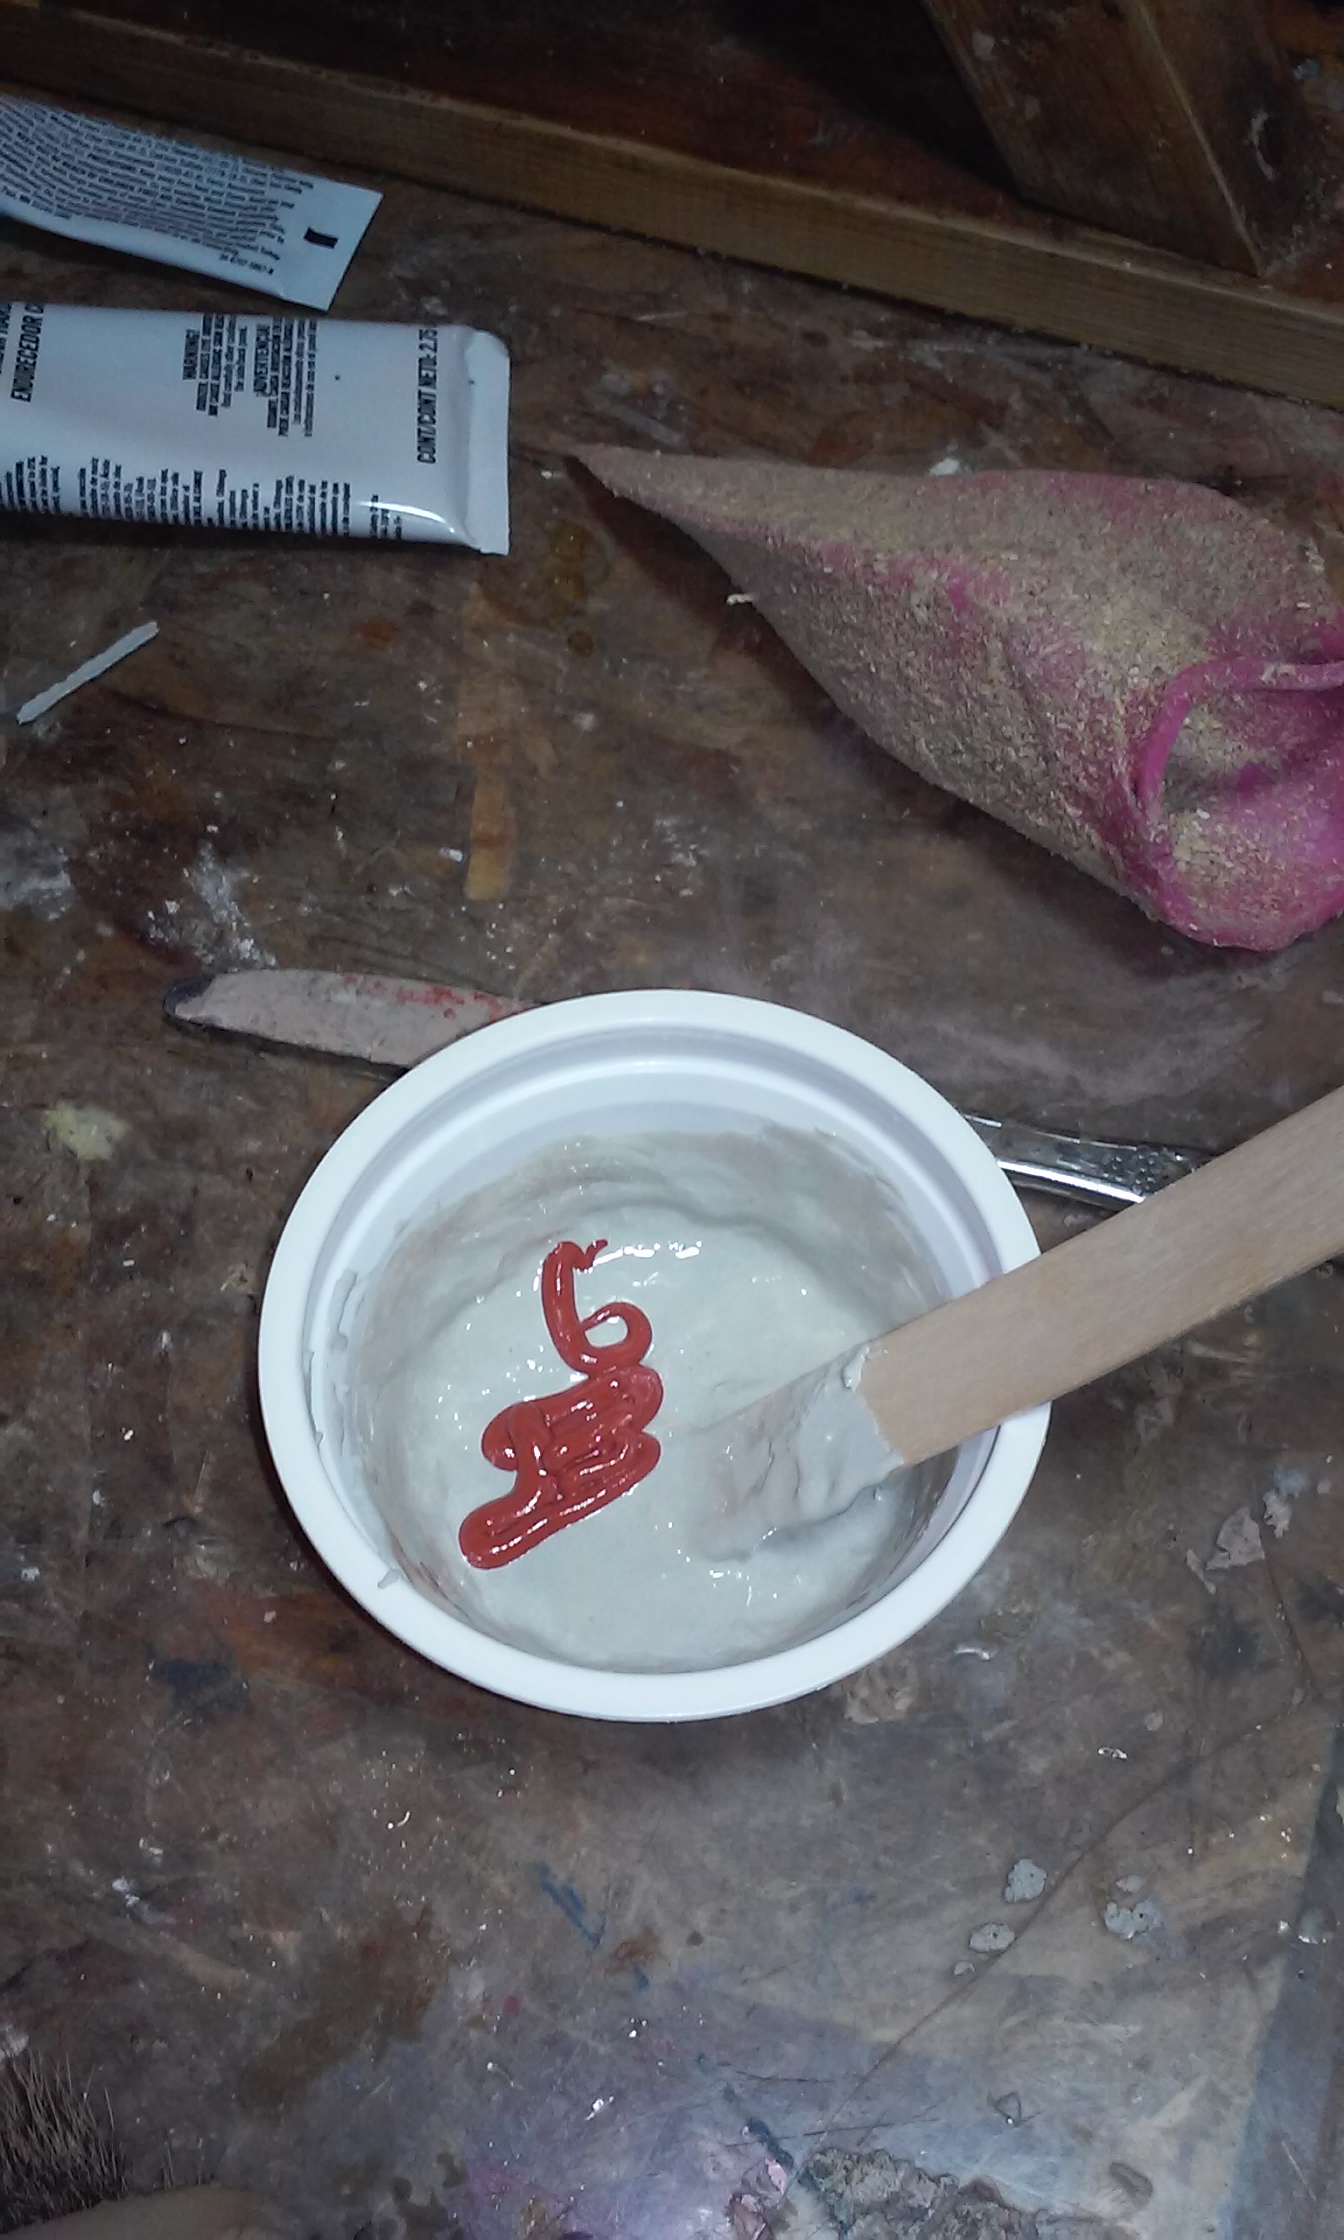
Now it’s time to mix up our Bondo. Mix it a little thin by adding resin to it. We don’t want it lumpy or thick. We are just using the bondo as a substitute adhesive which will grab onto the earliner and ear skin. The saw dust on the liner serves as a rough surface, which is excellent for any adhesive to adhere too. Many will argue that bondo is not an adhesive, but it sure does stick to anything and everything. Next poke a pin hole or two in the tip of the ear. This will allow air to escape. Paint the earliners with your bondo mixture the carefully insert it in to your ear. Taxi the ear skin into place. Make sure your hair patterns are lined up. At this time you will groom the ear until the bondo kicks in and hardens. After you mount up the deer be sure to card the ears.
Never throw away them yogurt cups. Bondo mixes well in them
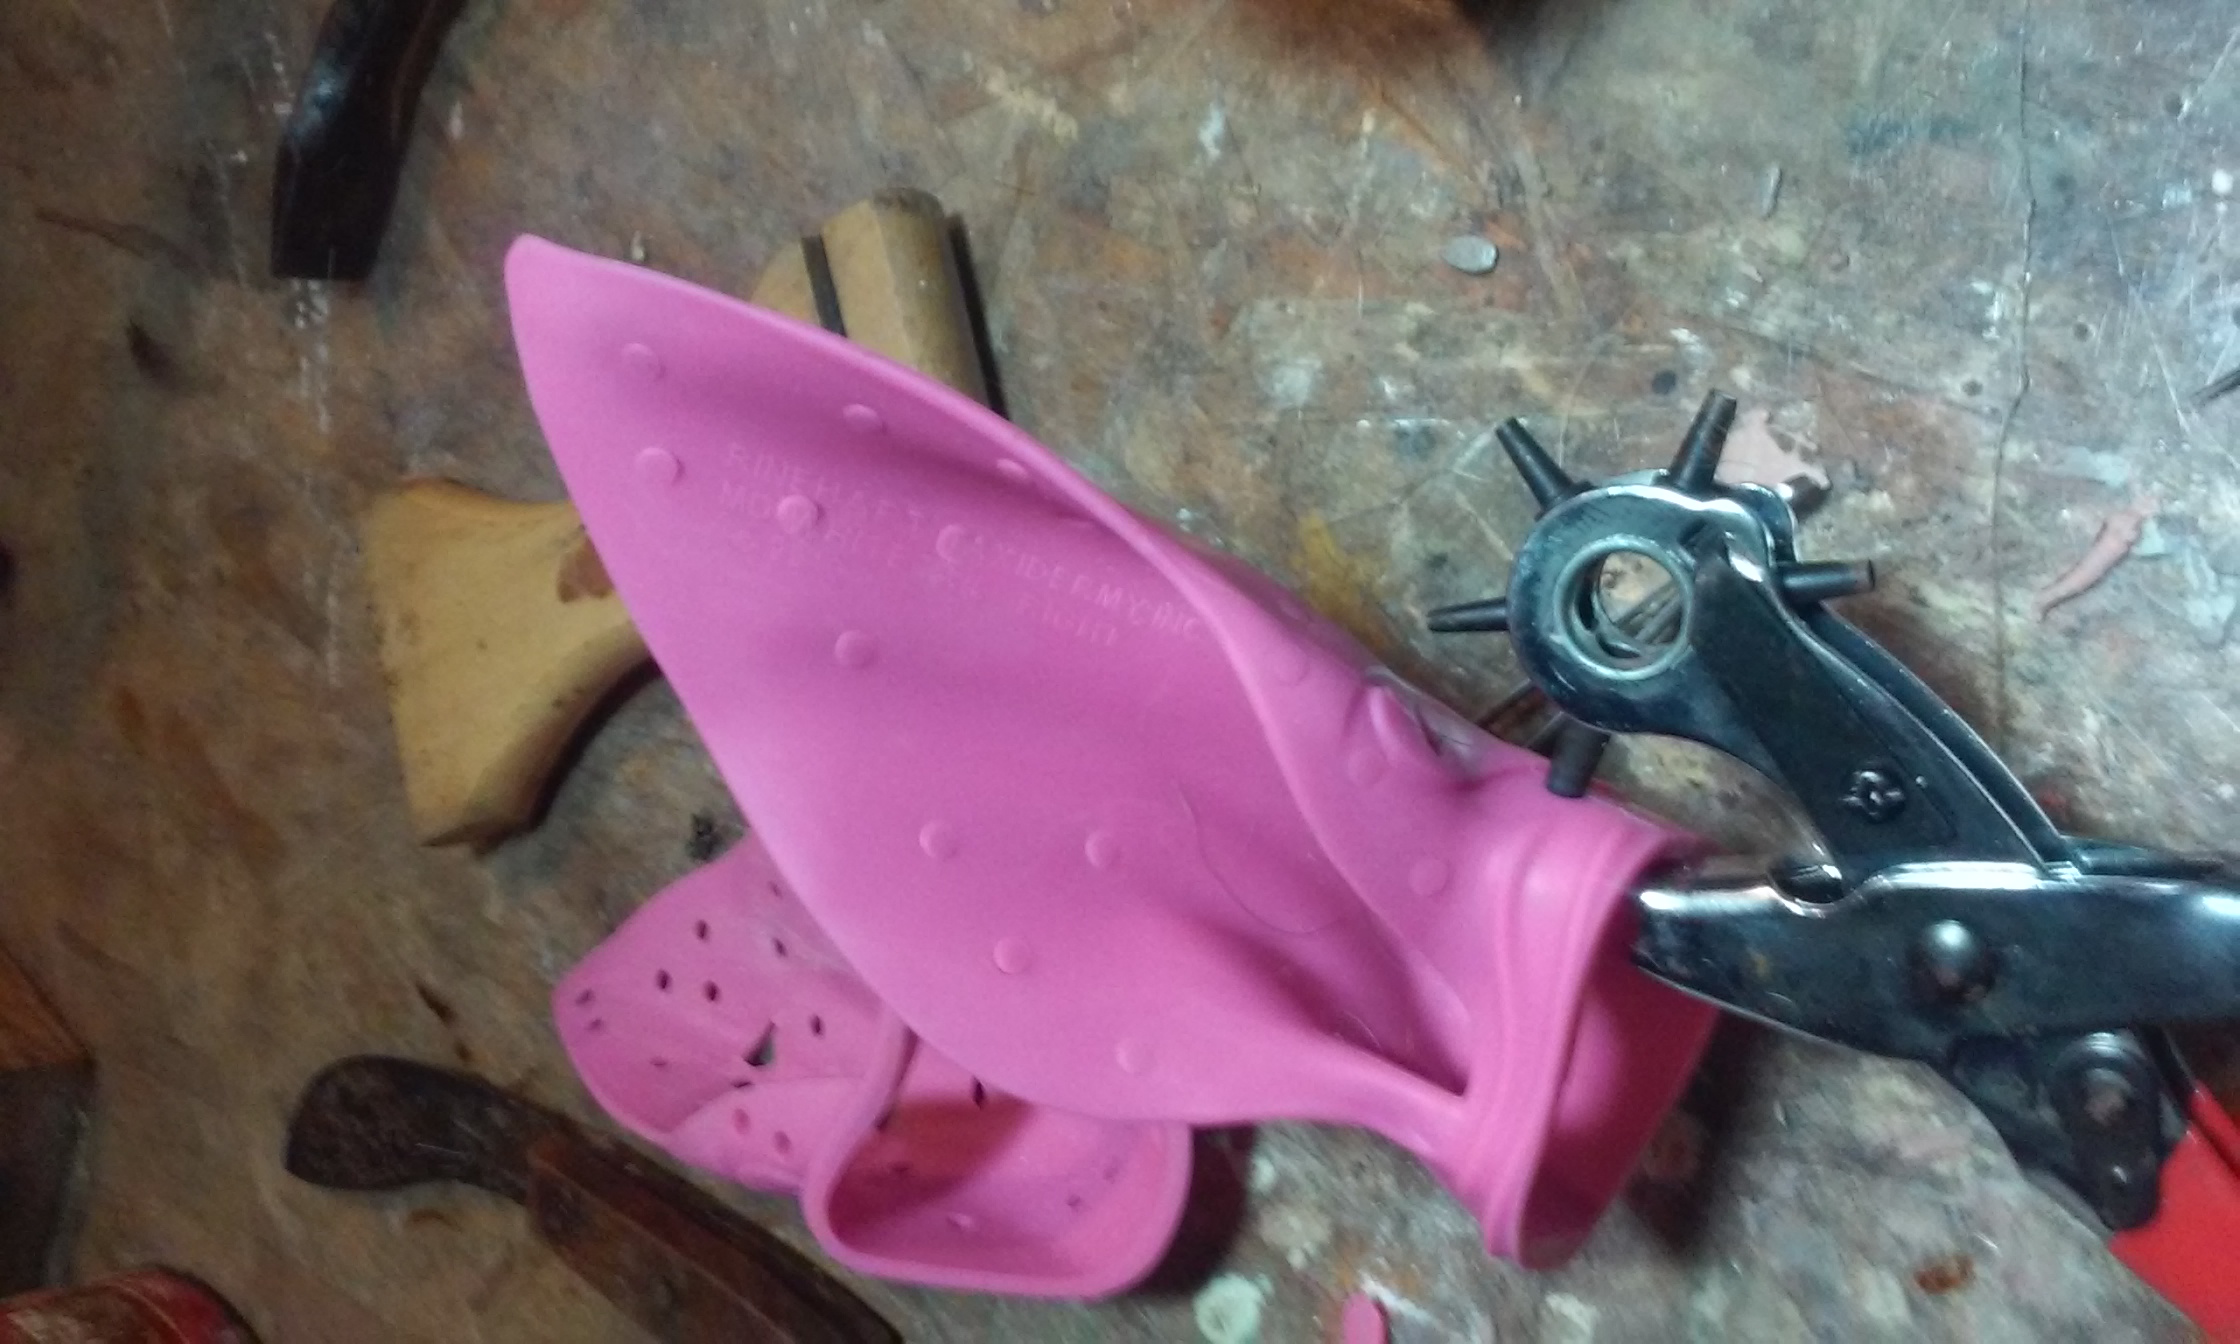
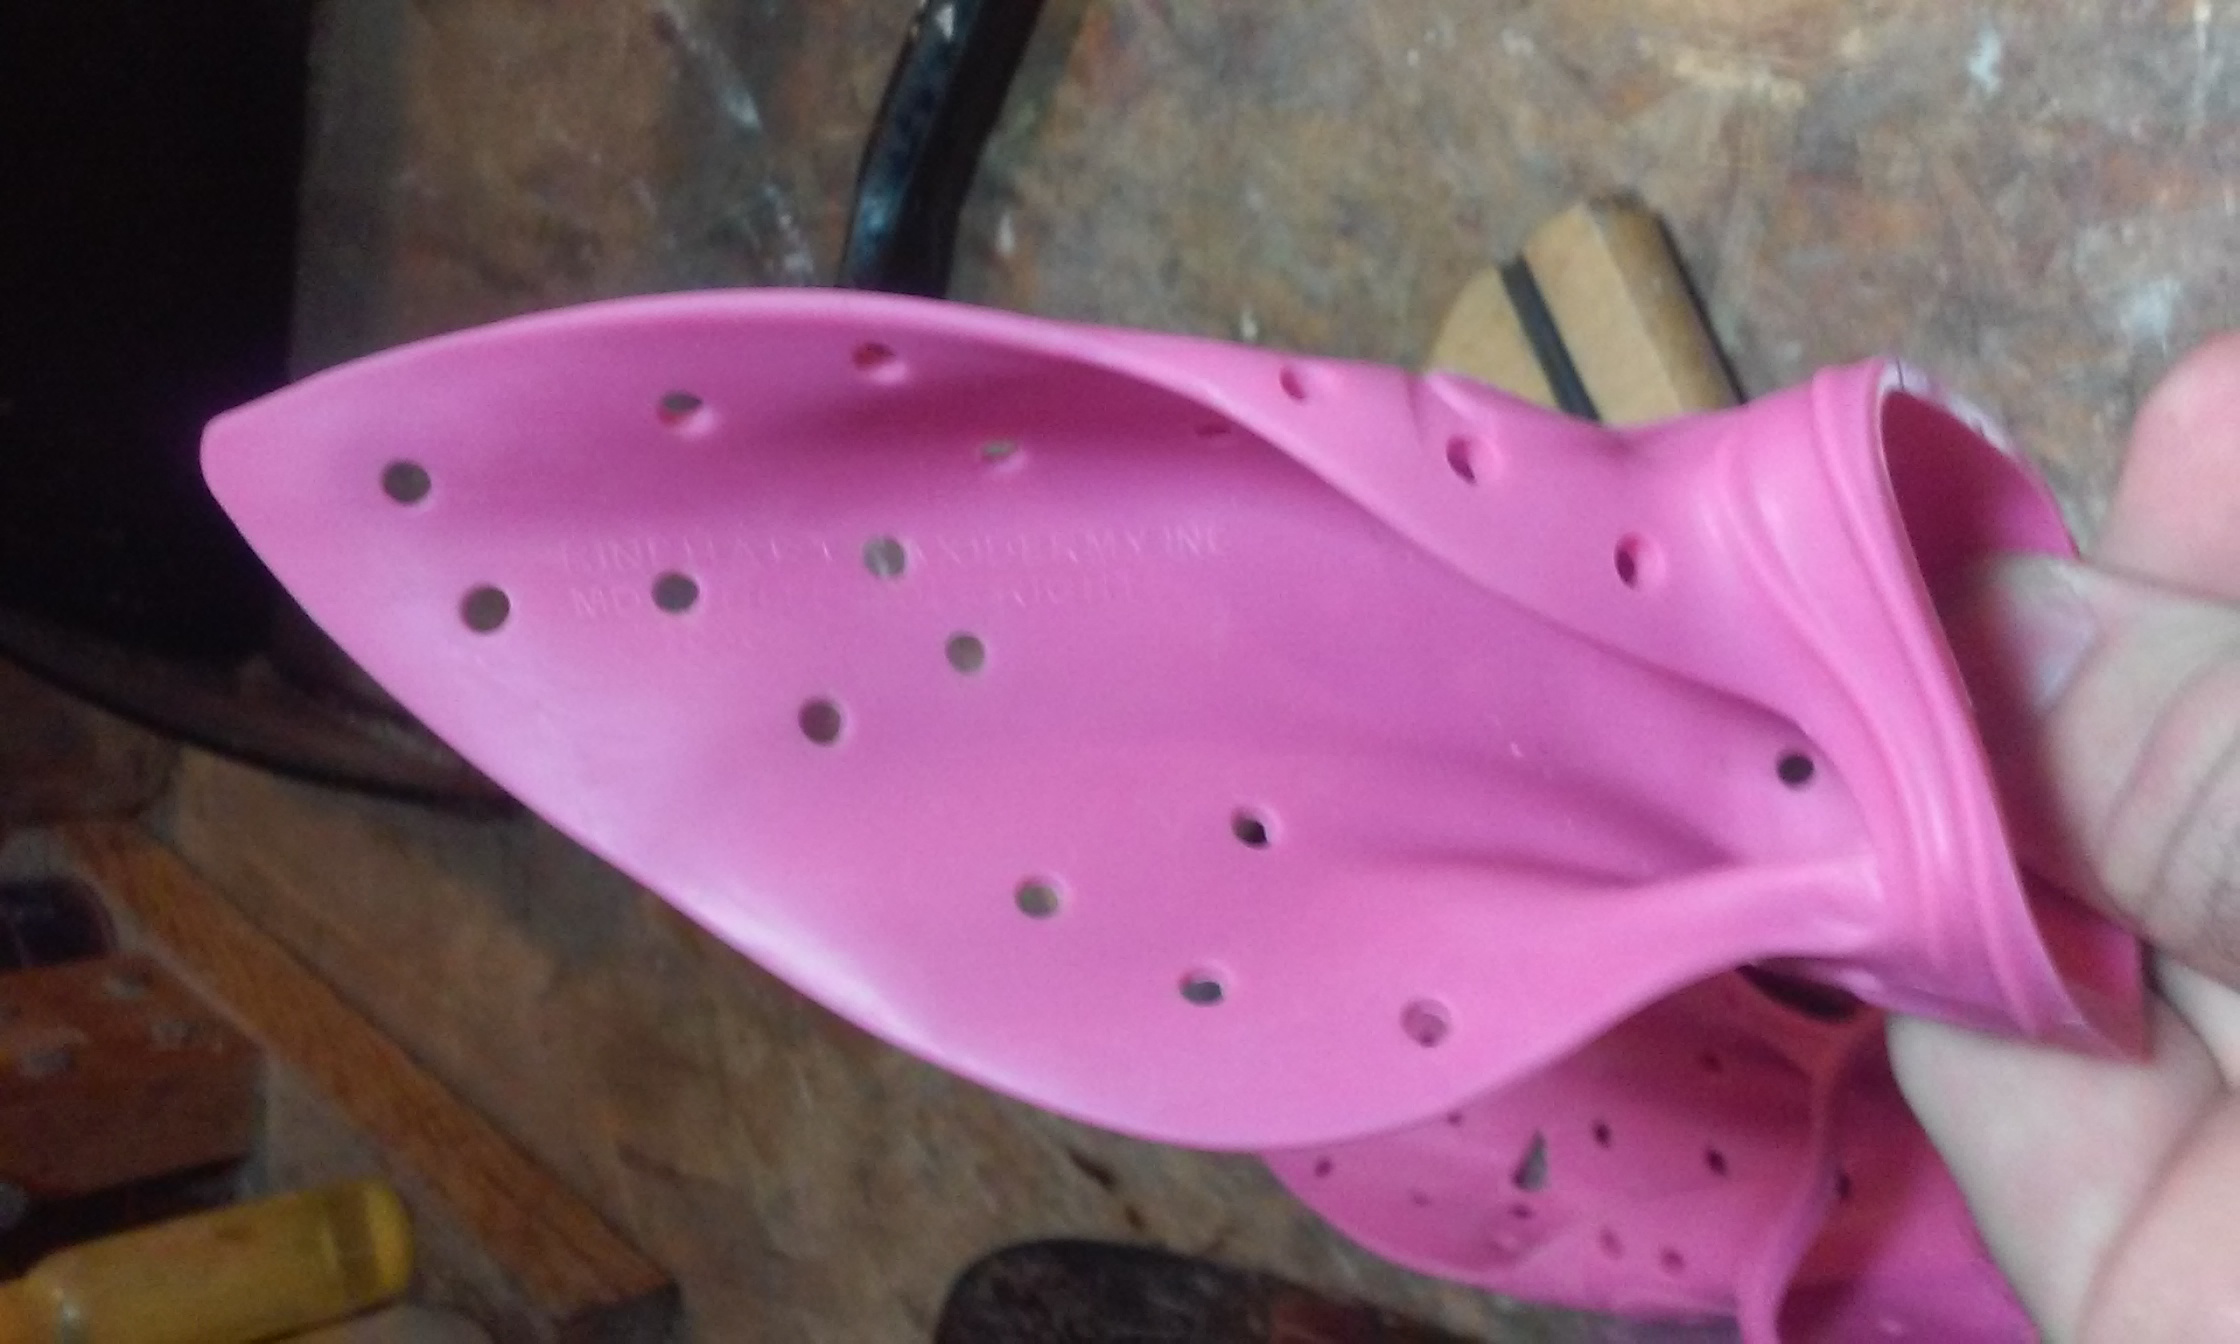
So now that I have covered the saw dust tip, I’m going to show you another way of doing it if you’re like me and use a high quality taxidermy grade earliner adhesive. I call it the perforated effect because you’re going to do just that. A good tool to use for this is a leather punch. Simply pierce the earliner from ear tip to base, spreading out over the earliner. Again you should have already test fitted your ear and trimmed as necessary beforehand. Apply your adhesive onto the liner front and back. Make sure the glue fills the holes you made. Next poke a pin hole or two in the tip of the ear. This will allow air to escape. Carefully and gently insert the liner into your ear and taxi the skin. Once the skin is in the correct position and all of your hair patterns line up go ahead and put a few staples into the ear and through the liner. If you catch any inner ear hair be sure to pull it out from under the staples. These staples will be removed once the ear is totally dried and set which will be in about a week or two. Now go ahead and groom your ear. Don’t for get to card the ears once you mount up.
Punching some holesAll done but feel free to punch some more holes
The whole idea behind the perforated earliner is to allow the inner ear glue to meet the back ear glue. Your adhesive will never pull away from the earliner when done like this. The whole concept is to prevent drummed ears. 9 out of 10 times it is the adhesive that separates from the earliner allowing for a drummed ear. If your ear skin is separating from the adhesive, then you are not getting the oils out of the skin and or your ear skin was too wet when you went in to set the liner.
Tuning your fleshing blade is an art in itself, above and beyond running the machine. To understand this process you must first know how the cutting edge or wire works.
Tuning Your Fleshing Blade
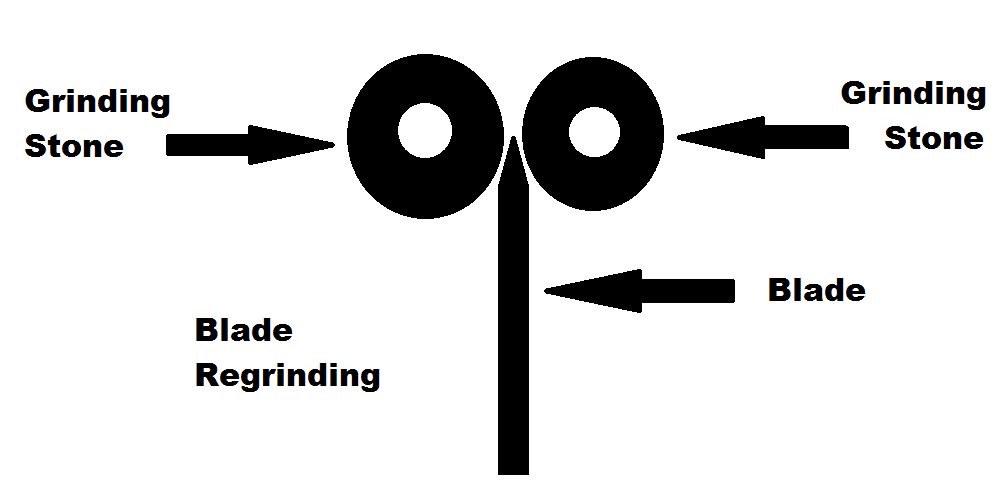
First lets touch on how the wire is created to begin with. The blade is attached to a machine that grinds both sides of the edge at the same time. This process uses two different stones that create even bevels on both sides of the blade.
Tuning Your Fleshing Blade
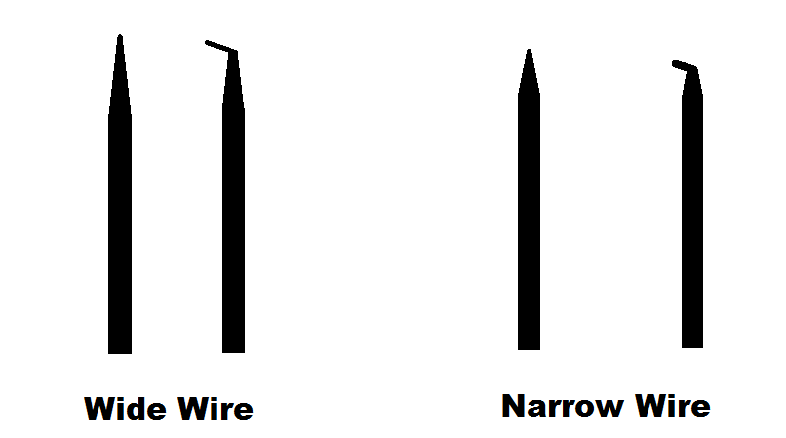
Once the edge is razor sharp it is rolled to an angle slightly less than 90 degrees. This is done by using a mechanical device that has roller and a tension spring in it and a handle for controlling the pressure applied to the bevel.
Tuning Your Fleshing Blade
You can turn the edge in different sizes by controlling the bevel size and pressure applied when turning. The wider the wire the thinner the lip will be. This causes the edge not to last as long. For that reason I prefer a narrower, heavy edge. This will also allow you to control the cut better by tuning the edge.
Tuning Your Fleshing Blade
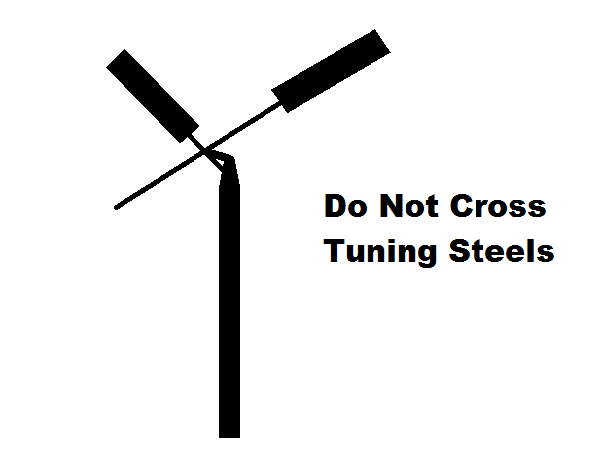
HOW TO TUNE THE CUTTING EDGE
You want to lift or open the wire with your left hand. You do this by lightly placing the short bullet shaped steel under the wire and slowly lifting. This will manipulate the edge to where it will cut deeper.
You close or turn down the edge with your right hand By laying the longer steel on top of the blade. Now lightly lift your right hand to close off the cut size. This is a very delicate process, you do not want to be heavy handed with this.
Tuning Your Fleshing Blade
DO NOT cross your steels while tuning. This will cause friction and heat that will only prematurely end the life of the cutting edge.
Tuning Your Fleshing Blade
This is an art that can be learned with the right guidance and knowledge. I go into much deeper and live demonstrations in my online video series “Mastering The Fleshing Machine A-Z PLUS”. These videos show you how it is done in the commercial tanneries every day. They are a must have if you own a round knife or fleshing machine.
This article was originally written for sportsmen on what a taxidermist needs to provide a matching replica.
Replica or reproduction fish are mounts that are completely artificial. They are commonly used if a fish was caught and released, the fish does not make a good skin mount, or for interior decorating projects/wildlife dioramas.
Replica fish are molded off of real fish. Once a mold is made, a cast is pulled and made ready for a production mold. A high quality production mold can produce hundreds of casts, or as we call them in the taxidermy industry, blanks. The replica fish blank goes through a cleaning and grinding process to remove mold release and flashing. We then have to repair seams, add glass eyes,gills and put fins back on. Then its off to the paint booth. A good taxidermist can recreate the colors of the fish you caught onto a replica fish with great accuracy .
You do not have to bring your fish in to a taxidermist to get a replica made. There are thousands of molds available for almost all of the common fish species caught. However,not all of these molds are of the best quality or made the same. Many of the newer fish molds offer higher quality and more lifelike poses, including full open mouth and gill detail. Ask your taxidermist for examples of their recently completed replicas to see if you like what they are offering.
Now that you have caught the fish of a lifetime, what does the taxidermist need ? While we can recreate a replica off of a good description,the more information we can get on the fish the more accurate the mount will be!
Pictures
Pictures are one of the most important things you can get before you release your fish. This is what the taxidermist will use to recreate the colors on your replica . Try taking pictures at different angles and in different lights. The more pictures the better. Most smartphones have cameras that are more than adequate for this.
Length & Girth
Take your length measurement from the tip of the jaw to the tip of the tail.The girth should be measured at the part of the fish with the greatest diameter. Normally this is around the center of the fish. A Tailors waterproof tape measure works great for this. The taxidermist can normally find a blank close to your size fish, but being a little flexible on the exact size is appreciated.
Weight
While getting an accurate weight on your fish can be helpful, it is not as important as pictures and measurements. If your goal is to release the fish alive, you may want to skip this step.
Good Description
Making notes of certain colors or features that make your fish unique is important. Write down anything that jumps out at you after your fish is in the boat.
A few notes on catch and release fishing
Obviously, the goal of C & R is to get the fish back in the water as soon as possible. Avoid holding the fish by it’s jaw. This is not a natural position for a fish and can cause internal injury. Keep the fish moist and avoid over handling the fish. Fish have a slime coat that helps protect them. Removing too much of it can open the fish up to infection . Big fish are often thought of as being ” tough”, but big fish are old fish and may not take the release as well as younger fish. Also many older fish are no longer fertile, even if they are carrying eggs. In some situations it may actually be better to keep larger, older fish and release the younger more vigorous fish. Warmer weather and water temperatures can also increase the mortality rate of released fish. Under ideal condition the mortality rate of fish is around 10%. In warmer water it can hit 25% or higher.
Good Fishing !
Aaron Stehling is a full time taxidermist in Jefferson WI. He is the owner of Stehling’s Taxidermy LLC, a second generation studio that has been in business for over 40 years.He is also administrator on www.taxidermytalk.com forums. Aaron is an online instructor on www.taxidermyinsider.com. Questions or comments for Aaron can be directed to a.n.stehling@gmail.com
TTN-Taxidermists and hunters are fighting to stop a new rule in Tennessee that prohibits the movement of legally taken animals from out of state into TN. The rule was put in place to stop the spread of chronic wasting disease. The implications for taxidermists are obvious and devastating . Taxidermists and hunters are working together to try to get this ban lifted.
As chronic wasting disease spreads, states often take a reactionary approach to dealing with the problem. Here in Wisconsin, much was done to try to stop the spread of the disease when it was discovered here in 2002 . Efforts to stop the spread were not successful. It appears the disease is not making a significant impact on the deer population in WI.
Common sense precautions should be used when handling any dead animal as a taxidermist. Wear latex gloves and an apron, work in a well ventilated room , and keep a clean operation.
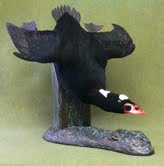
I paint a ton of fish in my studio, and have the best airbrushes available. after years of frustration, I wanted to try finding a more realistic way to finish bills and feet, not only saving a ton of time from color cup cleaning, but to also have a more intimate connection between finishing and application of some different mediums. I thank my good friend Rick Krane for sharing some of his methods and techniques for finishing fish, and I used those methods and applied them to finishing birds. so, I would like to share some of that hear for those that might find it helpful. this is my method to finish a Drake Surf Scoter. hope all will enjoy
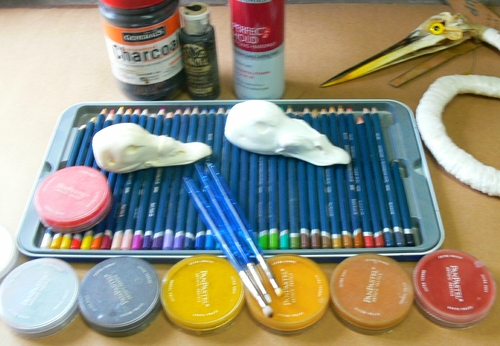
Some of the materials I use for finishing bills and feet:
Derwant Water Color Pencils, Pan Pastels, Folk Art Paint, Water Based Paint, Fine Powdered Charcoal, Woman’s Make up, Hair Spray, Scrubber Brushes, Rubber tipped brushes, rattle can primers and Matte Clear rattle can final finish. besides your local Dollar and hardware store, here are good places to find the art supplies: http://www.dickblick.com and http://www.jerrysartsarama.com
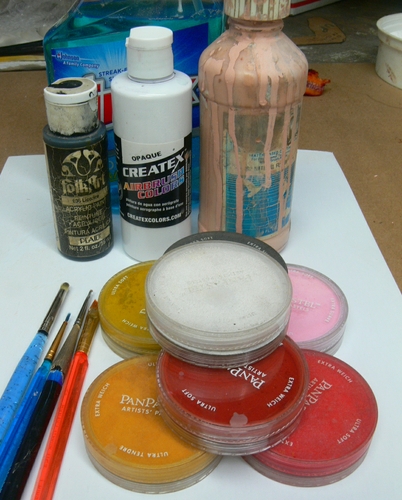
pic #1 shows some of the materials I use and the Derwant Water Color Pencils
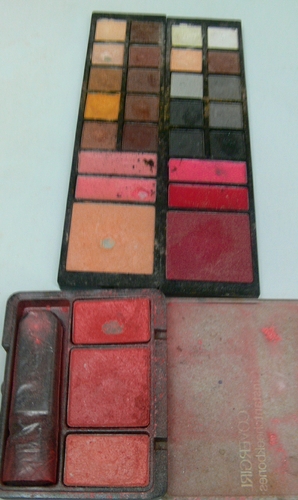
pic#2 shows some of the Woman’s Make up
pic#3 shows some of the other materials listed
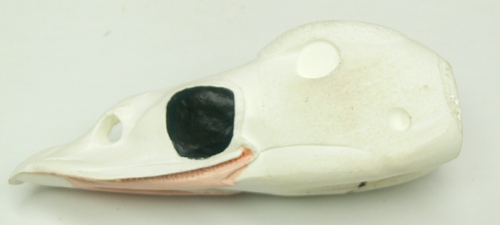
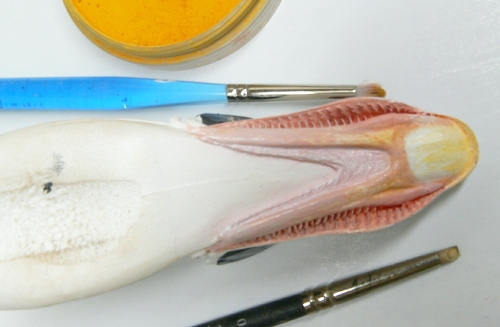
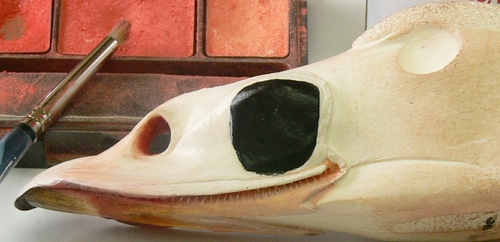
I usually finish the lower bill first, but do block in any defined black areas on the whole bill with Folk Art water based paint. the best color for this is the color called Licorice. I then block in the jaw on the lower bill as well with water based paint and a brush. these are then sealed down with Ultra Cover Matte Clear and allowed to dry. you can speed that up with a hair dryer
I then move to finishing the lower bill that has been blocked in with the natural flesh water based paint.
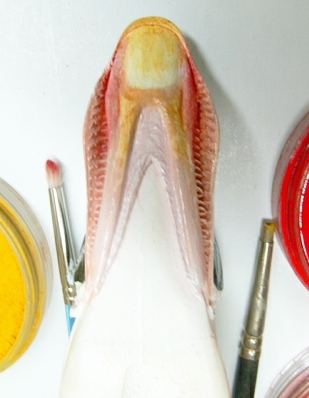
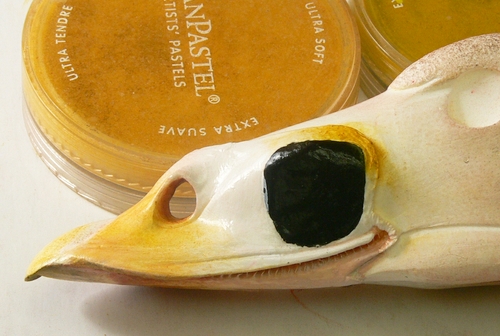
the soft tissue between the lower jaw is blended with Pan Powders. Titanium White and Permanent Red Tint I then start to blend the lower bill itself, still with Pan Powders. here I use the colors Diarylide Yellow shade and Yellow Ocrhe
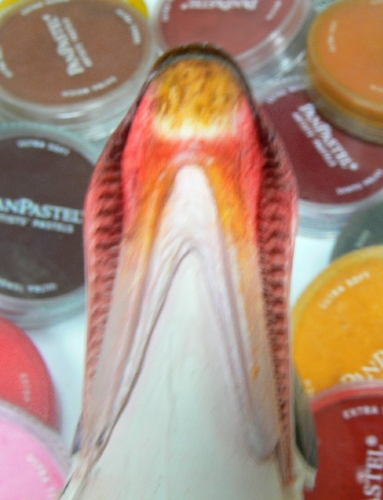
I then high light still with Pan Pastels the end of the bill. Orange Shade, Permanent Red and Red Iron Oxide. I forgot to mention in my previous post, that I seal down the powders between each color with hair spray if you don’t want to blend. if you want to blend between two powder colors, do not seal. the hair spray locks down your colors without building up a finish that can take the detail away from the bill, like many finishes can. Mod Podge is, IMO, is the worst medium to use on bills and feet
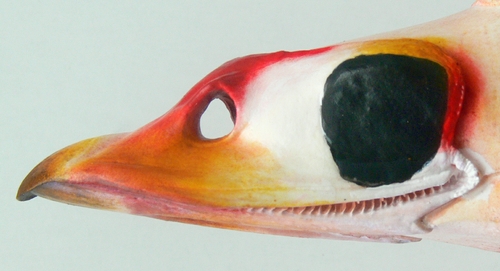
I then finish shading with both powders and watercolor pencils. you can go over your sealed work to adjust the colors and intensity. this gives you the opportunity to put in some contrast on you bills like you will see on live ducks. everything is not blended in nature.
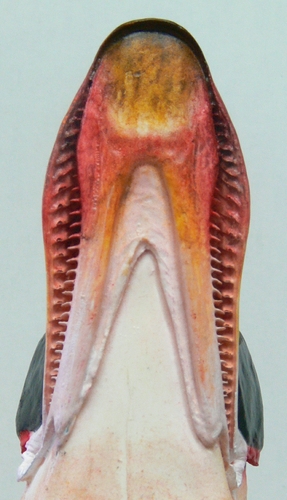
here I did some more high lighting, and finished with burnt umber, raw umber and burnt sienna. it was then sealed with hair spray, and the whole lower bill was dusted with Pan Powder Titanium White. this will pull all the colors together and give you a more natural, and blended tone to your finished work. once satisfied with the end result, I lock it all in with lacquer based rattle can MatteClear
the under bill completed. upper bill next
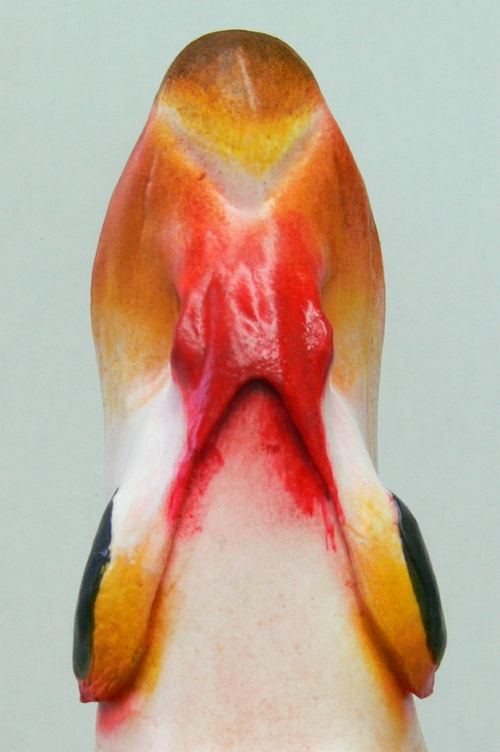
not to be redundant, the upper bill finish has all the same colors, materials and application as the lower bill. I do however use a small amount of woman’s makeup at the start, and is sealed down
the same color sequence is applied to the upper bill. starting with the yellow powders listed above, then moving to adding in the red detail
once you are satisfied, and your color detail is finished and sealed with Matte Clear, I go back over, and detail the black patch with Folk Art Licorice. your done! I hope this might be helpful for all forum members!
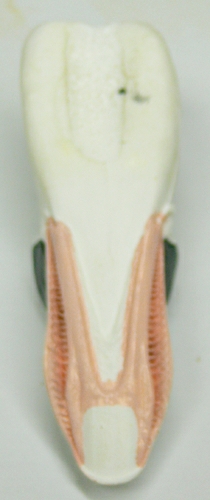
finished Drake Surf Scoter bill: top, side and bottom