Magic Sculpt is pretty much a god send for the taxidermist. It has many different uses in the industry and is used every day in taxidermy shops around the world. No matter what you specialize in, whether it is fish, birds are deer you will most likely have a kit of Magic Sculpt on the shelf somewhere in the shop.
The biggest complaint I hear from fellow constituents involved in taxidermy is that the hardener goes bad and is unusable. It happens to all of us and the older the Magic Sculpt is the worse it gets. What is happening is that the Hardener is drying out and is almost impossible to get out of the container to mix with the resin. It can get to a point that the hardener crystallizes to the point that it is useless. Well never fear again of opening a container of Magic Sculpt to only find out that it has dried out. This video will explain the secret to keeping your Magic Sculpt soft and usable 24/7.
Hello everyone, this is my first article contribution to the site. As the title suggests I will be explaining how to remove animal horns from the bone cores and why this is important. The following are some items that you will need for this task.
A large pot
Propane Burner and Propane
Drill with no larger than a ¼” drill bit
Water
Arm and Hammer Liquid Laundry detergent
Rubber Mallet
Knife or Scalpel
Something to mix the water and detergent with ( a paint stir stick works well)
Metal Tongs
Good Quality Gloves that are waterproof and chemical resistant
Eye protection
Waterproof Apron
This first thing you will have to do is to fill the pot about ¾ of the way full with water. Next you will get the propane and burner set up. Once the pot is on the burner and the burner is going add about half of a cap full of the detergent to the water and stir it up. Depending on how large your pot is you may need less than a half of a cap full of detergent or you may need more. I wouldn’t put more than one (1) full cap in though. Let the water start to boil and submerge half of the set of horns in the pot. Leave the horn in there for about 15-20 minutes. Then carefully remove horns and try to wiggle them. When doing this grab the horn about 4 inches up from the base. If it doesn’t start to move or wiggle take you knife or scalpel and carefully work it around the base of the horn. You want to make sure not to cut the actual horn because it will become very soft during this process. You will work the knife between the horn and the meat/tissue that holds the horn to the core. Then place the same horn back into the pot of boiling water. Repeat this process until the horn comes off of the core. If after several tries the core still isn’t starting to loosen try to hit the base of the horn with a rubber mallet. You can hit it fairly firm but be careful not to crack the horn because that will just create more work for you later. If the horn still is not loosening you can drill three (3) or four (4) small holes in the back of the horn. Start slightly above the bottom of the horn and drill a hole. Then move directly up from that and drill another hole and continue this until you get no more than four (4) holes. Put the horn and core back into the boiling water and it should come off fairly easy. This is the process that I use to remove all of my horns.
Another option is to bag the horns up (preferably in a black garbage bag) after you have caped and capped the animal. Poke a decent amount of holes in the bag and hang it up in a tree or off the side of a building where it gets sunlight for a large portion of the day. After hanging there for 3-4 weeks if it’s during the summer and maybe 6-8 weeks if it’s during the winter take the horns out of the bag and pull the horns off the cores. A note about this is that you want it to be outside because as the tissue starts to break down it will start to smell pretty bad. This process is less labor intensive but it doesn’t seem to work as well; at least not in my experience. Sometimes though after using this process you still need to do the first process that I outlined to get the horns off.
If you have any questions please feel free to email me or message me on here. In next month’s article I will cover how to re-attach the horns for mounting them.
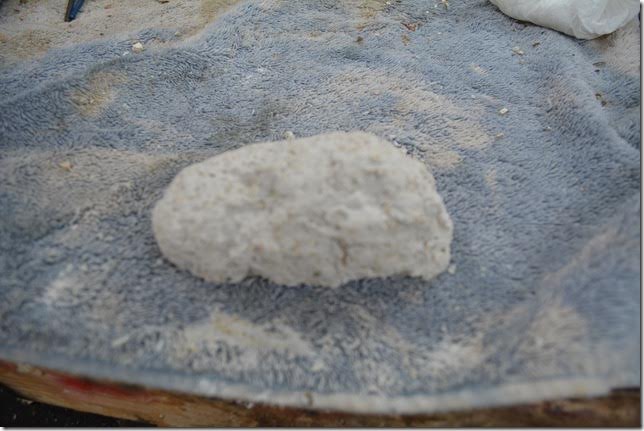
First, I cut a piece of rigid foam or use a piece of an old mannikin.
Next, I sand or scrape it to the shape I want, making sure to sand off all of the slick areas where mold release was used.
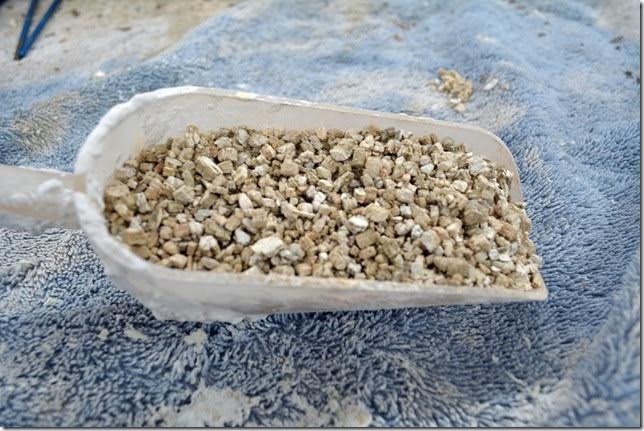
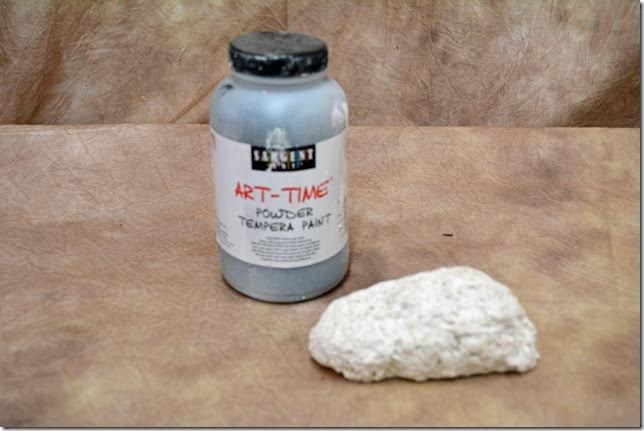
Next, I mix 50/50 Durabond powdered drywall plaster and Vermiculite ( I get it at plant stores or nurseries)
Next, I cover the entire foam piece with it, except the bottom, and let it set up for a few minutes.
Once it has set and firmed up a little, I use a damp paper towel and smooth down some of the pointy looking areas.
After this has set up ( about 20 minutes ), I mix about 5 parts water to 1 part powdered Tempra paint.
Using a 1 “ paint brush or a Tempra brush, I dab on the paint making sure it gets down in the cracks and crevices of the rock.
Next I dab the rock with a dry paper towel until I achieve the look that I am after. I used Black Tempra on this rock, but you can use any color you want, and even mix them.
Very simple and saves a lot of money if you need to add some rocks to your habitat base! I attach them with hot glue.
If you don’t know what or who McKenzie Taxidermy (McKenzie Sports Products, LLC) is, then you don’t know very much about taxidermy or should I say the Trump of taxidermy. If any one supplier ever comes up for discussion on Taxidermy.net or anyone of the Facebook taxidermy groups it would be that of McKenzie Taxidermy. It’s no secret McKenzie gets a bad rap in most of those discussions and if you ask me it’s always about their shipping department.
Before we get going you may look at this article as review of McKenzie or a plug for McKenzie but I am only speaking from experience. I do not work for McKenzie nor do I have any strong relationships with the company. This article has not been endorsed by McKenzie and in no shape or form have I been contacted by anyone to write such an article.
Founded by Larry McKenzie thirty or so years ago, I do believe they are now the largest taxidermy supply company within North America which is headquartered in Salisbury, NC. In November 2010 the Triangle Capital Corporation invested $6.0 million dollars into McKenzie Taxidermy. In October 2016, McKenzie purchased the assets of Knoblochs Chemicals. Knoblochs Chemicals is a major player in the taxidermy field has been providing products to the taxidermy industry for decades. As of this date McKenzie Taxidermy now has 5 distribution centers strategically laid across the United States, Ogden Utah, Caldwell Texas, in Beloit Wisconsin, Camp Hill Pennsylvania and Salisbury North Carolina.
I could keep going on and on about the accomplishments McKenzie has achieved in the last 20 years, but I would need to write a book. Some the biggest business moves that come to my mind when I hear the name McKenzie is their acquired purchases of VanDykes and W.A.S.C.O. Those two companies are the ones that got me going into taxidermy decades ago. My first ever supply order was from VanDykes. I had never heard of McKenzie until they had bought out those two major suppliers. McKenzie has kept their promise and to this day I’m still able to buy taxidermy products that were originally developed and branded by those two companies. So to this day you will still hear the names VanDykes and W.A.S.C.O. within the taxidermy community.
I have heard the argument amongst taxidermists, that McKenzie is becoming a monopoly. Yes it’s true the company has acquired many other taxidermy supply business which means there is less of a choice today then there was 10 or 15 years ago when ordering taxidermy manikins from different companies. But I can tell you this; I bet there are at least a dozen catalogs that still sit on my desk. All from different taxidermy supply companies and all who are still in business today. So that theory or argument that McKenzie is taking over the world doesn’t hold water in my books. Last I checked they (McKenzie) are not stopping, discouraging, and or threating anybody with half a brain from starting up their own taxidermy supply business.
The biggest complaint I get from fellow taxidermists is that McKenzie charges too much to ship its products. About once a month sure as the sun sets there will be a new post or comment somewhere on the net that bashes McKenzie on their shipping practices. It’s getting so old now I don’t even pay attention or bother replying to those negative and misinformed threads. As far as I’m concerned their shipping and handling charges is spot on. I have never felt I have been overcharged or scammed on the shipping. If you didn’t already know you are in full control on who delivers your package. McKenzie gives you that option during check out. Remember you’re not just paying for the actual costs of the shipping. That box and packaging material costs money too. They are not just going to give it to you. All that stuff, the boxes and packaging material like bubble wrap is recyclable, stuff that can be re-used at a later date. If you’re a full time taxidermy shop, you’re just not receiving taxidermy, your also shipping it. In no time you will have a small supply of bubble wrap and boxes of all sizes if ordering on a weekly or monthly basis.
Shipping prices will continue to rise every year by all the major carriers. McKenzie runs a business and adjusts accordingly and you should too. Sure McKenzie gets discounted rates from the major carriers like UPS and FedEx and they should. If you feel they should pass down those discounts to their customers then I think you missed class on the day they taught business 101. Every year thousands of taxidermists attend local, state and national taxidermy shows, events and competitions. At almost all these events they are able to buy deer manikins directly from the manufactures and take them home. Not only do you as the taxidermist get to write off all expenses for the trip, but you also didn’t have to pay any shipping for those manikins you threw into the back seat for the trip home. So are you now going to lower your deer mount price for your customers because you saved a good chunk of money? I think not. If you are not adjusting your mounting prices to reflect increases in delivery of your taxidermy supply, then you will be out of business. Taxidermists are the worst business people on the face of the earth as far as I’m concerned and I see so many go out of business for this exact reason. The guys and gals who are charging $600 to $800 to complete a deer mount get it and understand the dynamics of overhead costs and most importantly the shipping costs associated with taxidermy. It isn’t because their work is worth that much, it’s because it costs money to do a mount and their goal to come out ahead with a profit when all said and done.
My theory on those who complain about the high shipping charges attached to their McKenzie invoice, are those who take in way too many deer at a low ball price and or those who don’t have a clue on how to run a business in the first place. If you’re placing a small order, like for eyes, have them shipped via USPS, not UPS, its common sense. On larger orders like deer manikins for me Fedex Ground is the cheapest rate. For others it might be UPS. The box you see pictured in this article held a wall pedestal manikin along with other goodies and was shipped via FedEx at a charge of $20.00 during the month of January 2017. I can live with that and for one second wouldn’t even give a double take on that shipping charge. Actually for 2017 that’s a good price since other suppliers have charged me $25 to $30 to ship one deer manikin.
If there is anything I love about McKenzie is the speed in their shipping. 90% of all my orders placed via the internet are here at my doorstep within 24 hours. When it started happening I thought it was just a once in a lifetime fluke. Then it kept happening and I do believe the credit goes to the Camp Hill, PA facility servicing the northeast sector of the US. No other taxidermy supply company has ever delivered to my shop with such speed and accuracy before. My boxes are also not crushed or ripped open upon arrival either. Whoever does the packing also knows how to pack an item properly and securely. I hope and pray that this type of service continues well into the future. Common sense will tell you though not everyone will get their supply order within 24 hours it’s just not going to happen for certain parts of the country.
Just like any other taxidermy supply company I have dealt with, there have been a few hiccups with McKenzie over the years. Not all transactions have been smooth, but then again I can give you the names of a few other big name supply houses that have screwed up more than once with my supply orders, including one nationally known taxidermy supply business that overcharged my account by a few hundred dollars. Small problems over the years with McKenzie I’ve had range from billing to missing items and a few other minor inconveniences. However there has not been one issue ever un-resolved with just a simple phone call. They have a department called customer service, and I highly recommend calling it if an issue ever arises with your order. Remember the young lady on the other end of the line had absolutely nothing to do with shipping your box or deciding on how much to charge you for shipping. Cut them some slack and don’t go off the deep end when calling in a concern.
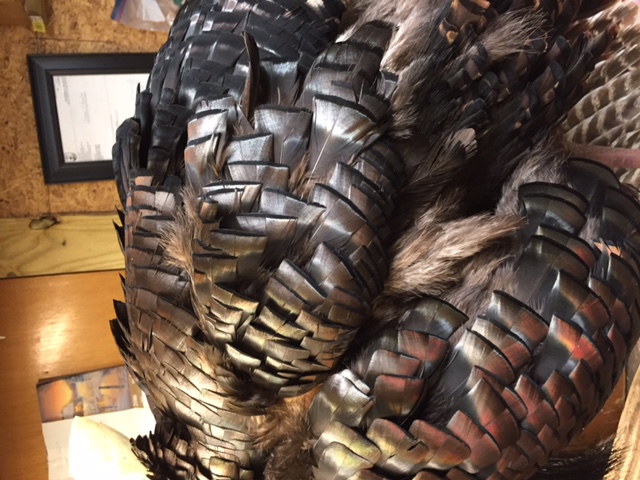
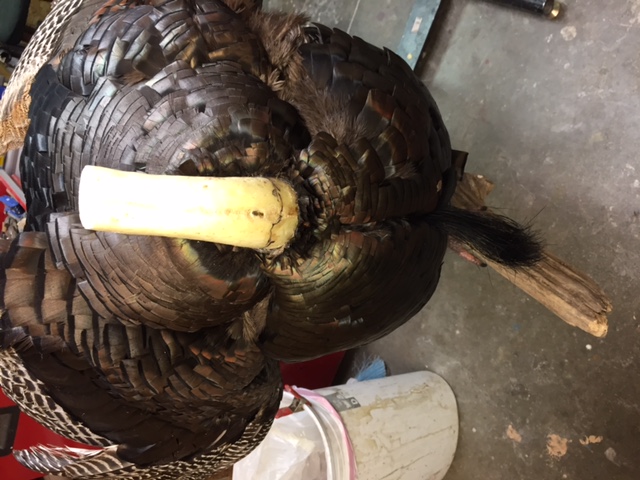
As far as products go, McKenzie Taxidermy has some of the best quality. Their deer, turkey and waterfowl manikins are some of the best out there. I’ve used them all and will continue to. Their library of DVD’s cover just about every subject related to taxidermy. If you’re looking for a good whitetail mounting video I highly recommend A to Z by Rick Carter, an original W.A.S.C.O product now distributed by McKenzie Taxidermy. Their line taxidermy airbrush paints are the best of the best and all I actually use.
In closing I want to address that there are other supply companies you can deal with if you’re unhappy with McKenzie Taxidermy. It is what it is; they are here to stay and I suspect they will continue to grow in leaps and bounds. Love them, hate them, McKenzie Taxidermy is the Trump of taxidermy.
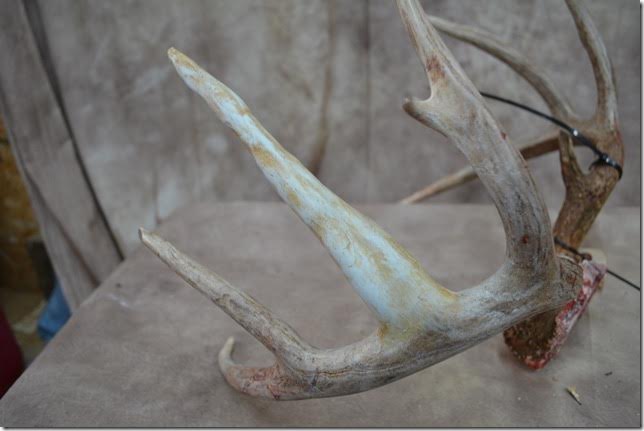
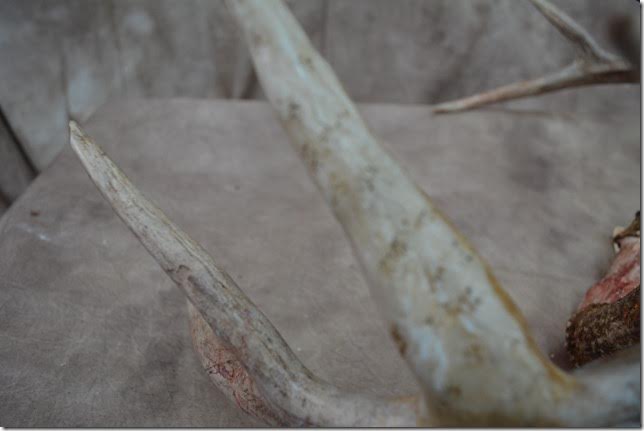
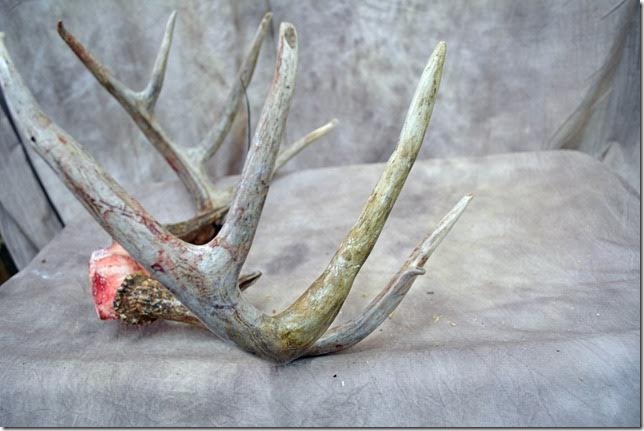
I start by matching the length of the same tine on the opposite side of the rack. I then drill a hole into the broken tine and insert a 10 gauge wire and glue it into the base with super glue.
Next I sculpt the new tine with “ Fix It “ by Aves studio, white.
After drying ( I let it dry at least 12 hours), I use Yellow Ochre mixed with Burnt Sienna paint thinned down A LOT!!
I paint the tine with this wash, then wipe it with a dry brush to blend. If it gets too dark, you can use steel wool to remove the paint wash and redo it.
The paint wash will stay in the abnormalities of the sculpted tine.
Next I use a small brush to stipple Raw Umber onto the tine, then wipe it down with a dry brush.
I then make a very thinned down wash with Dark Brown, and paint the entire tine, and dry brush it again until I get the desired look.
If you hunt and or fish in the state of New York and find yourself one day in need of a New York taxidermist perhaps this article will guide you in making the right decisions. This article can be also applied to other areas of the country, but we will be focusing on taxidermy within New York.
The biggest and most common mistake one does when looking for a New York taxidermist is price shopping. You should never ever allow a price to dictate which taxidermist you are going to choose. It is a nightmare ready to happen. If you find yourself calling around to get the best price on a deer mount, do yourself a favor and hang up the phone. Until you can bank some disposable cash after all your monthly bills are paid and keep that piggy bank balance healthy, then and only then should you be considering preserving your trophies.
Getting your trophy of a lifetime mounted is a big deal. It is something you will be looking at for the rest of your life while it hangs on your wall. It’s your trophy and something you worked hard for and most likely have already spent a big chunk of change on in pursuing it. From your sporting license, to that $800 rifle, $200 in camo, another couple of hundred dollars in gear whether it be a tree stand or game blind, all the gas spent going to and from your hunting grounds, etc. Think about it, it adds up and now you are going to call around and shop for the cheapest taxidermist? Shopping around for the cheapest New York taxidermist is like shopping around for the cheapest doctor to deliver your first born. There is no other way to explain it.
What anyone should be shopping for when looking to hire a New York taxidermist is the quality of their work. In this day and age the internet has made it very easy to weed out the good from the bad. I will tell you that every business orientated taxidermist today will have a website and most likely social media profile promoting their work. Look at them, studying them. The pictures of their work should be clear and up close for the most part. Study the eyes, nose and ears. If that mount stood in the woods would it fool you into believing it was a live animal? If you’re looking for a fish taxidermist does their paint jobs look like the real thing. Compare a live fish photo the mounted photo. Are all the colors there? Are the fins positioned correctly? The next step is to read the comments on their profile page like on Facebook. Is there any negativity and or complaints? You should also Google the New York taxidermist in question if you know their real name, and not just their business name. You may learn a lot more about the individual by doing just that. Any taxidermist who has a strong online presence and can be easily found on the first page of Google is most likely someone you will want to look into further to possibly creating a business relationship with. If you Google the taxidermy advertised business name in question or the taxidermist who owns the business, and you can’t find them stuck to the top of the search results page that will be your first red flag.
If you must know what to expect to spend on quality taxidermy from a New York taxidermist I guess there is no harm in throwing out some numbers. Deer mounts should be in $500 to $600 range and yes there are a few New York taxidermists who push the $700 mount and don’t have a problem in getting that price. Euro mounts for deer alone should be anywhere in the $200 range. Fish taxidermy should be around the $15 to $20 per inch range minimum. Those $10 per inch prices are so the 1980’s, don’t expect to find them anywhere in New York. Waterfowl mounts should be $350 and above for ducks, and $450 and above for geese. Upland game birds like grouse and pheasants will be in the $300 range. Squirrel mounts will be close to $300. A qualified New York taxidermist who mounts turkeys will always be in the $500 to $700 range. If you find a New York taxidermist charging these prices I just mentioned, you still owe it to yourself to do your research. Just because a taxidermist is charging $650 to mount deer heads doesn’t mean their work is great. They just could be a really good business man or woman who knows how to operate a profitable business or has a hired accountant with half a brain, but actually suck at taxidermy.
If you didn’t know New York State does not require a person to be licensed to practice taxidermy. But the federal government does if anyone engages in migratory bird taxidermy. There are also NYDEC laws that pertain to taxidermists when it comes to business records and the handling of CWD. Every county within the state requires and individual to have on file a DBA with the county clerk when conducting a New York taxidermy business using a name other than their own legal name. Furthermore it is illegal to conduct and accept any money for taxidermy services without a certificate of authority issued by the New York State Taxation and Finance Department.
New York is flooded with low ball taxidermists. There is no shortage of them. Everything mentioned in the above paragraph does not apply to them in their own minds. These are the ones who will charge only $250 or $350 for a deer mount and make big promises that it will be done in 4 months or less. Your drinking buddy will swear they do great work and in the same breath state that they heard that from another party, so it must be true. These are fly by under the radar operations. Most of the low ballers hold other full time employment and taxidermy income is more or less beer money because they are making very little profit. That’s if they are using high grade materials and actually tanning your deer cape. Year in and year out new low balls open up shop and many others fold up and vanish with their clients’ money. There is a big demand for low ball taxidermists and price shoppers will flood to them thinking they are getting a good deal. Getting quality taxidermy at those prices is like having a qualified experienced auto mechanic charge you only a $100 for a complete engine rebuild. More than likely people who have never had taxidermy done before and can’t tell a good mount from a bad mount will know no better and conduct business with these taxidermists. If by chance or bad luck one of them gets caught flying under the radar you can most likely kiss your trophy good bye. The state can and will seize all specimens found within the premises of the illegal operation and it could be years before you get your antlers back once the courts settle. If the taxidermist never got around to mounting your deer, you can kiss your deer cape goodbye.
I know I have thrown a lot at you and it’s probably going to take some time to digest. You don’t need to go to a big taxidermy shop to get your deer done. There are plenty of New York taxidermists who operate out of small shops and produce great mounts. Only a small percentage of taxidermists compete at competitions nationwide. If you think you are going to get the same work back that your taxidermist produced and won with at the World Show at the same price he or she charges for commercial work, think again. Competition taxidermy and commercial taxidermy are two totally different animals. Blue ribbons and trophies on the wall mean nothing if they are not giving you quality commercial work back.
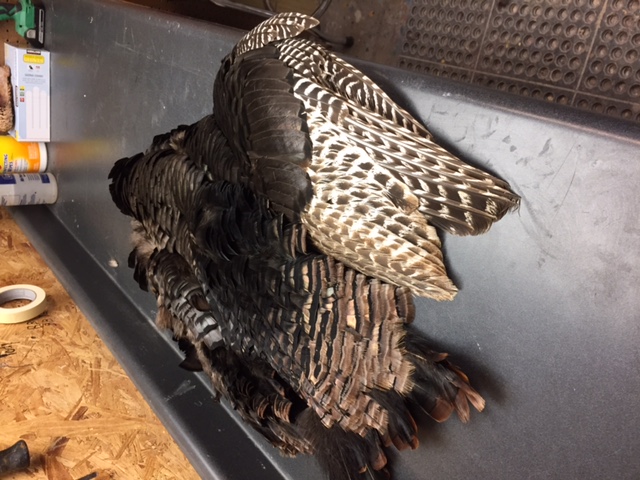
Skin showing bad wing off and were it was cut from the skin
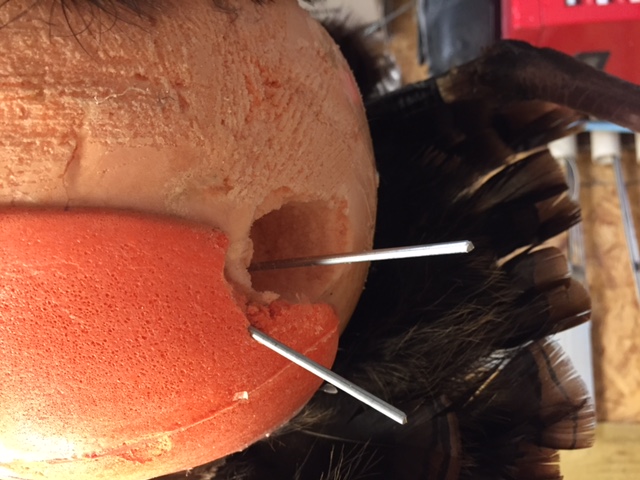
Body set up and pre drilled for the wing wires. Note that they are exiting close together. 1 1/8 hole were the wires come out and with the skin on with the one wing into body.
Showing were wing will go back into the skin and new wing wired up and ready to go into the skin.
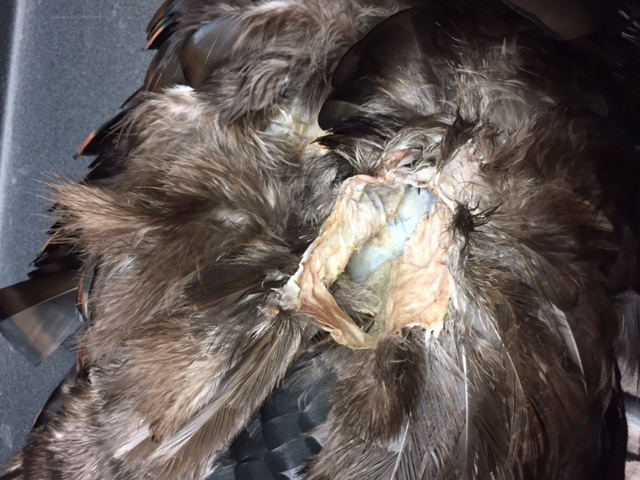
Hole in skin lining up with pre drilled hole and wing into the body and wires crossing at the exit hole.
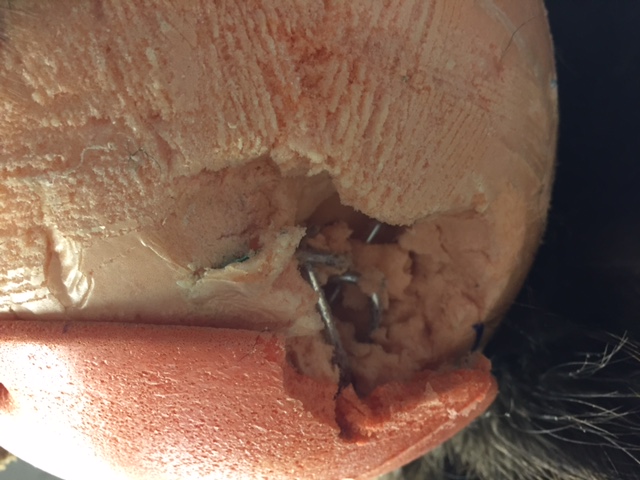
Wires twisted back into body and make sure skin isn’t pinched and humerus bone is pulled up and tight.
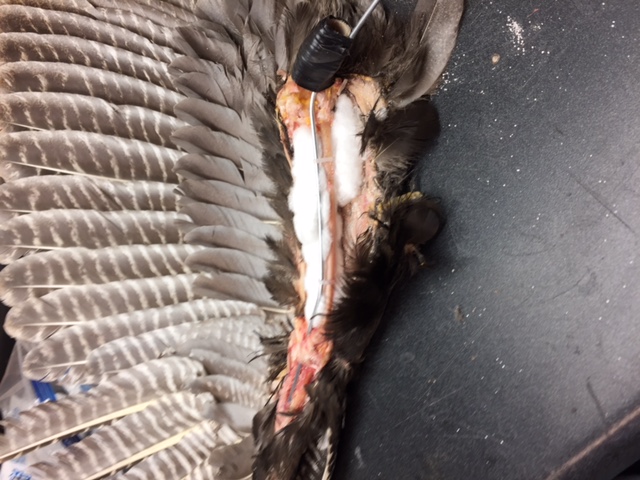
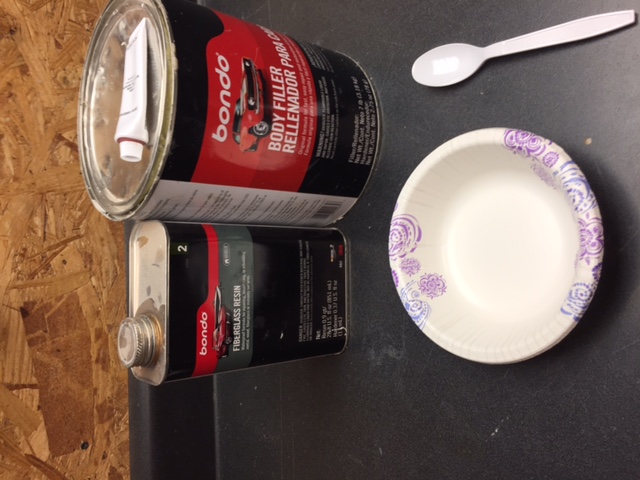
Next we will bondo the hole were are wings exited the body. I like to add some fiberglass resin to my bondo to make it so you can pour it into the hole. Note the cotton ball as a dam for the bondo. You can also place a couple of cotton balls into the hole if you are a little short on the bondo pour. This will make for a solid wing set that wont wable out of the hole.
Bird mounted and groomed for the first day. Note the feather lost on the breast we will replace that area once the skin is dry. I set my bodies up a little different than Aaron Stehling’s method outlined in his Taxidermy Insider® video series,and I’m using Bad Boy Bodies with the breast inserts. I will cut off the neck and replace it with the one from the head as every freeze dry form is different and I will cut the insert into so the head will come off. I will show this in another lesson. If you have any questions on this let me know.
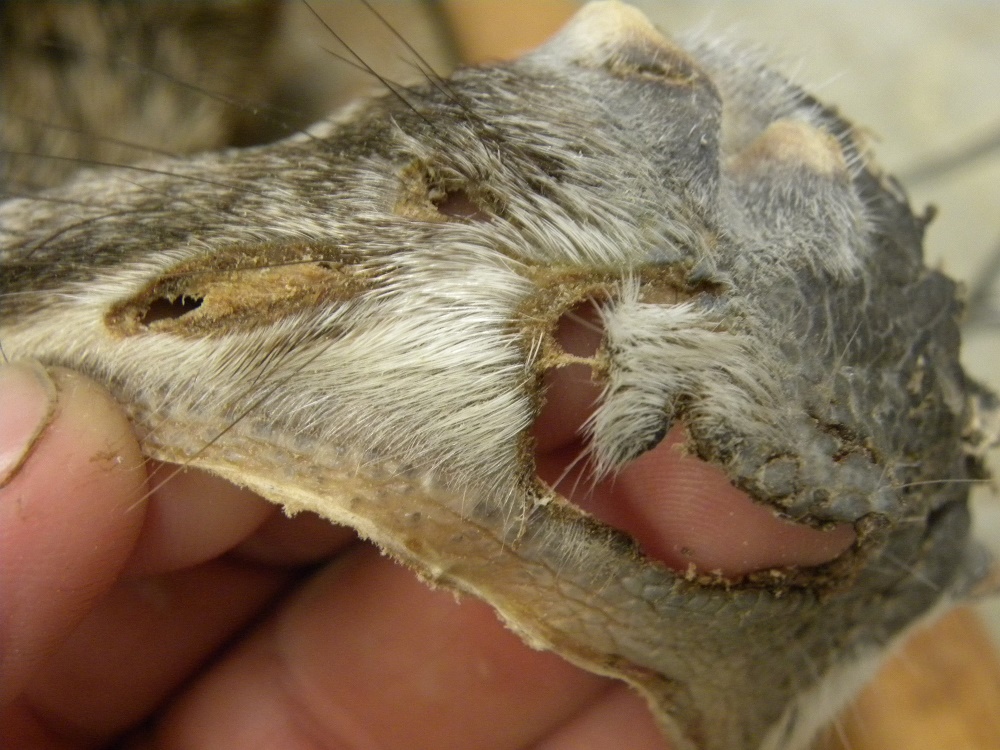
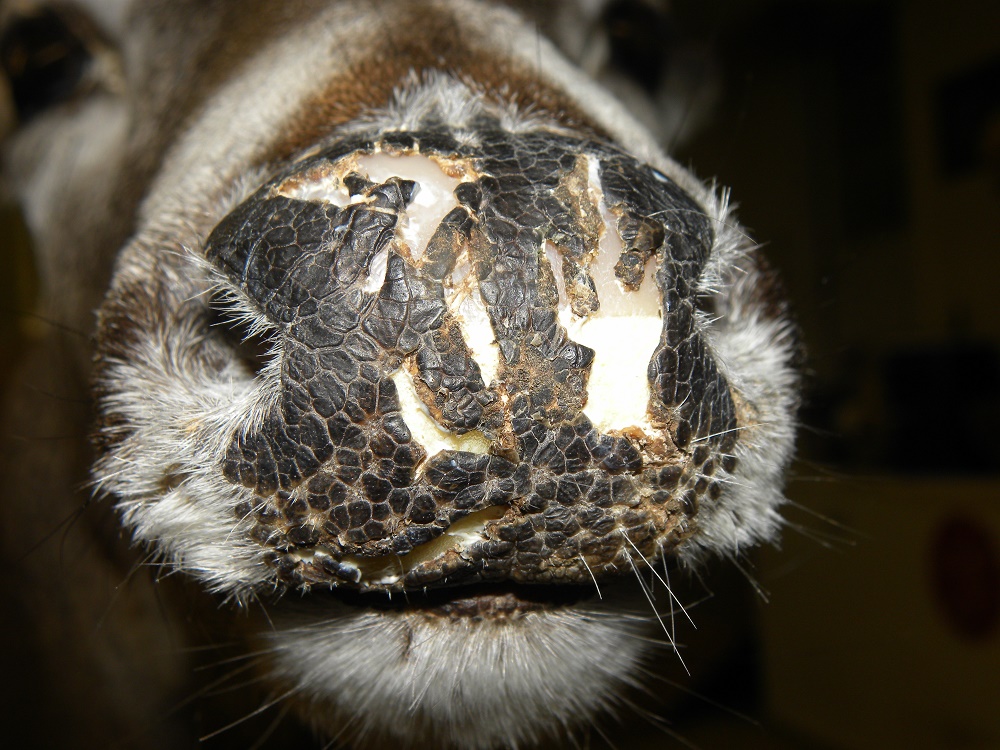
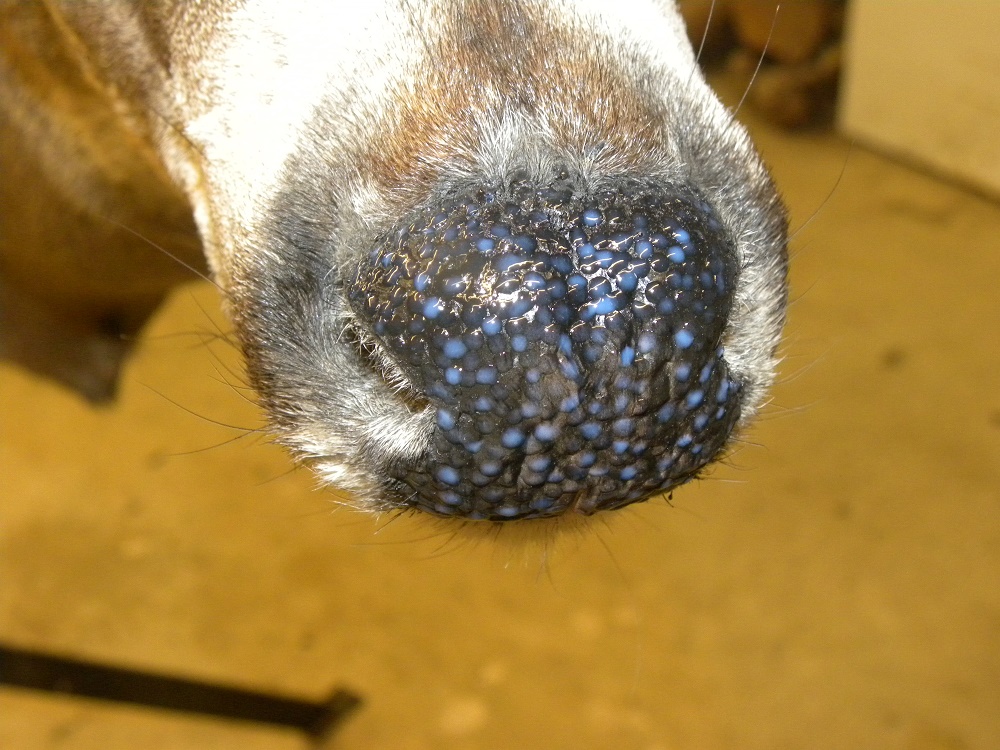
Recently, I was working through my work order backlog and I came across a Whitetail that I remember very well from when my client dropped it off right in the midst of the rut. It was covered in battle scars as well as fresh wounds. I asked the guy if he had hit it with his truck. Laughing he said no, that this buck had been in some hardcore battles with two other deer, one about the same size and another much larger brute. He had open wounds, his nose was ripped to shreds and he had a couple of lower front teeth missing. I could not believe there weren’t any breaks or chips in the antlers.
The client wanted to know if I could save the cape because he wanted to mount it, but only if we could use the original cape. I promptly said sure, no problem. WHAT WAS I THINKING? So we filled out the work order, he paid the necessary deposit and he went on his way. Now, eight months later his work order comes up and the wet tanned cape is thawing. I am now faced with pulling my foot out of my mouth and saving this man’s cape as I said I would do.
So in this article I am going to show you what I did to pull this off. Then when you are faced with a cape like this you can say “Sure, No Problem” just like I did. Remember, repairs are a part of taxidermy, and if done properly, you are the only one who knows where they are. Okay, time to stop talking and get to work.
Let’s do this thing!
We will be starting out with a wet tanned cape and it will be mounted on a W03-7119R from Head Quarters Supply. We have already test fit the cape on the form and installed a medium Gene Smith Quick Nose. Final prep has been done to the cape ie. ear cartilage removed, final splitting and thinning ect. So this is where we will pick up with this article.
As you can see there are many repairs to be made, from the nose to eyes and on down the neck. To start you need to go ahead and repair any holes in the hair line around the nose pad and lips. If it is in the fleshy part just leave as is, no need to sew these, they will be repaired later.
Repairs, Repairs, Repairs….
Using 4lb Berkley Fire Line, the Smoke colored in the dark haired areas and the Crystal color in the lighter or white haired areas. Make small stitches making sure to catch the very edge of the skin and bring the needle through at an angle. This will help to hide the stitches from the hair side. This particular Whitetail had many superficial wounds to the face and neck. Only once it was shaved did they start opening up and leaving small puncture like holes in the face and neck area.
Repairs, Repairs, Repairs….
You will need to sew these up as well. There is a lot of sewing to do on this cape. But to get the best mount possible it needs to be done and done correctly so you will have limited finish work to do once the deer is mounted and dry. You will most likely have bleeding or at the least very sore fingers when done.
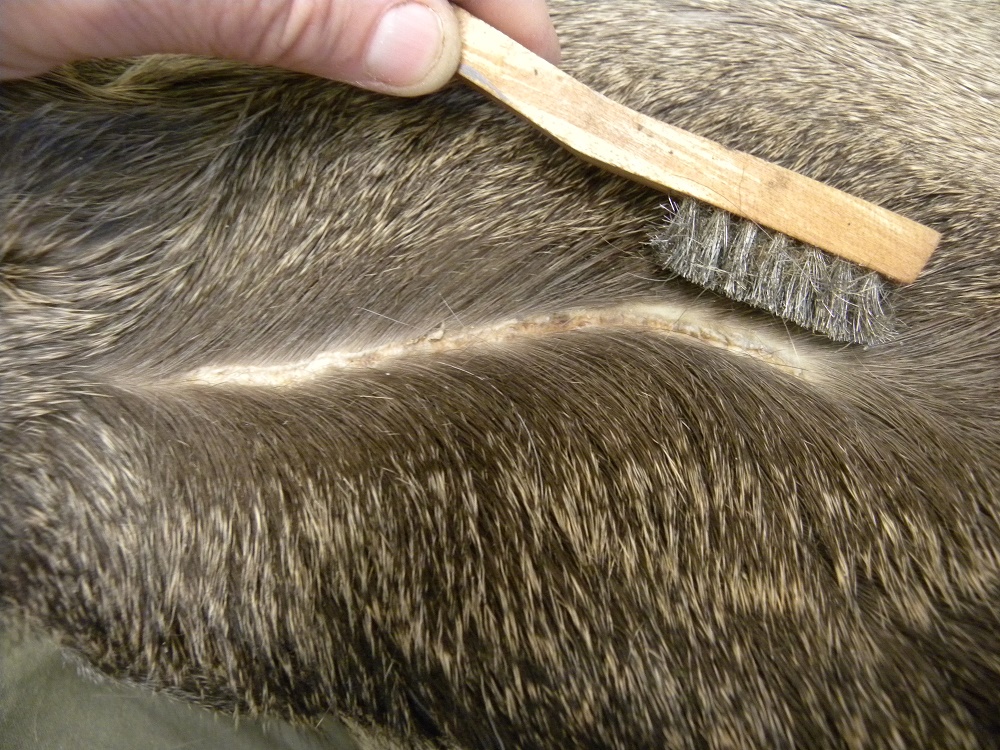
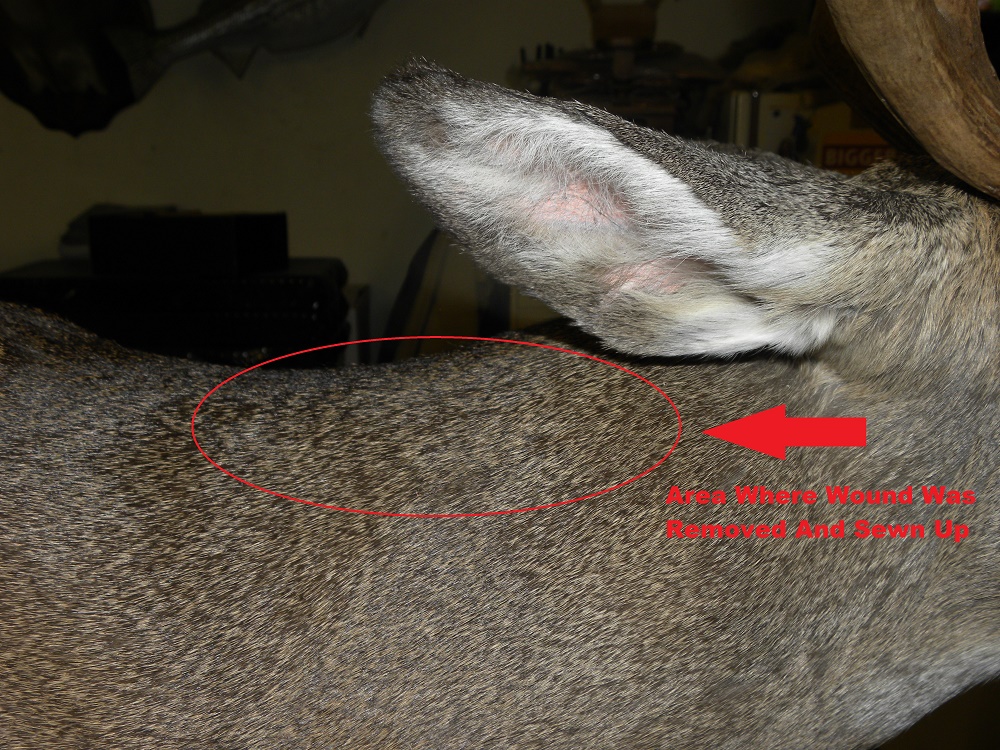
On the back of the neck behind the right ear there is a fairly nasty looking scabbed over wound, for best results you need to cut this area out and sew it up.
Your client will never remember it was there. To do this, just part the hair and with a sharp scalpel cut the area out following along the edge of the good hair. If you take your time cutting, it should go right back together like a zipper.
Now once you have your form prepped you can mount as normal and let dry. Do not worry about holes in the nose pad. Line up your hair patterns using references. With a project like this you can really see how much shrinkage you have from mounting to dry. Notice how the wounds opened up as the nose pad dried out.
Repairs, Repairs, Repairs….
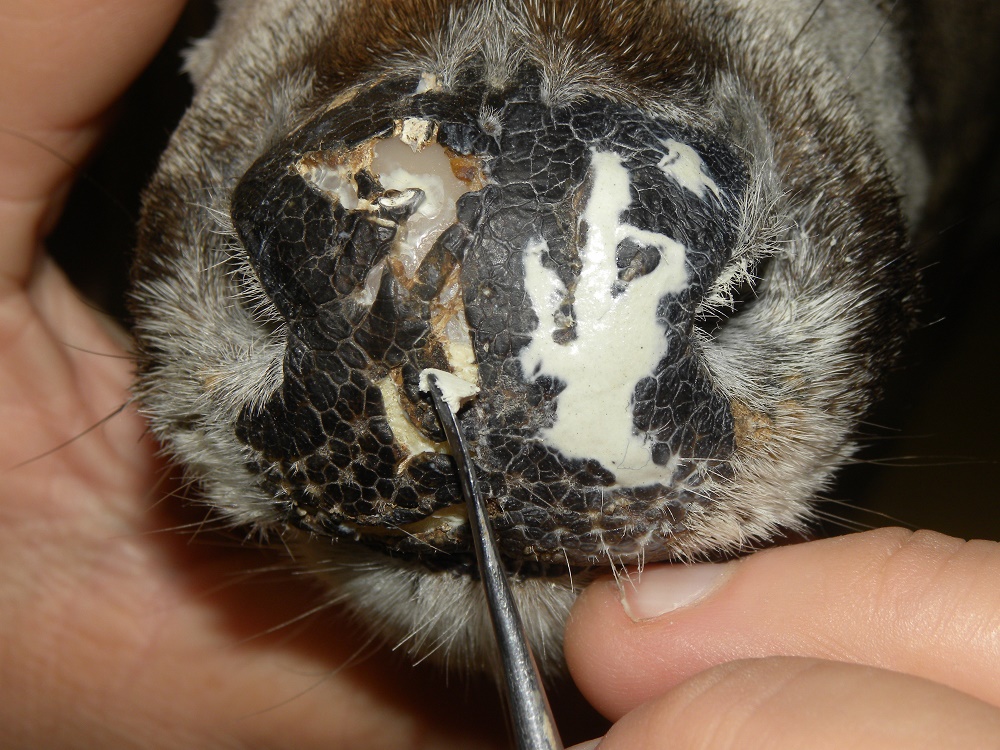
After the deer has had adequate time to dry you can move forward with your finish work as normal. The only difference is rebuilding the nose pad. First make sure there are no parts of the skin that has curled up and not stuck to the form. You can do this by clipping off any loose skin with a pair of small scissors. Next mix just enough Aves Fit-it Sculpt to fill in the open areas in the nose pad and with a small modeling tool apply it.
Repairs, Repairs, Repairs….
You should actually do this step first. This way the Fix-It Sculpt can begin to set up while you do your other filler work and painting. Once the filler on the nose pad has kicked, lightly sand the surface of the pad just enough to blend the filler and skin together. Be careful not to get into the hair line and damage the small hairs around the nose.
Okay, now you need to finish this nose up. Mix you some more Fix-It Sculpt, this time add a little black powdered Tempera paint. This will give you a medium grey color, which will provide a good base color for the nose pad. Next apply a thin layer over the nose being extremely careful not to get it in the hair.
Repairs, Repairs, Repairs….
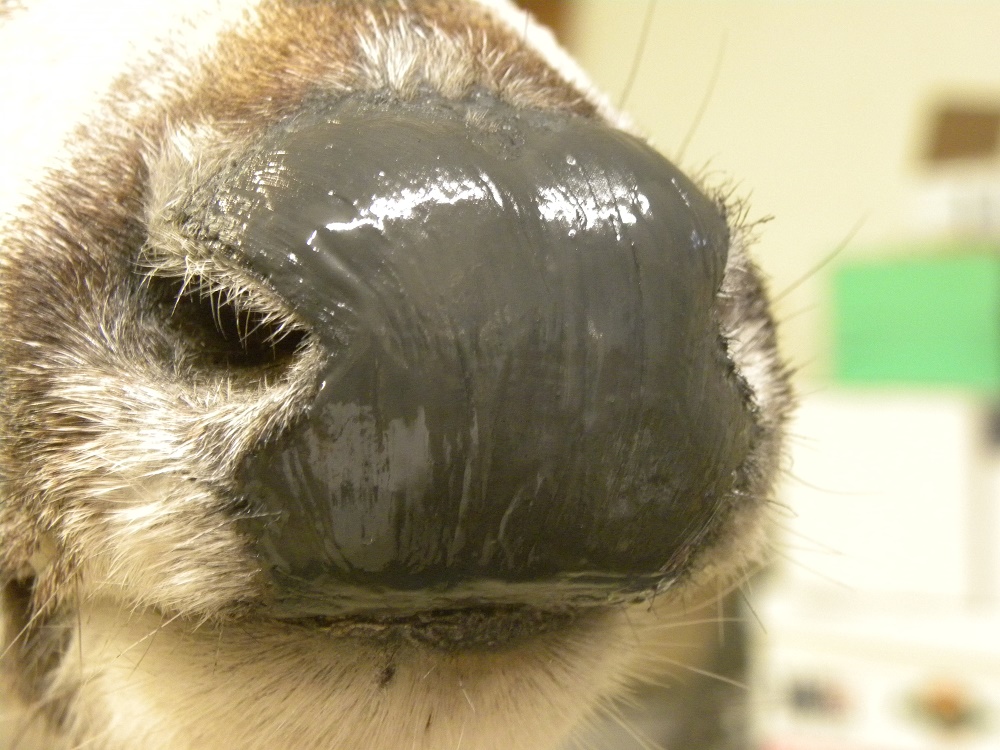
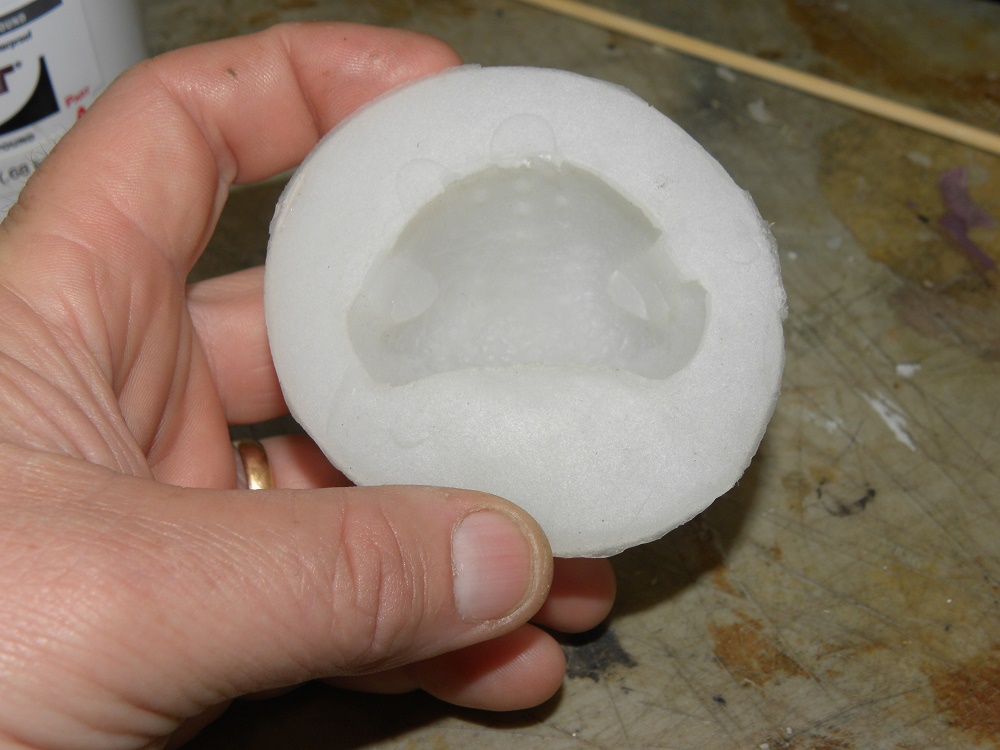
Now, with a mold of a freshly harvested deer nose, with a liberal coat of Apoxie Safety Solvent firmly but carefully press it into the nose pad.
Repairs, Repairs, Repairs….
This will give you a bit of texture to the nose instead of a slick surface to work with. Next go ahead and paint the nose using your normal schedule. Then finish retexturing the nose pad using an applicator bottle with Liquitex. Apply a little gloss, and your repaired nose is complete.
Repairs, Repairs, Repairs….
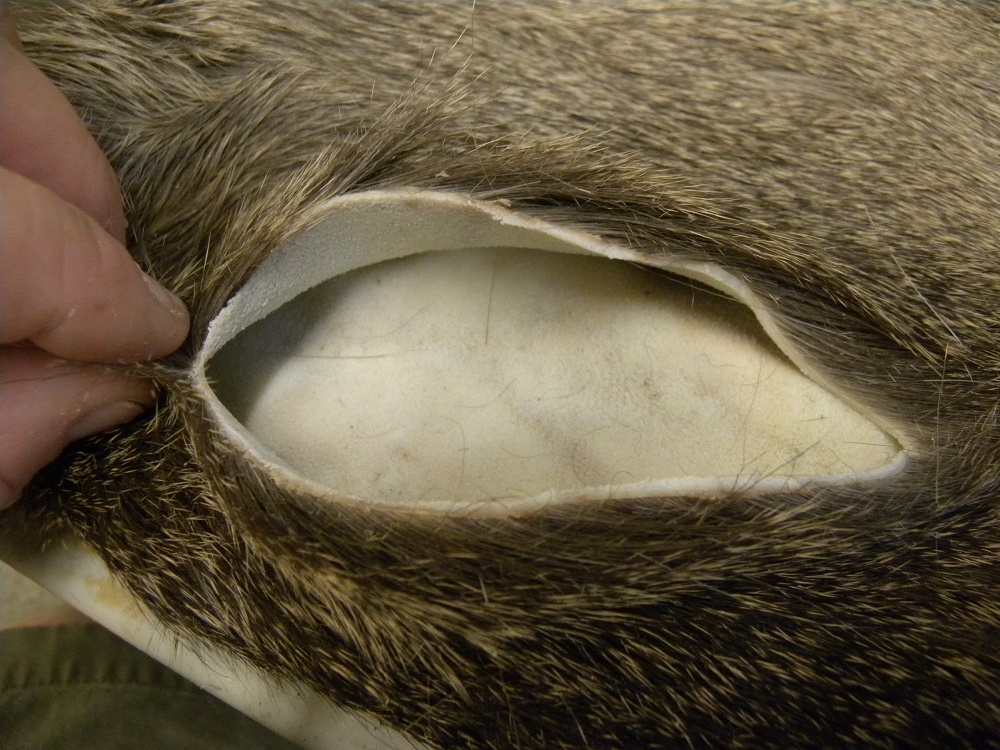
With a little know how, time and patience you can pull off repairs such as this. Here you can see where the scabbed over wound was removed and stitched up. It looks much better than having that nasty scar showing on your client’s wall.
Repairs, Repairs, Repairs….
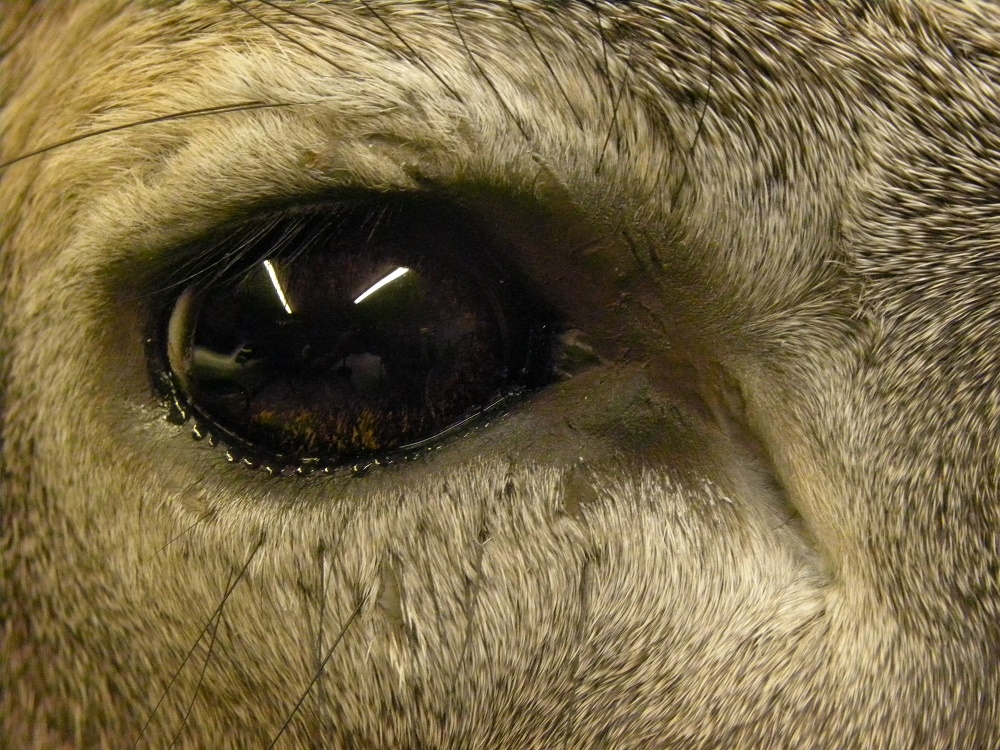
Now the battle scars around the eyes and down the muzzle are hidden. This gives you a much better final product and you were able to use the original cape.
Repairs, Repairs, Repairs….
I hoped I was able to share some repair tips in this article that will help you to save a special trophy for a client one day. For tips and other techniques click here.
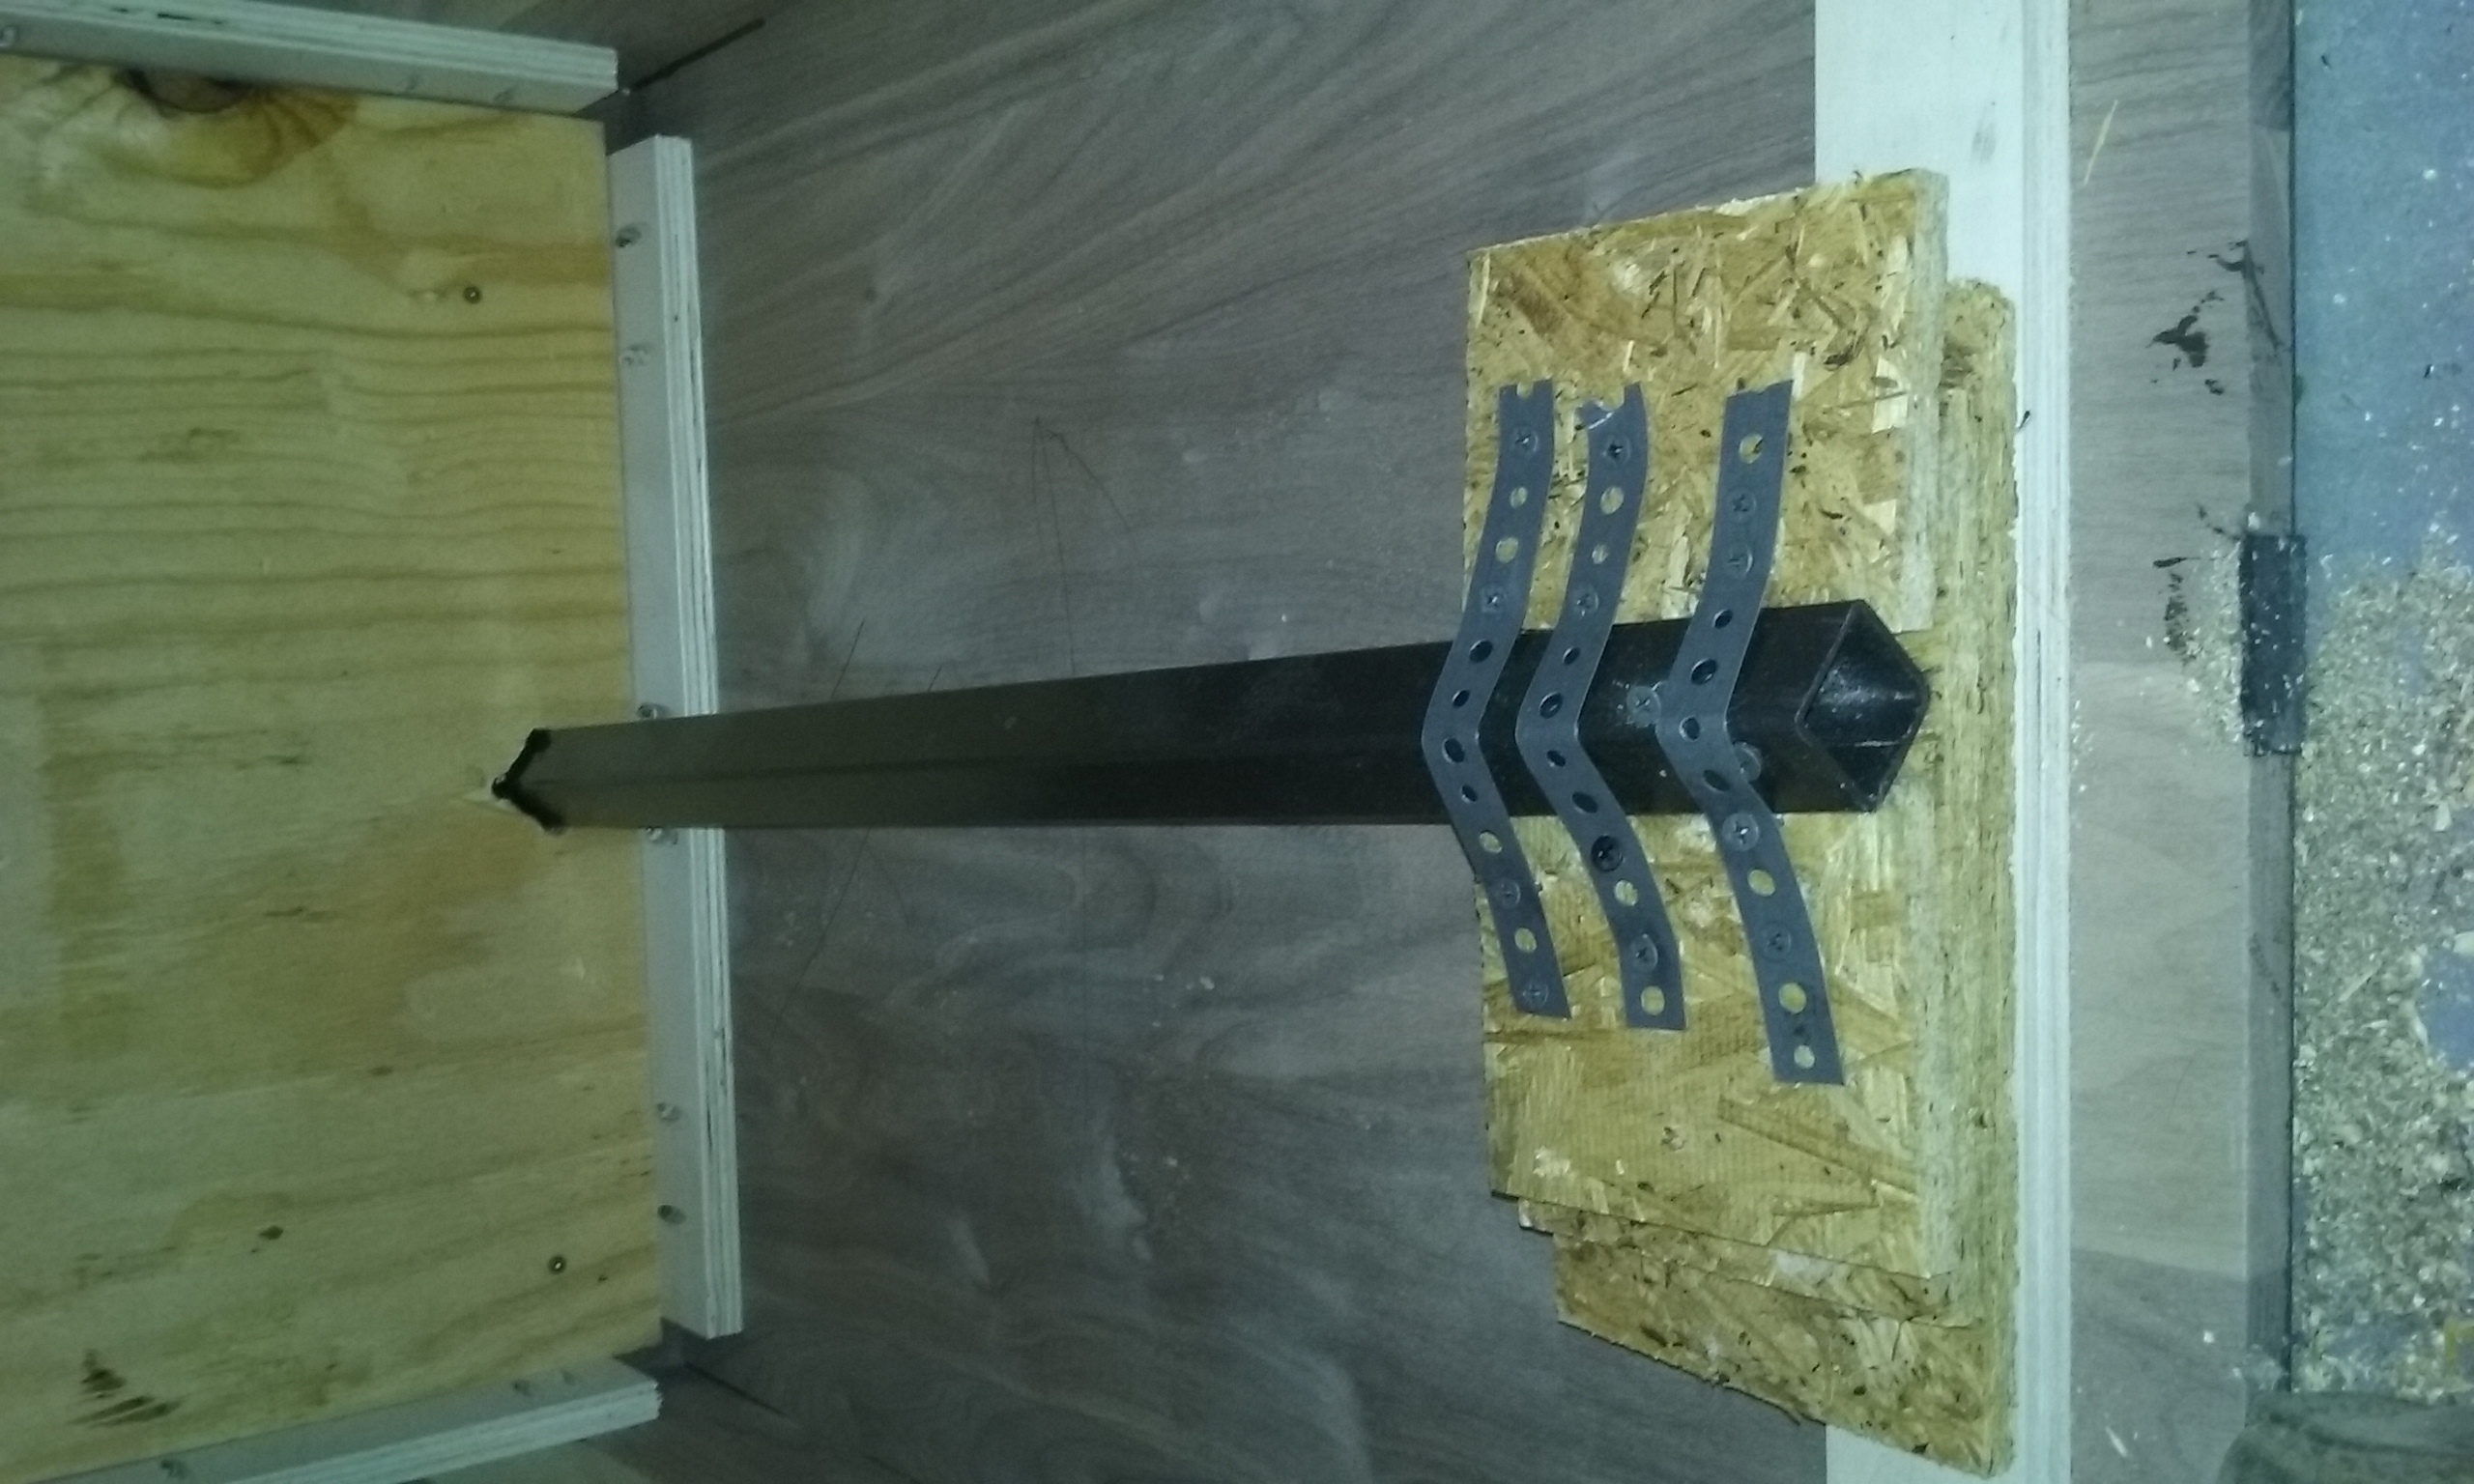
On the last article we talked about the square tubing in the manikin. This article I will cover how I install the tubing in the base.
First I have a helper set the animal on the base to see where it looks the best. I step back and look at it while my help is holding it. I like to place it to where their is an equal amount of the animal on both sides of the base.
After the attachment point is figured out I trace around the square tubing with a marker. Then I set my larger receiver tubing on it and mark around it. I use a drill bit for each corner and finish up with a reciprocating saw. I stick a tape measure down in the hole all the to the bottom of the base and this is the length I cut my tubing. My wood guy builds my bases to where the bottom is removable. I remove the bottom. Then i temporary secure the bottom of the tube to the insides of the base to where i think it need to be. I then put the form on the base to see how level it is. If I need to move it side to side or lift the front up some now’s the time. Flip the base back over and repeat process until it’s where I want in. Then permanently secure bottom of tubing and replace bottom of pedestal.
This method may not be for everyone but it works great for me.


")


")