
Simplifying a Quick Money Maker
All businesses need cash flow, and quick cash flow is always there if you just look for it and not turn it away just because it is a small job. If you simplify these jobs where you can knock them out quickly but still give a professional product to your client, you can really capitalize on these small projects and keep the cash flowing. Simplifying is not the same as cutting corners. We are not going to cut corners just to get work out the door and money in the bank. This will always come back to haunt you down the road.
One of these quick money makers are deer hooves for gun, coat and hat racks. A very simple job, but so many times I hear taxidermist say I don’t like doing them. Or even worse I DON’T do them because they are too much trouble to skin out, or they are a pain to sew up. Well, get over it, you are a taxidermist and this is easy money you are passing up. In this article, I am going to show you how to simplify and streamline your system to turn these out quick and efficiently.
Here we go! Start the skinning process by beginning just below the dew claws with a #11 scalpel blade and cutting all the way up the back side of the leg.
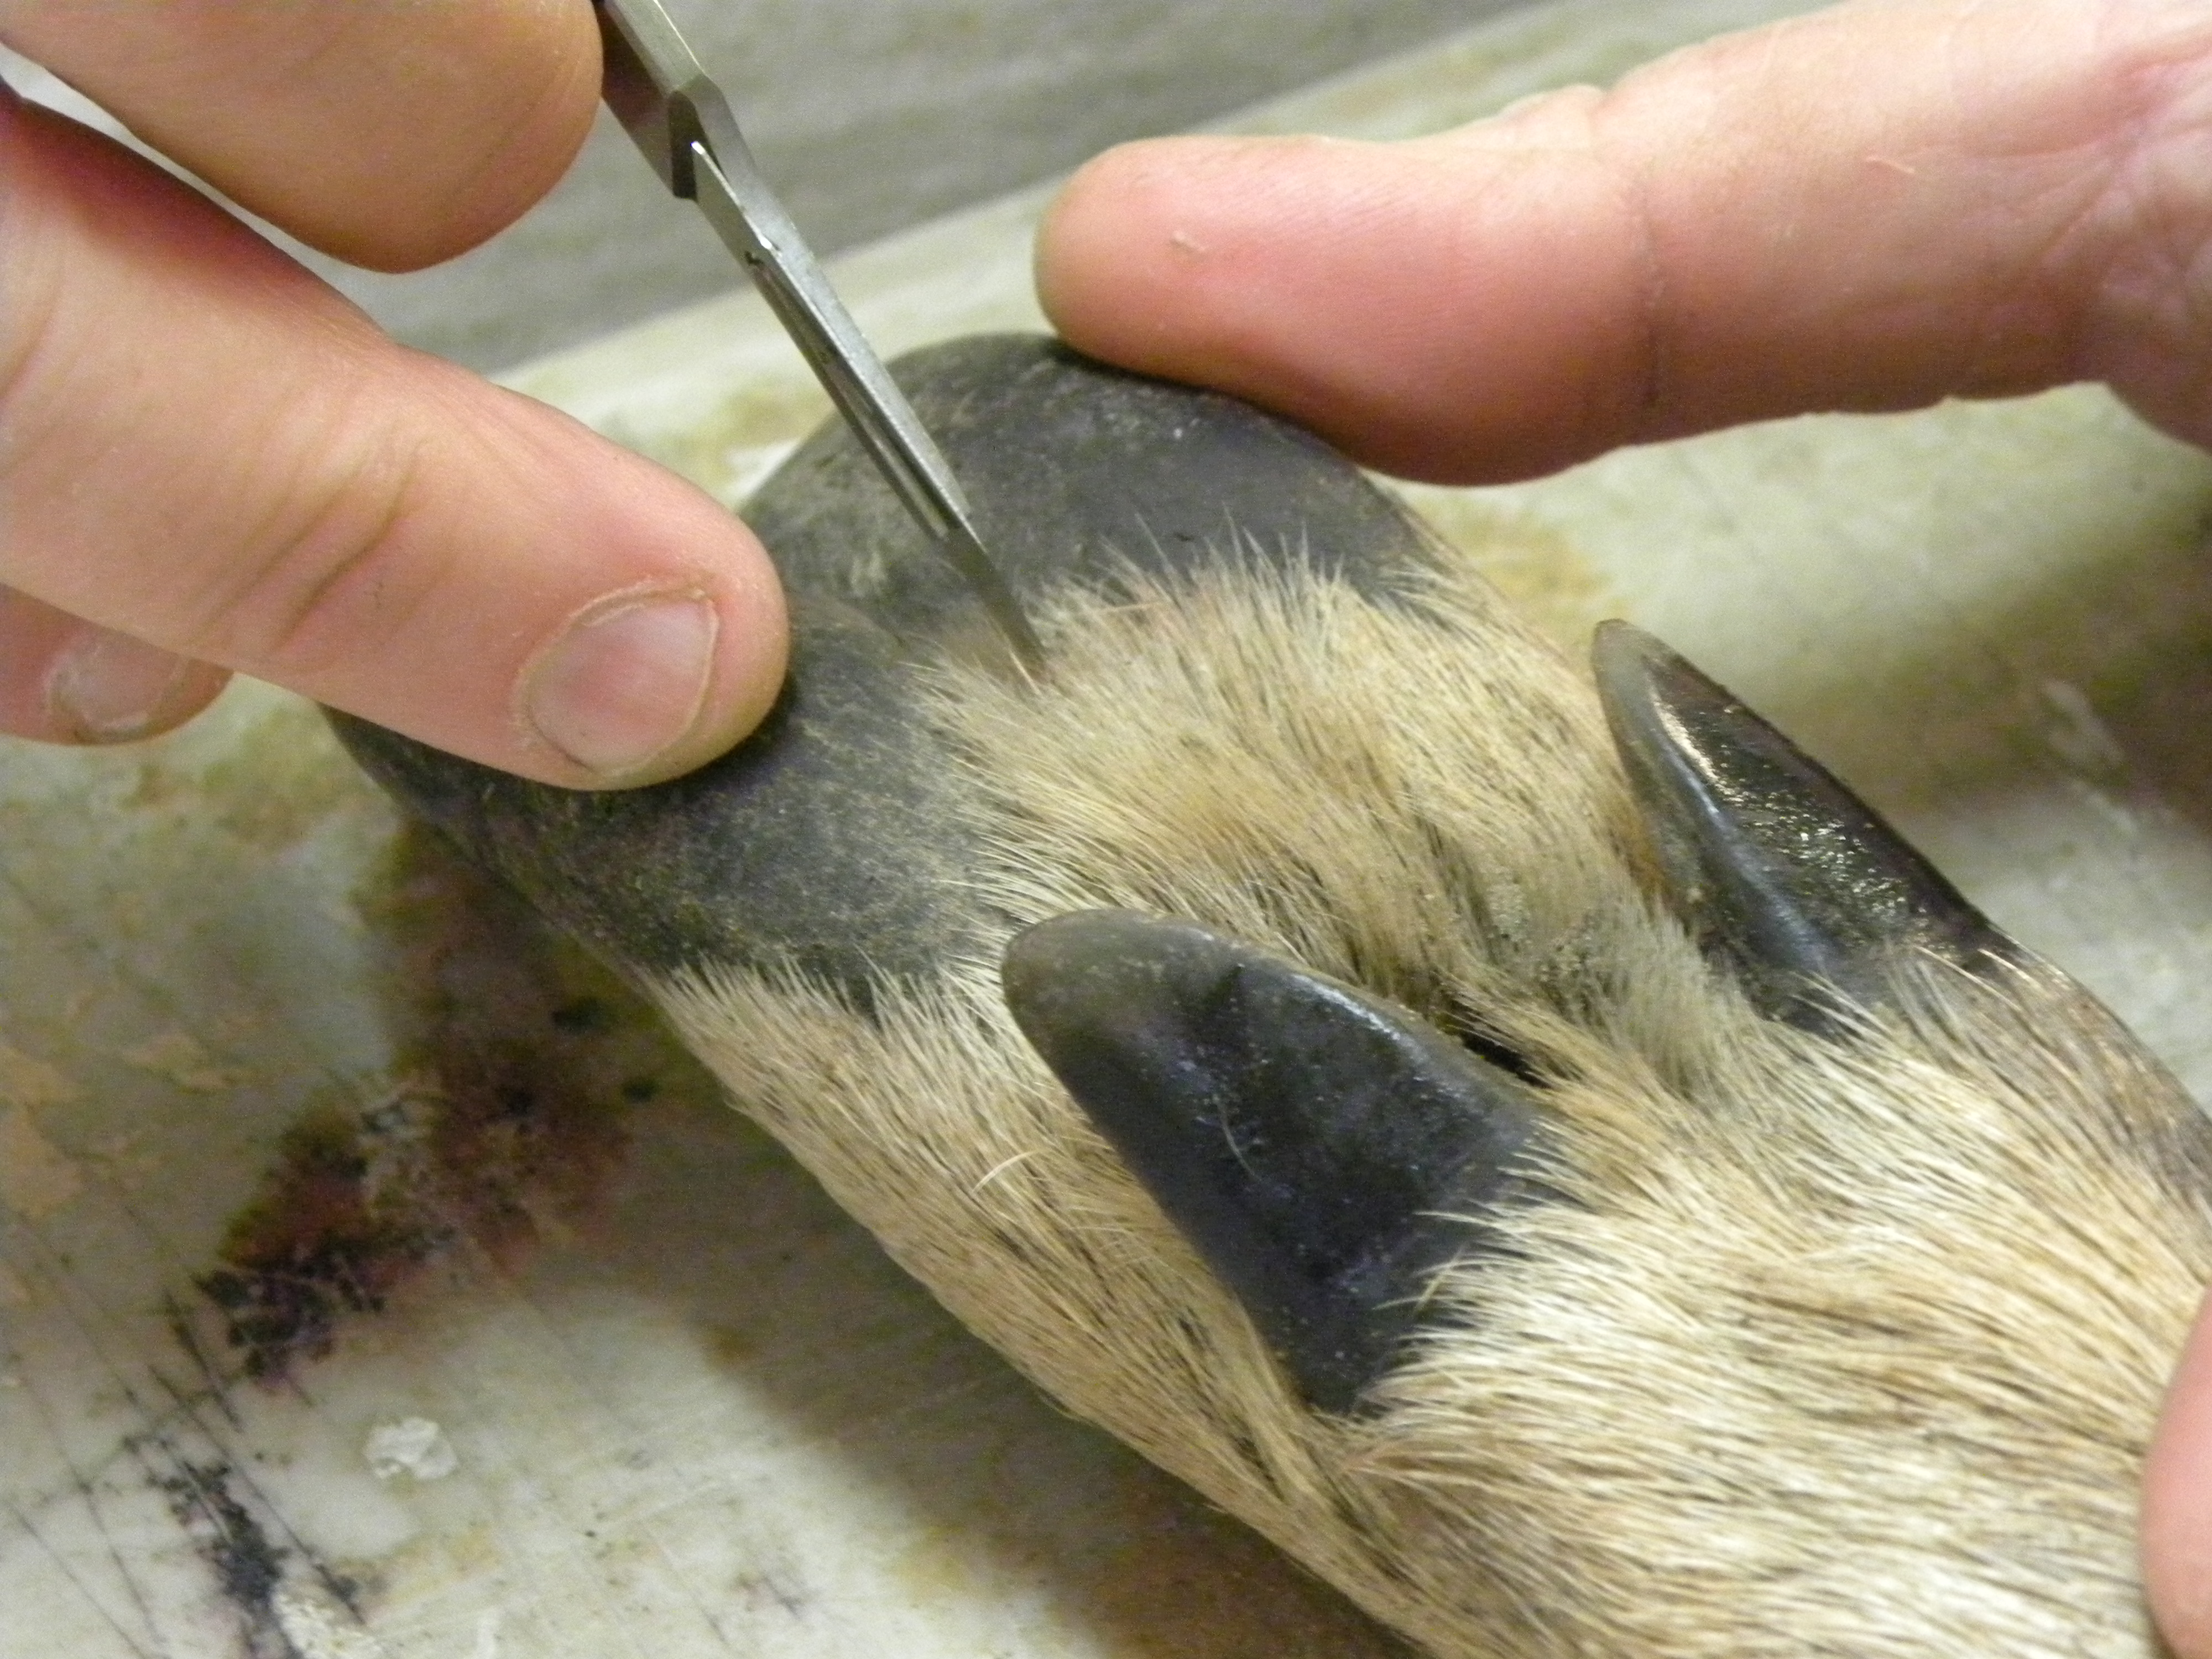
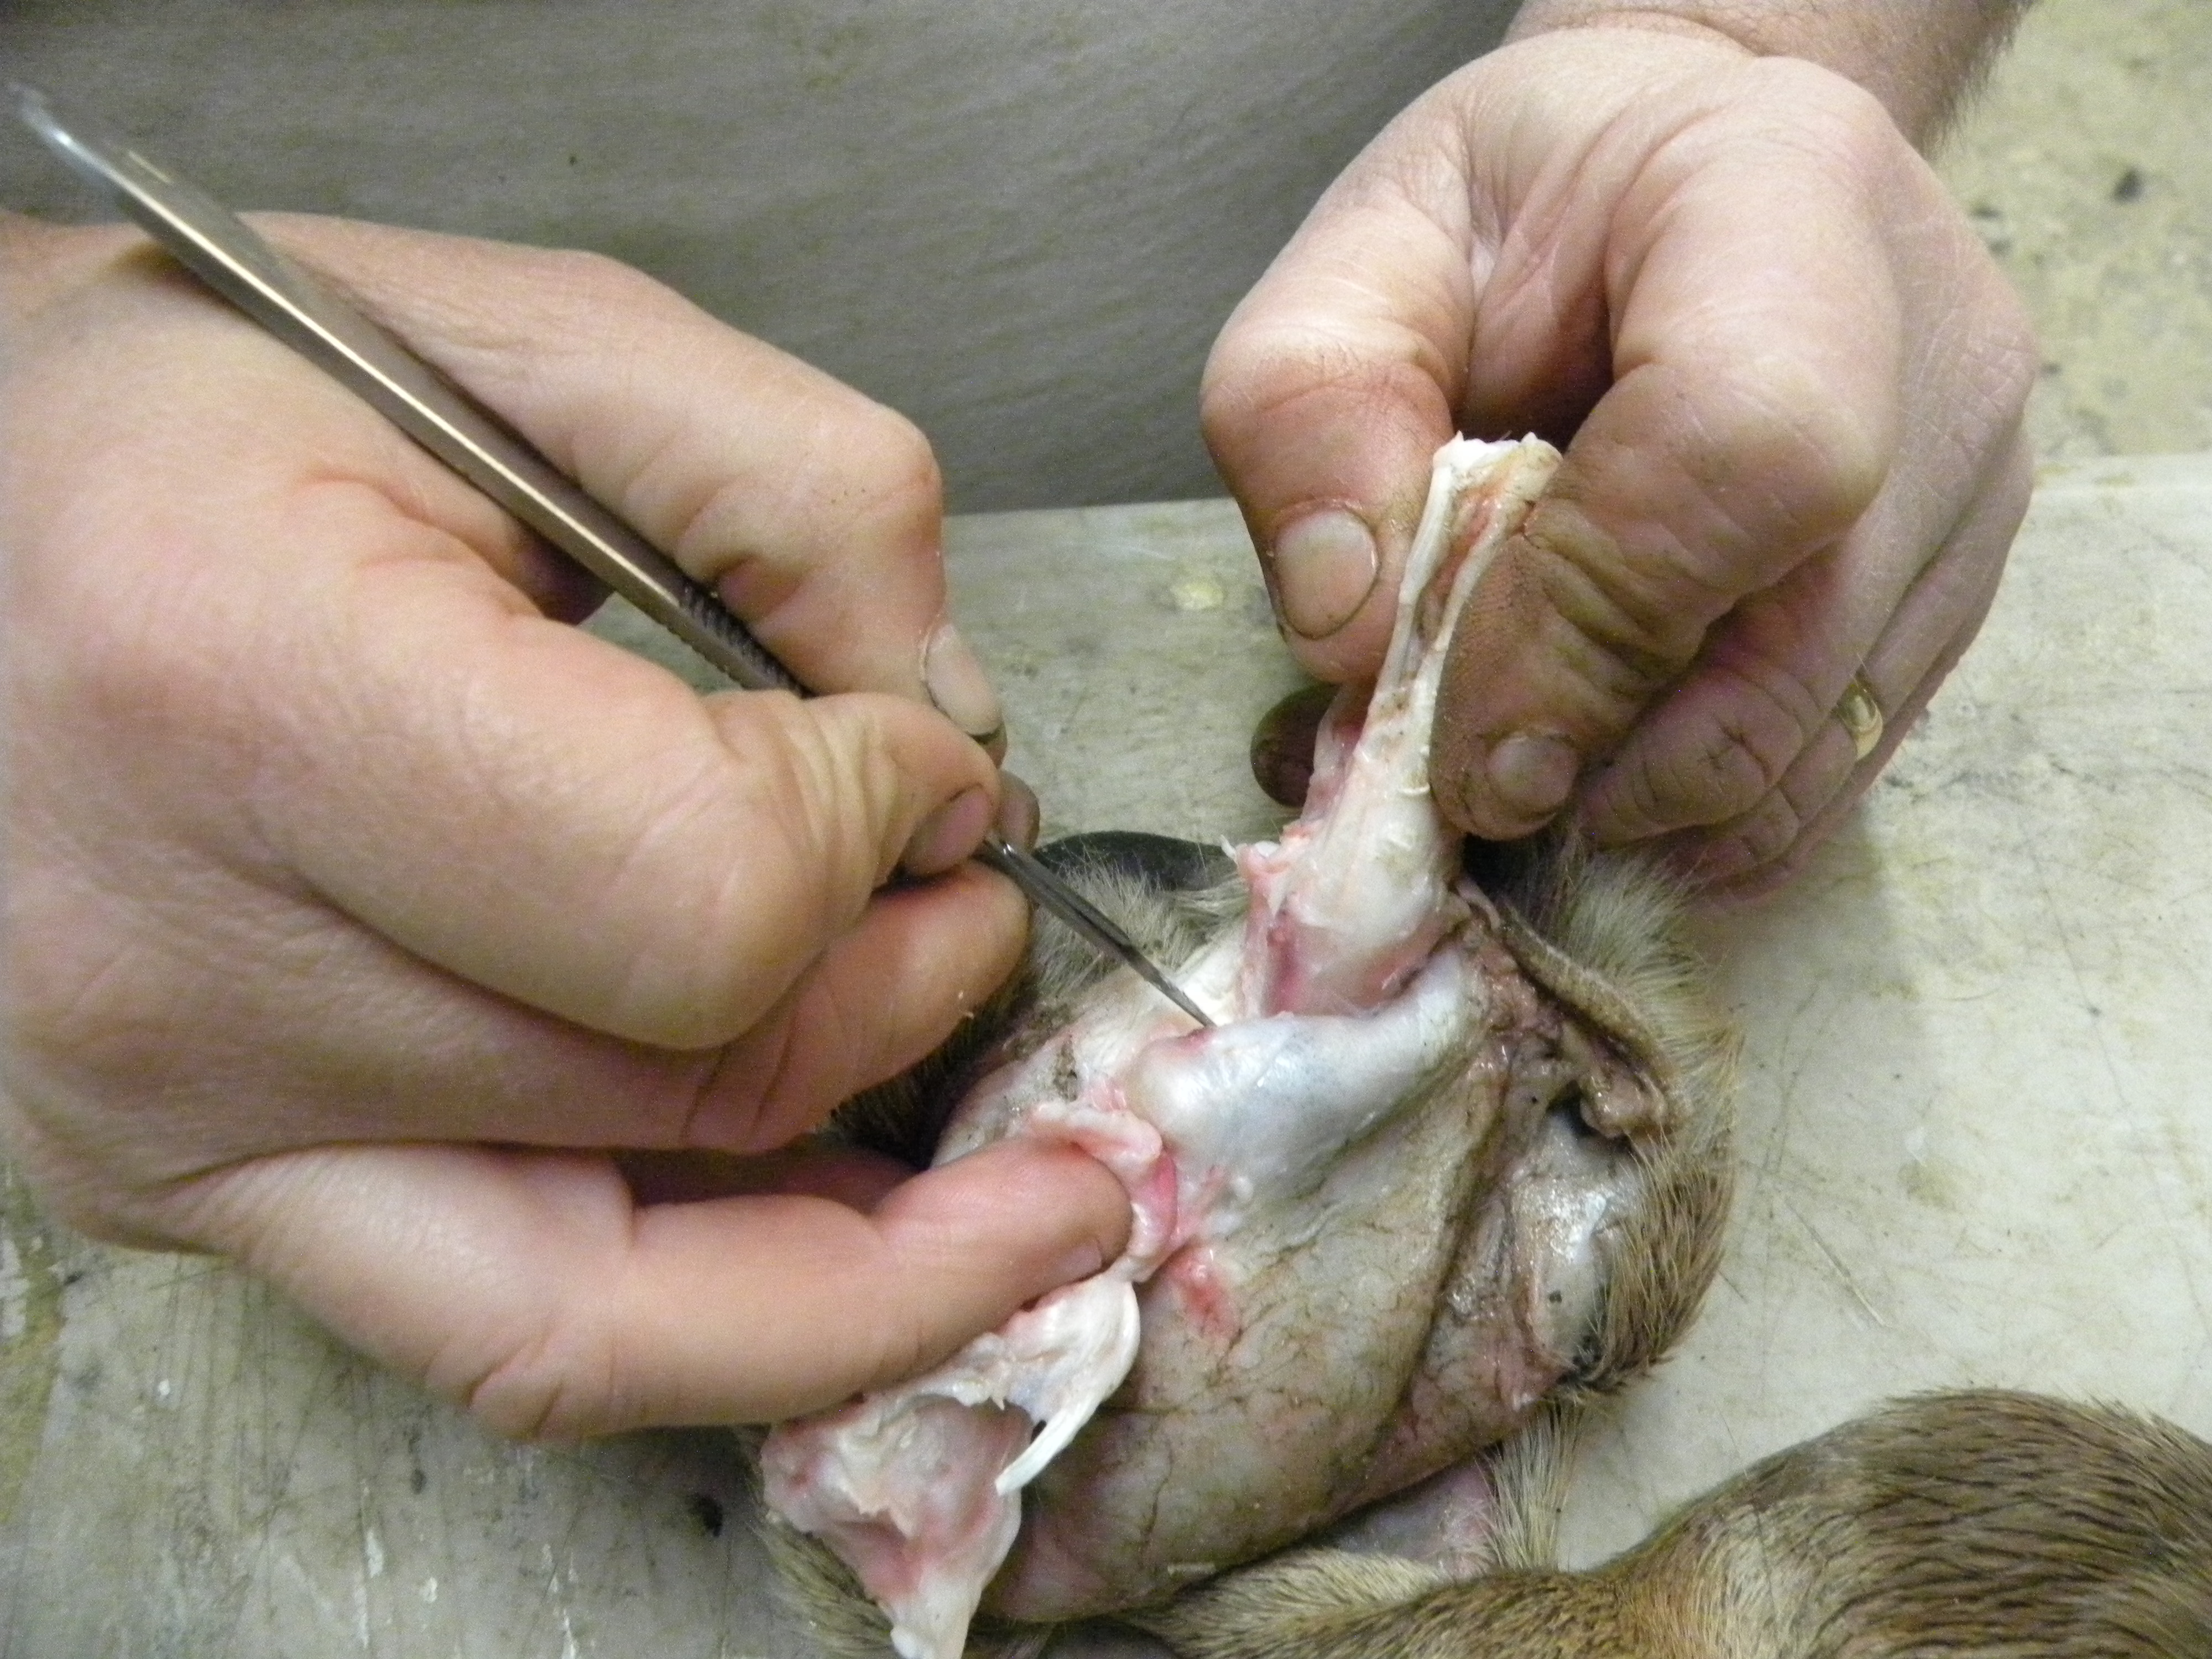
Then start separating the skin from the tendons, muscles and bone with your scalpel. Once down to the dew claws carefully cut around and through the knuckle until it is free from the skin. Continue to skin down towards the hooves as far as possible. Then cut through the ankle joint removing the lower leg bone from the knuckles. Now separate the two sets (inner and outer) of knuckles so that they are free from one another. Next using a bench vise as a third hand, place the end of the knuckle into the vise tightening down to hold it firmly. Now both of your hands are free to hold the skin and cut the knuckles loose down inside the hooves. Make sure you get all the way down to the quick of the hooves, leaving no bones.
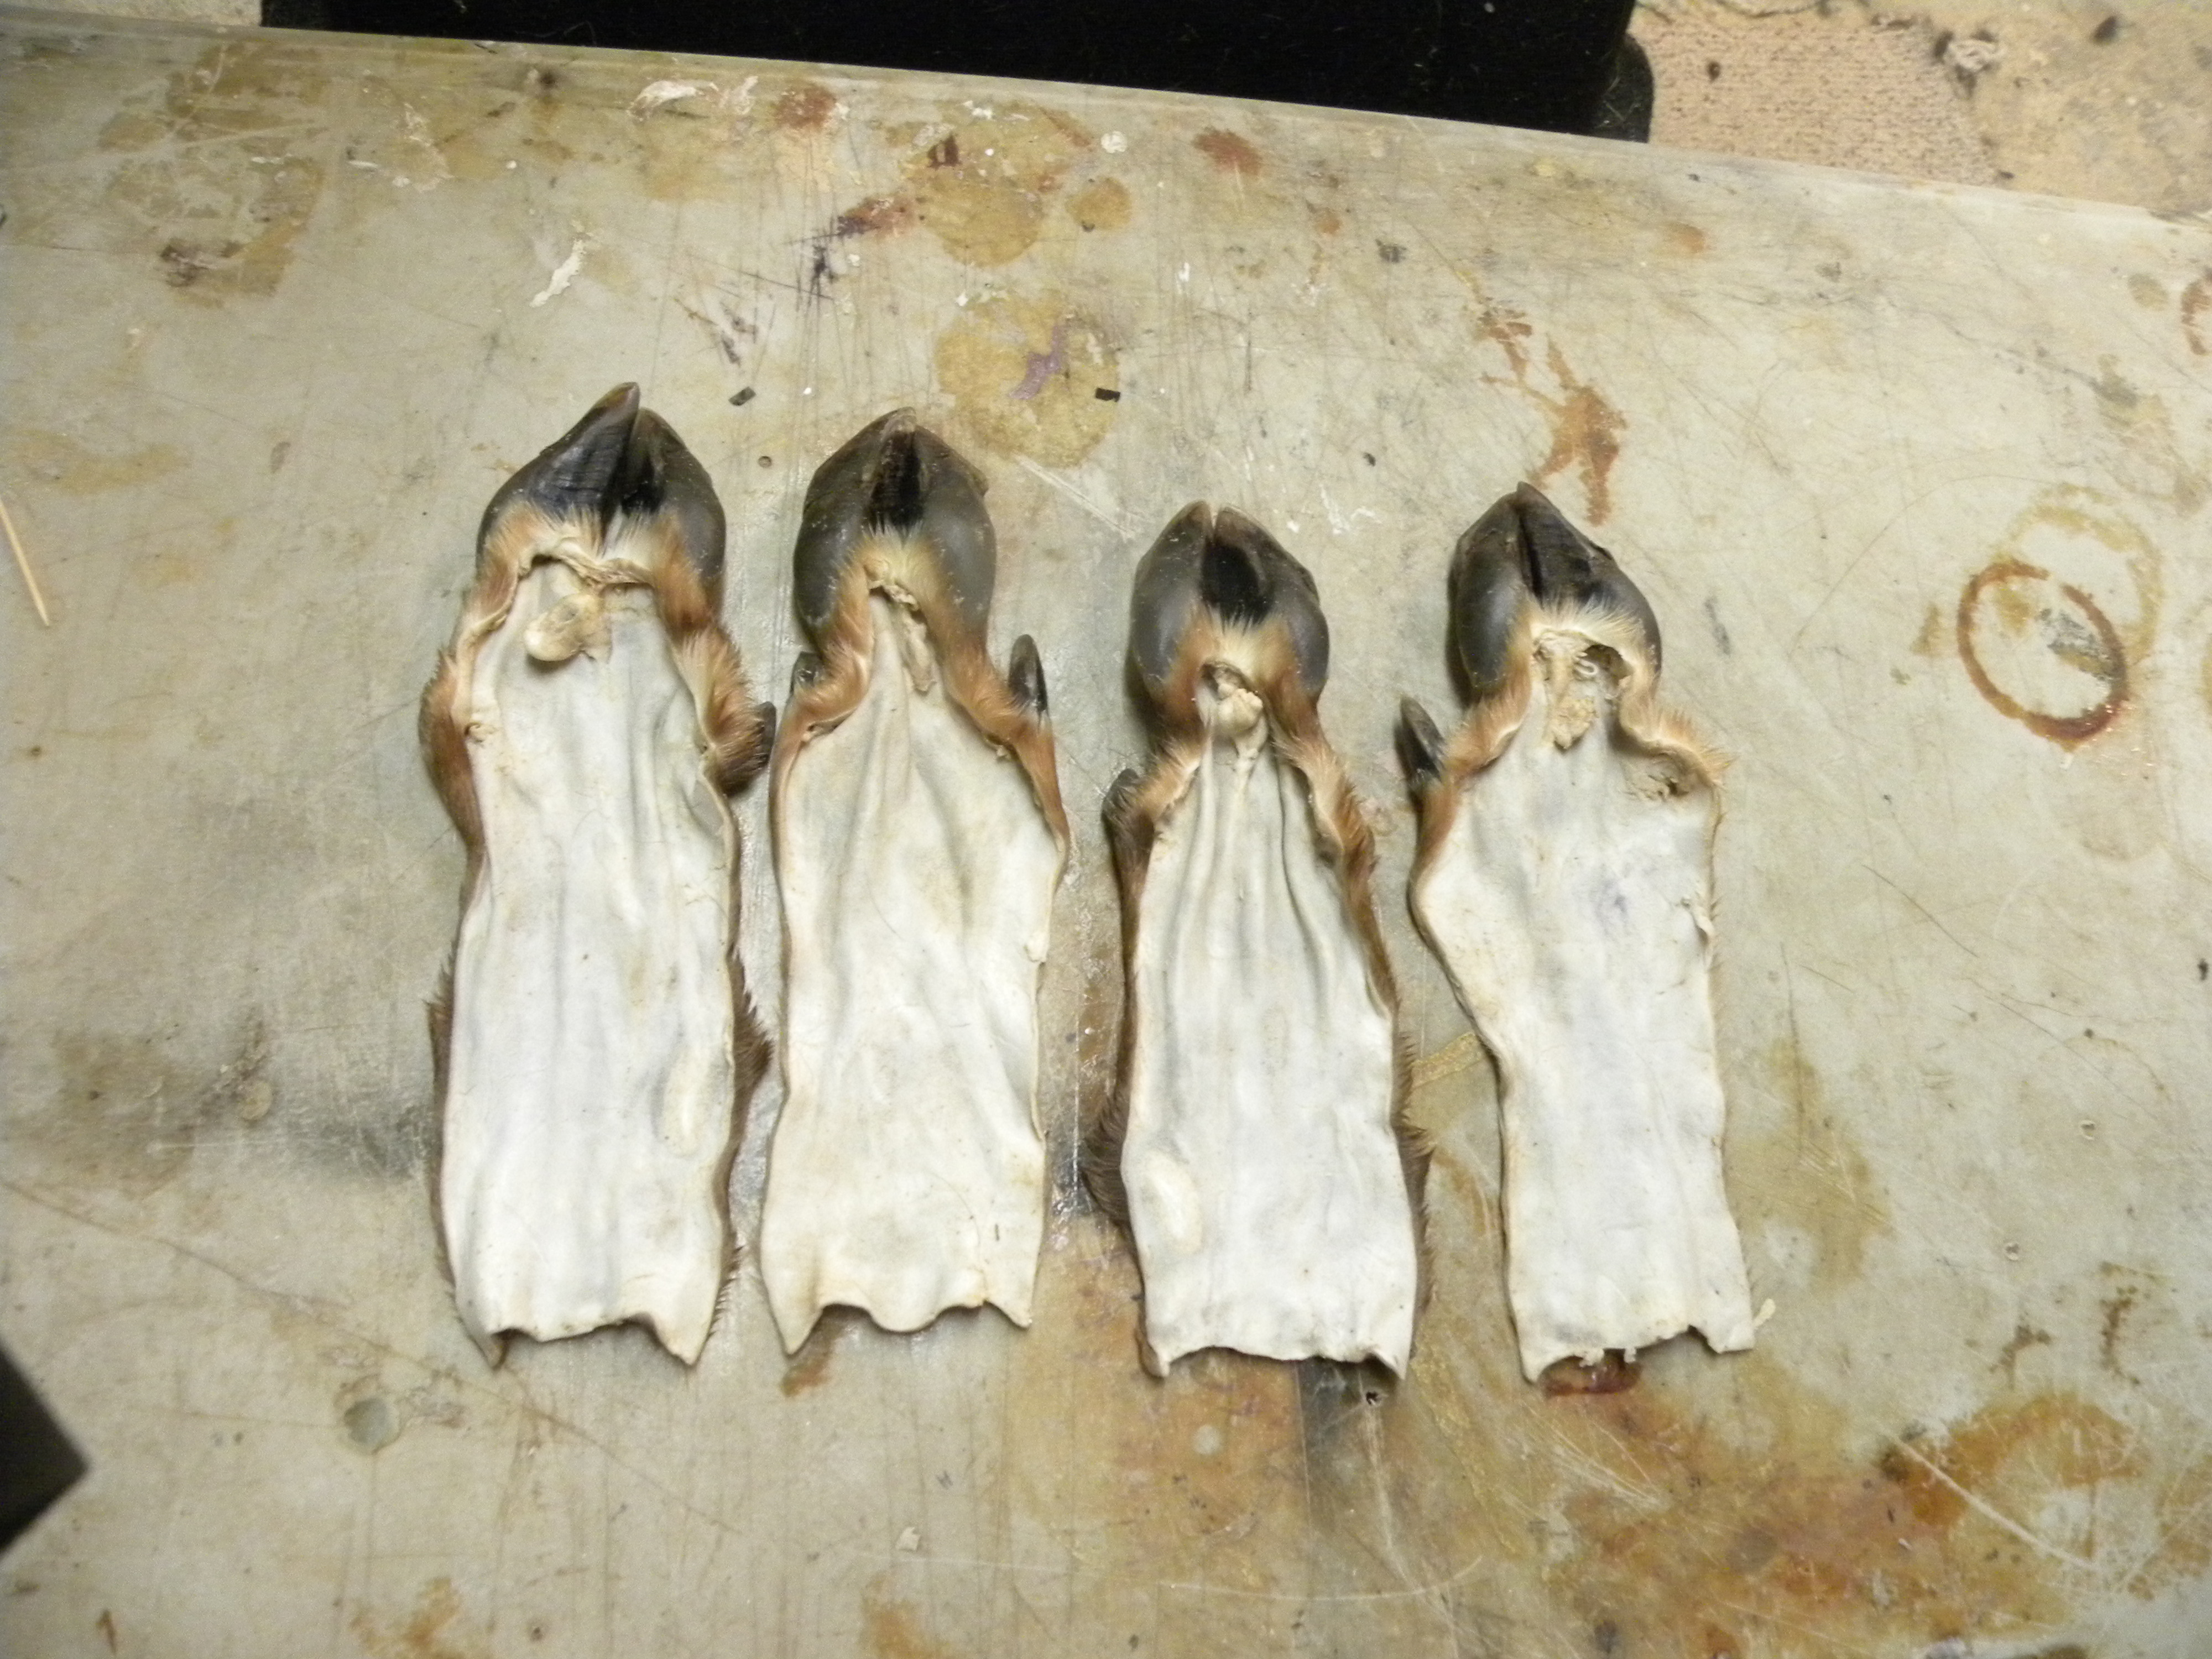
Once you have all your hooves skinned out, you can tan/preserve them using your method of choice. I tanned these in this article using the methods in my Tanning 101 Video Series.
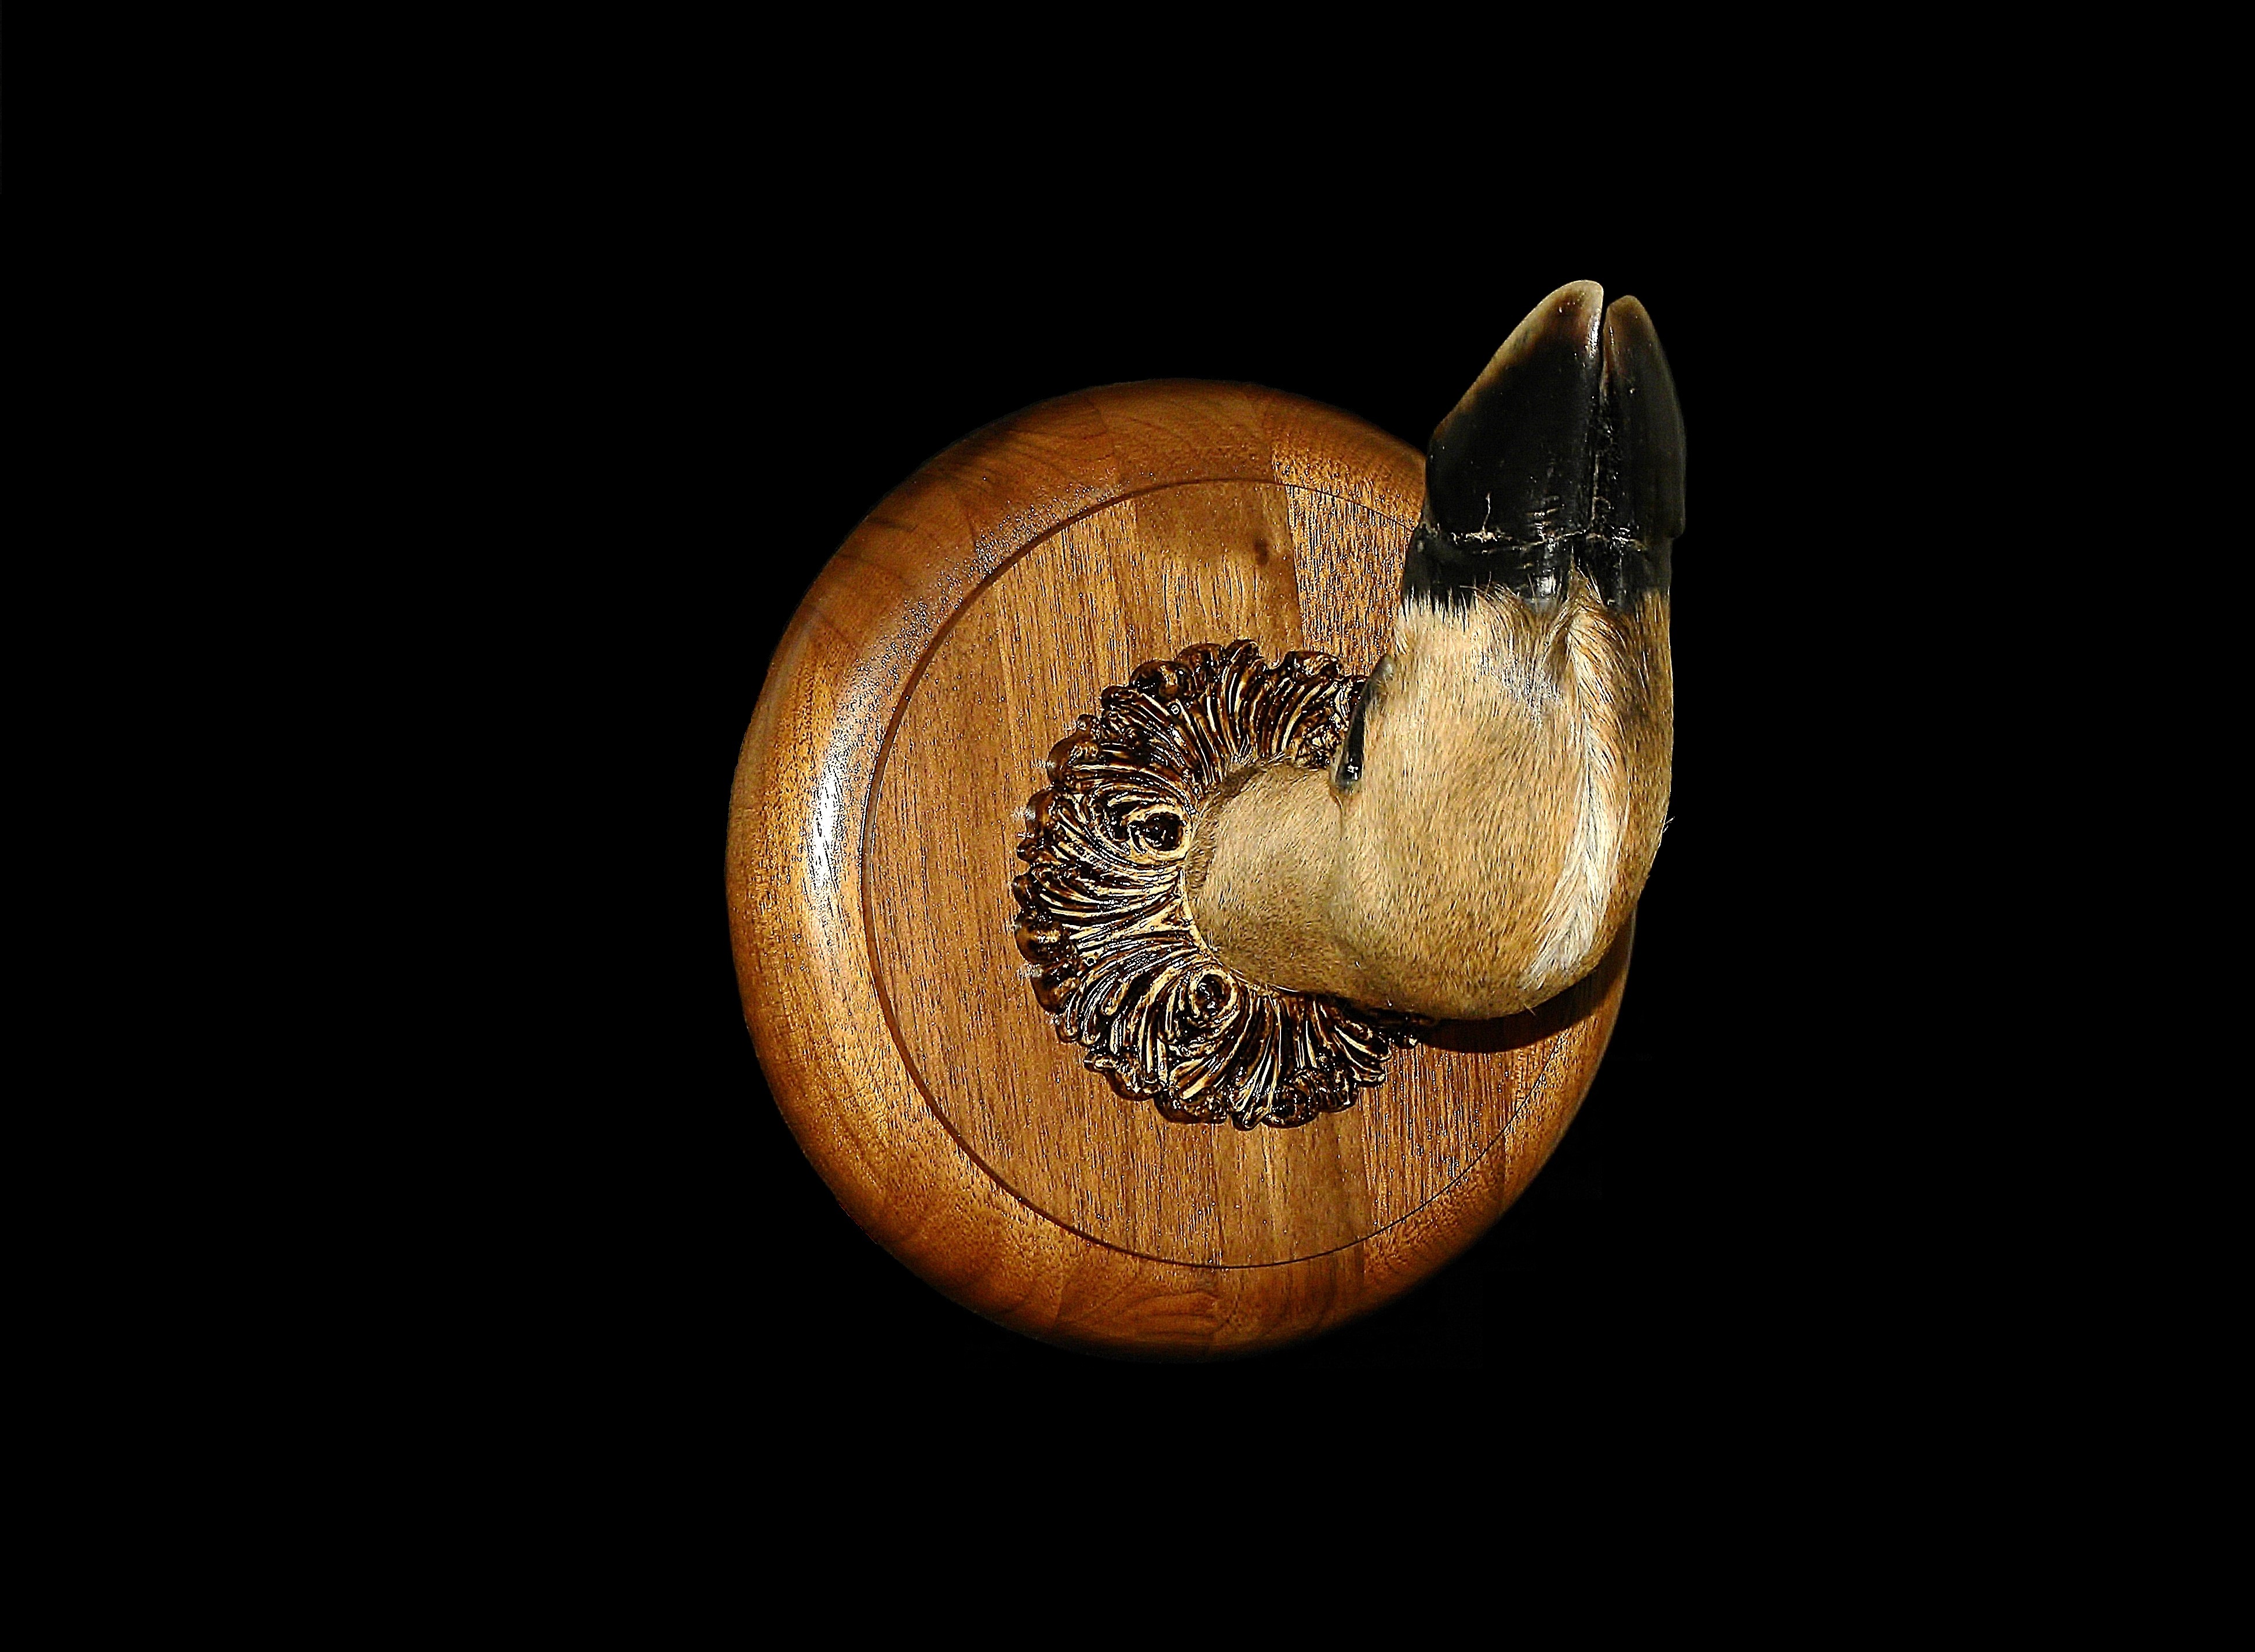
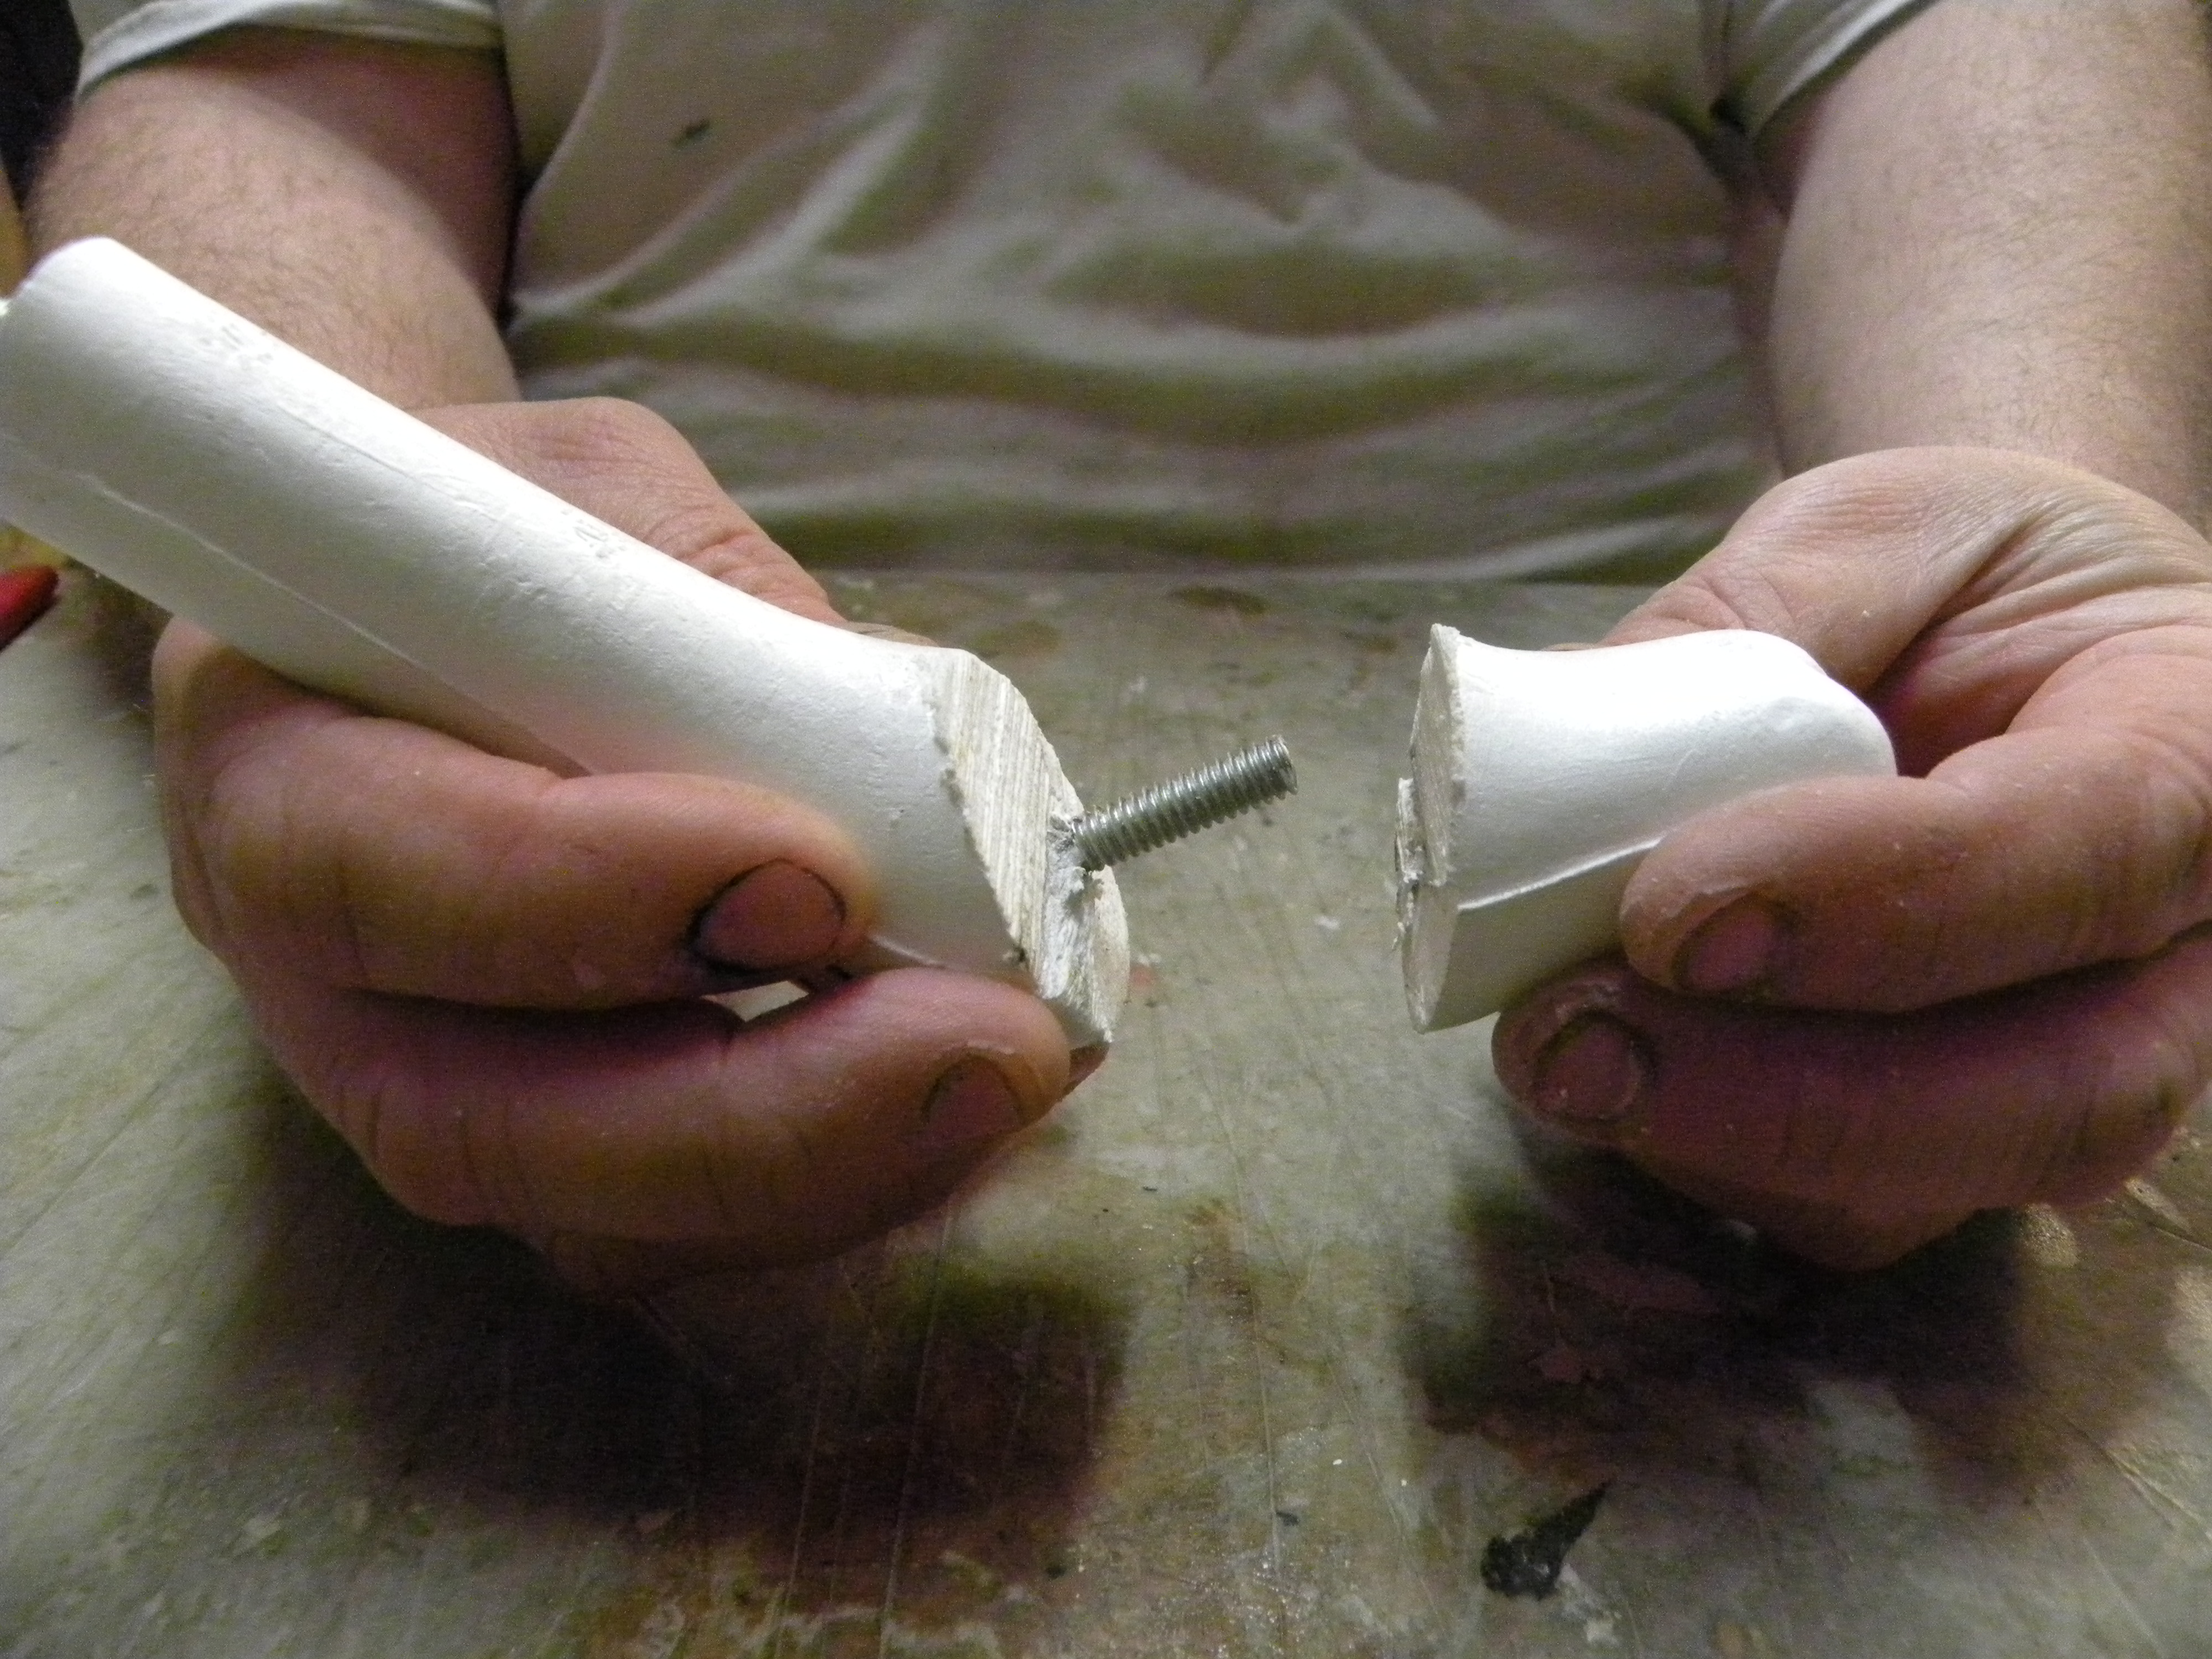
Okay, let’s move onto putting them back together. I prefer the deer hoof mannikins from Van Dykes for this process. 1, they are not over sculpted which makes them inexpensive. 2, they are made from light weight softer foam, making them easier to cut. 3, the threaded rod is actually bent and goes up into the hoof area, leaving a much stronger and rigid support for a heavy gun or jacket to hang on and doesn’t just stop at the bend like some on the market do.
Here is where a lot of people have problems, they can’t figure out how to get the skin to meet, let alone sew the skin up at the bend of the ankle. So let’s “SIMPLIFY” the process. First, using a band saw cut through the bend of the ankle at an angle. Roll the form as you cut making a complete circle, DO NOT CUT THROUGH THE THREADED ROD.
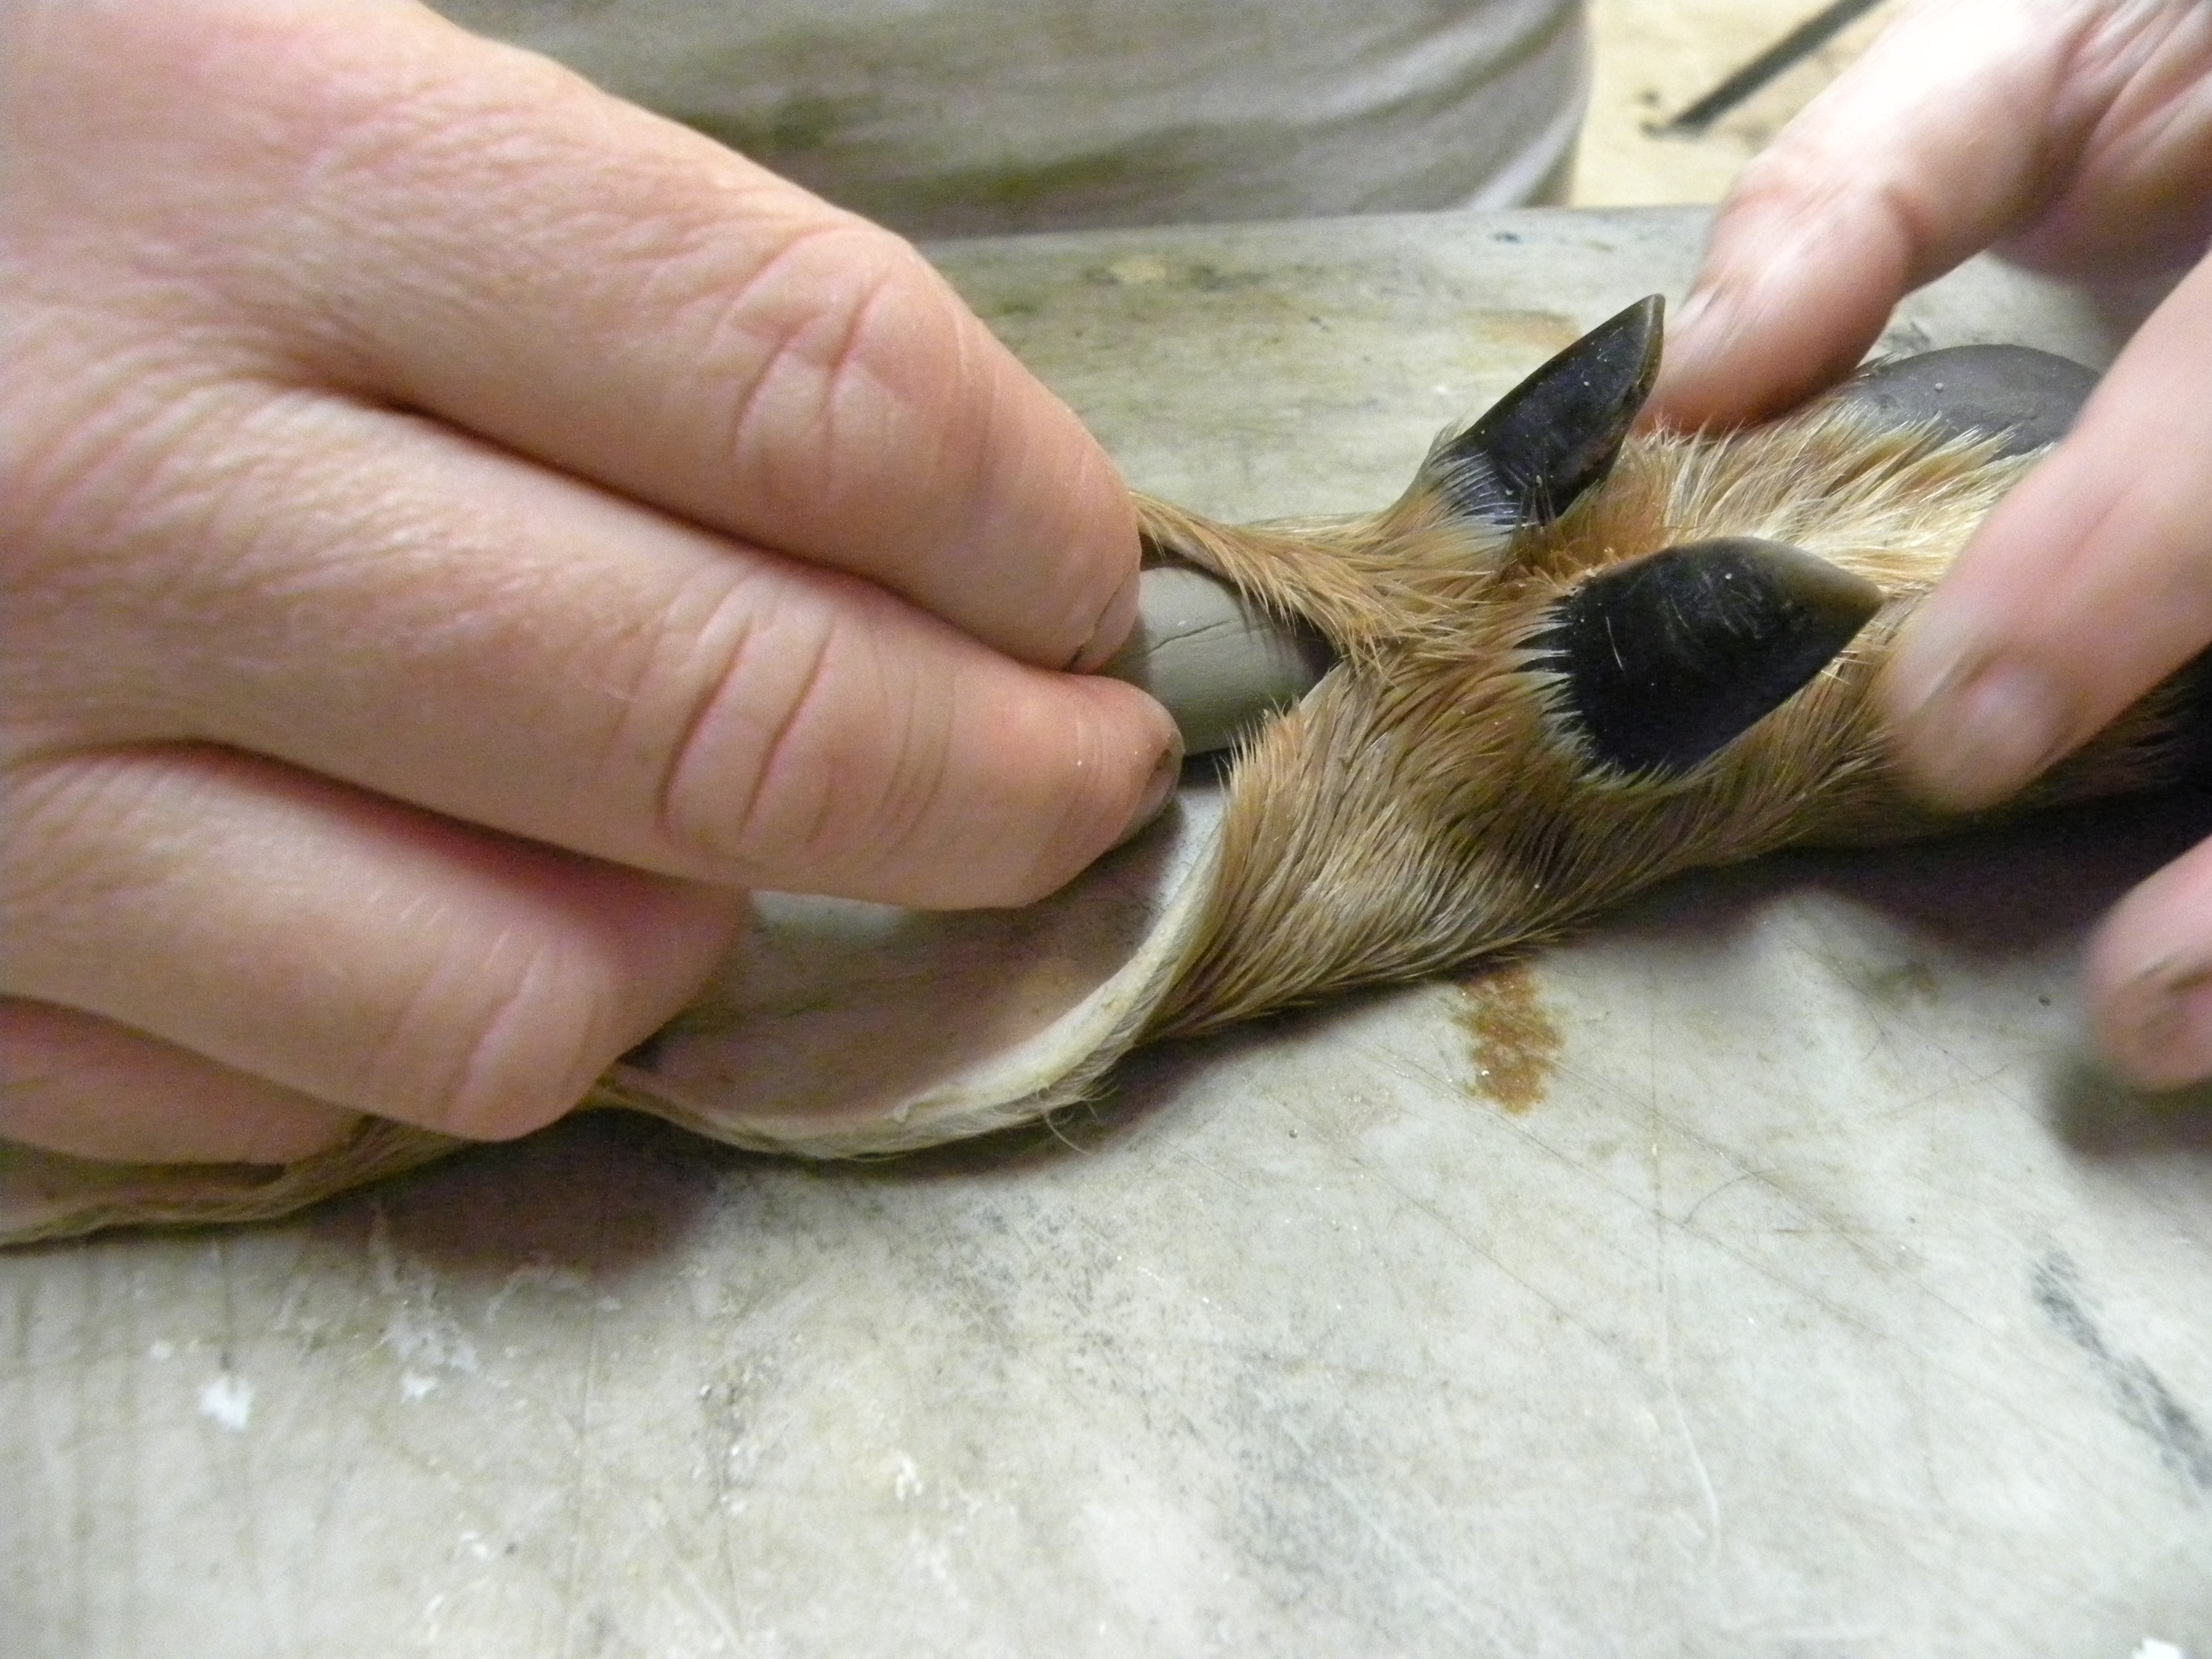
Discard the foam cut from the form, it will not be needed. Next go ahead and sew the leg skins up just past the dew claws. Do a quick test fit; the form should slide in effortlessly.
Now once you are satisfied with the fit, start replacing the knuckles with critter clay, building it all the way out to the dew claws because you are going to need to replace the foam you removed from the mannikin.
Insert the cut end of the form into the clay and push it up into the hoof. Work the clay to make a smooth transition from the clay to the foam.
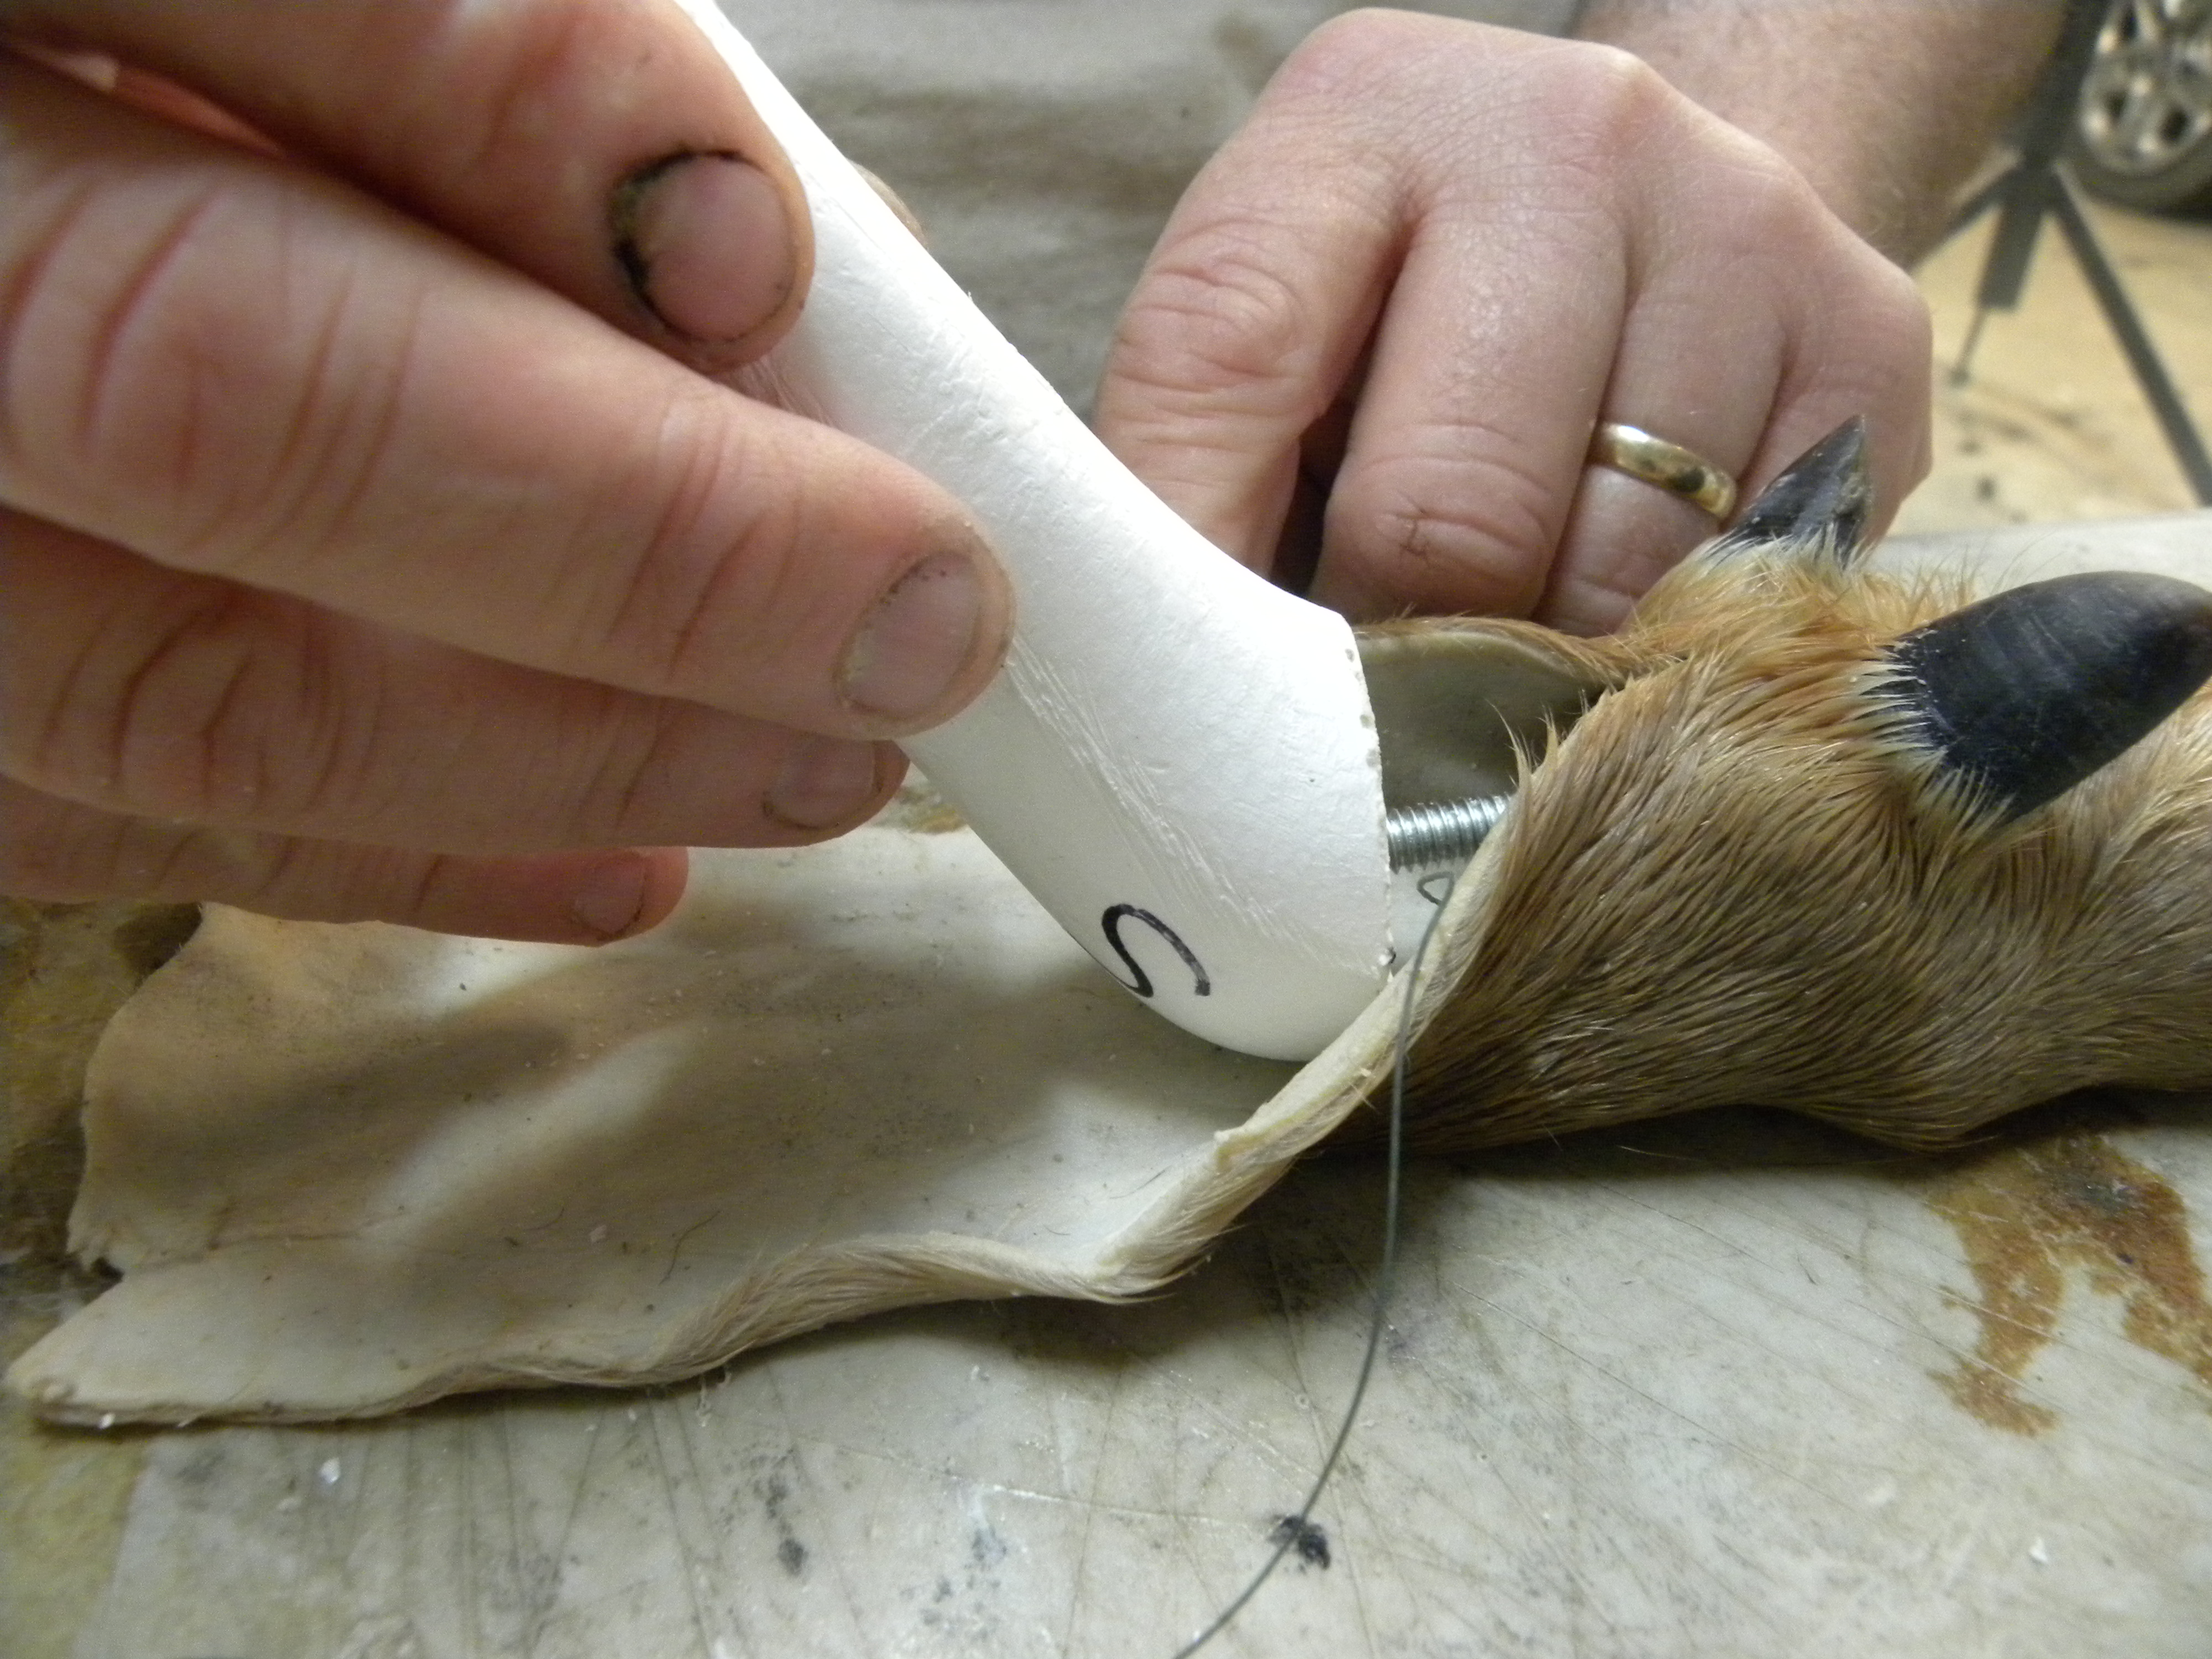
Now you can lay the hoof out flat and finish sewing it up, don’t forget to add some hide glue. Be sure to leave a little over hang of skin at the end to allow for shrinkage.

Once the skin is sewn and hair patterns are aligned bend the hooves up into the desired position. Make sure the skin stays aligned and the clay to foam transition is nice and smooth. With a piece of thread, tie the hooves to the threaded rod to hold it all in place as they dry.
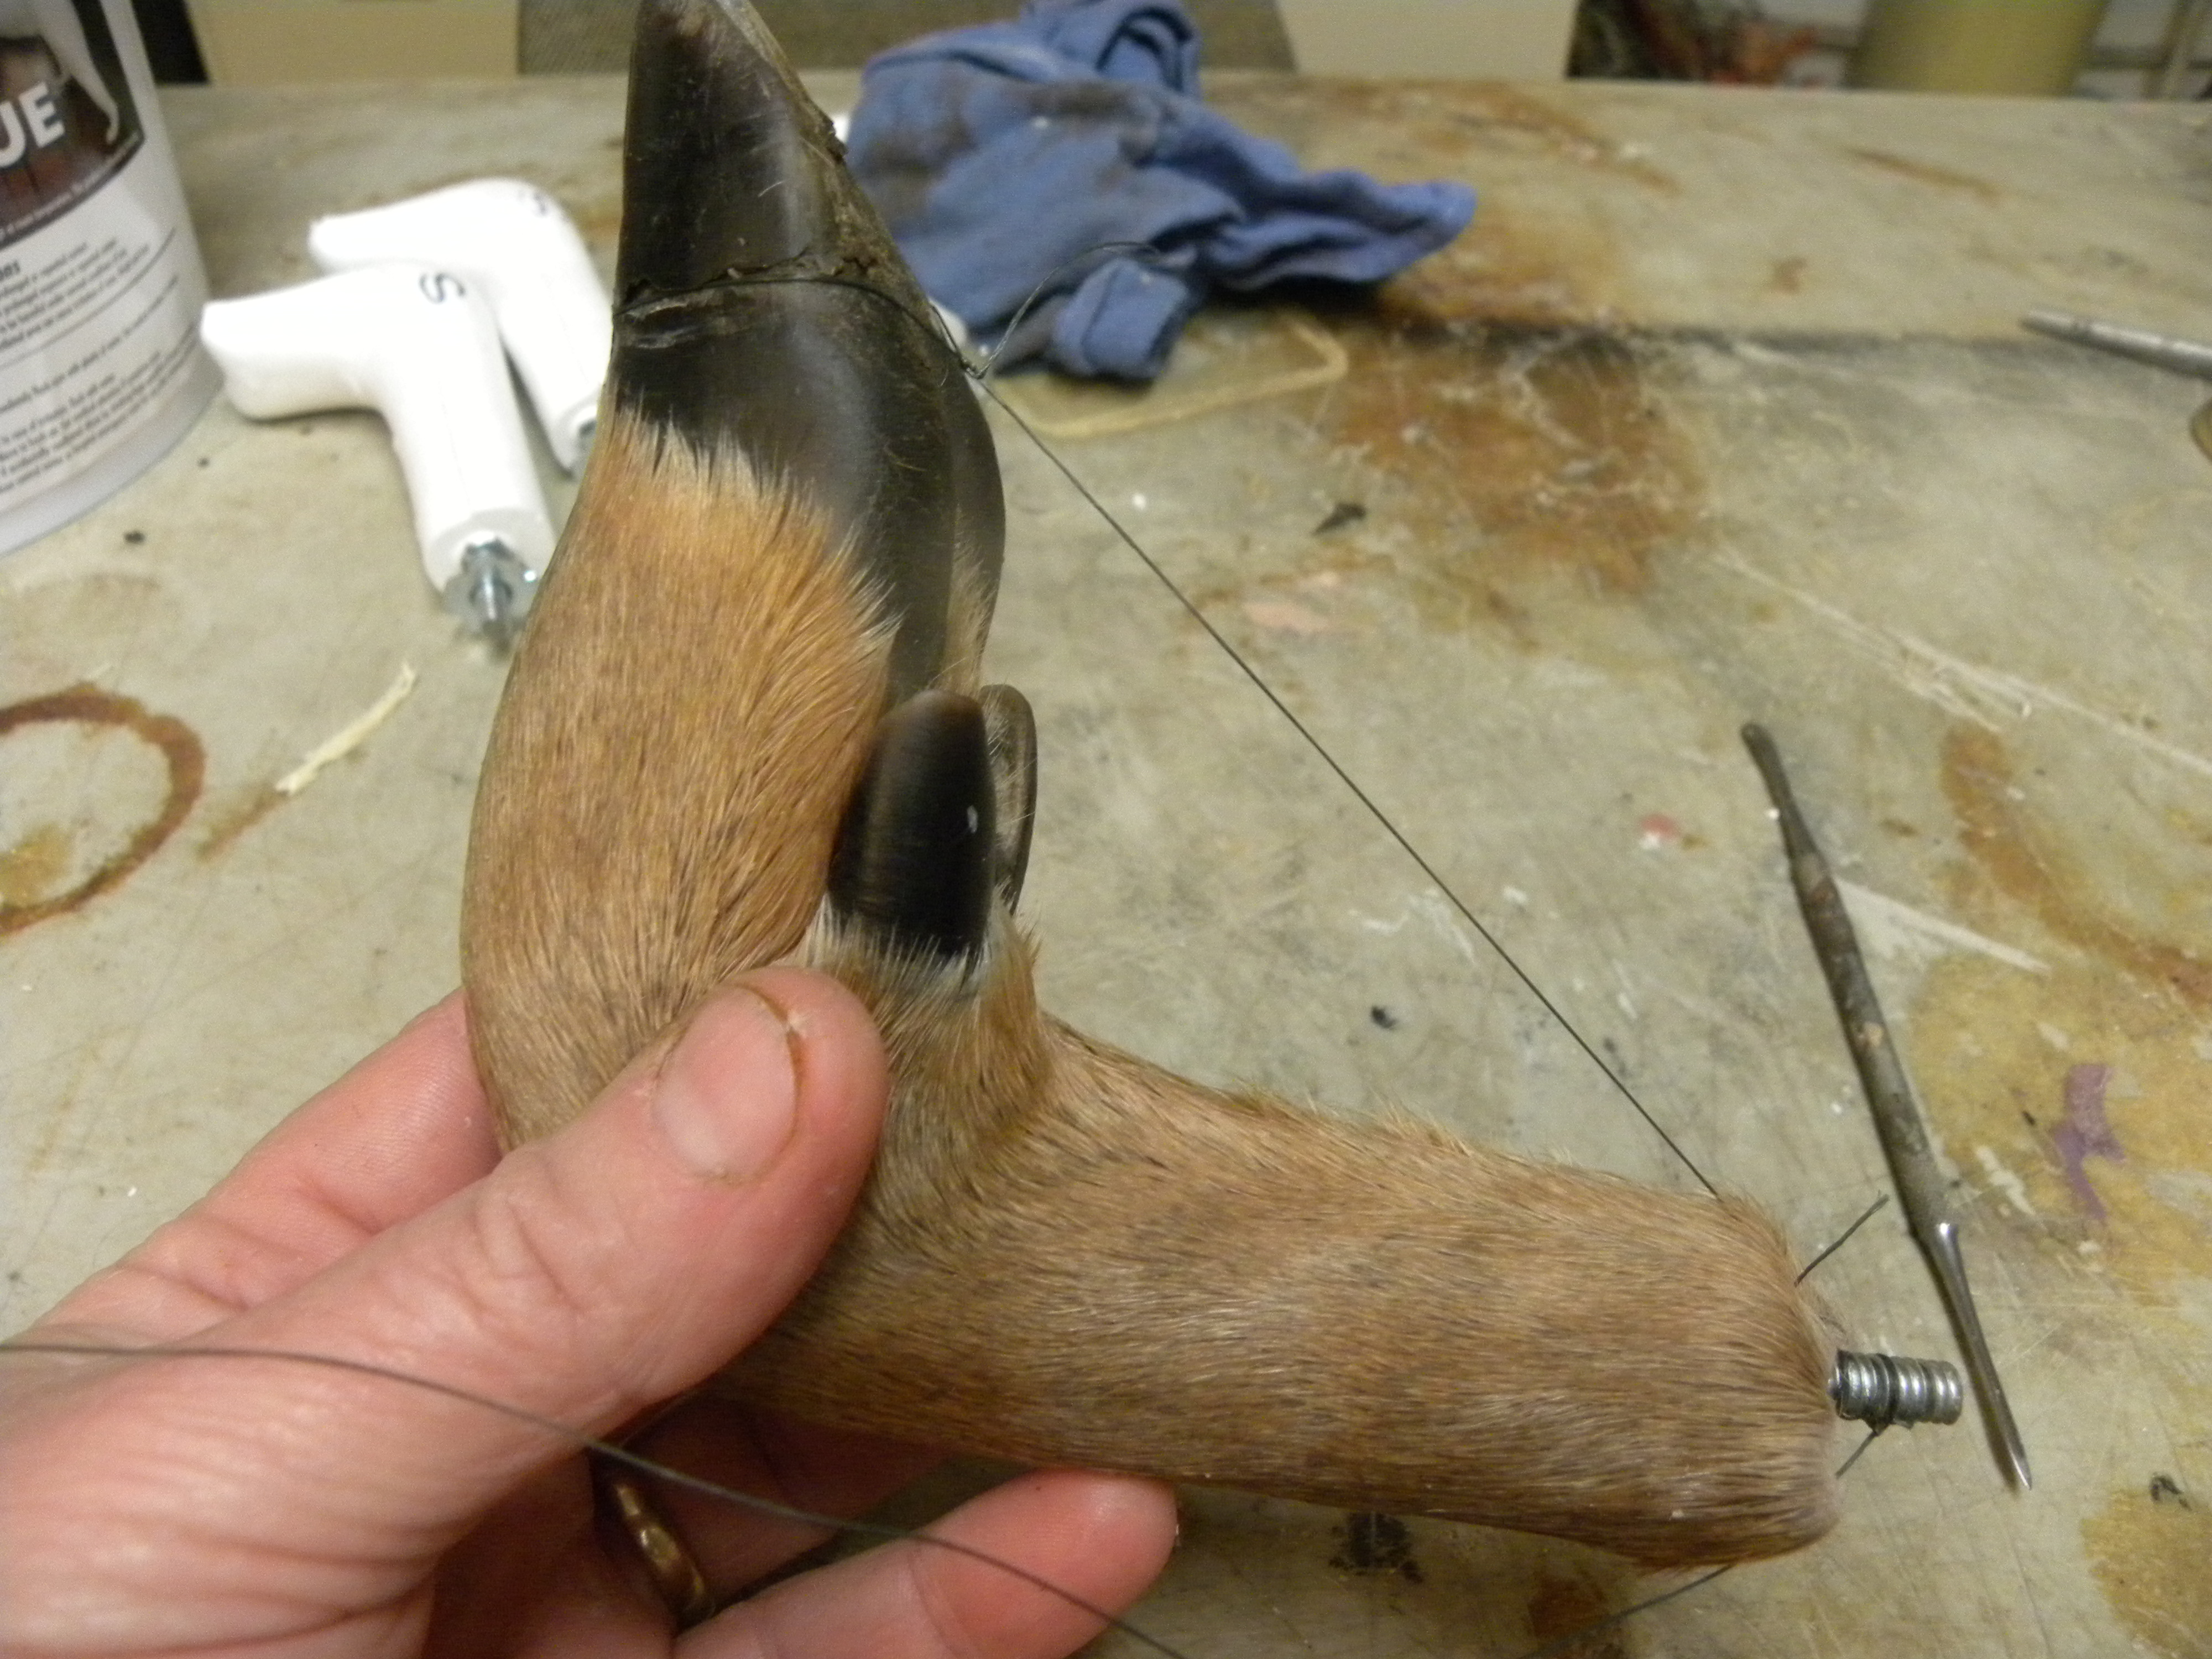
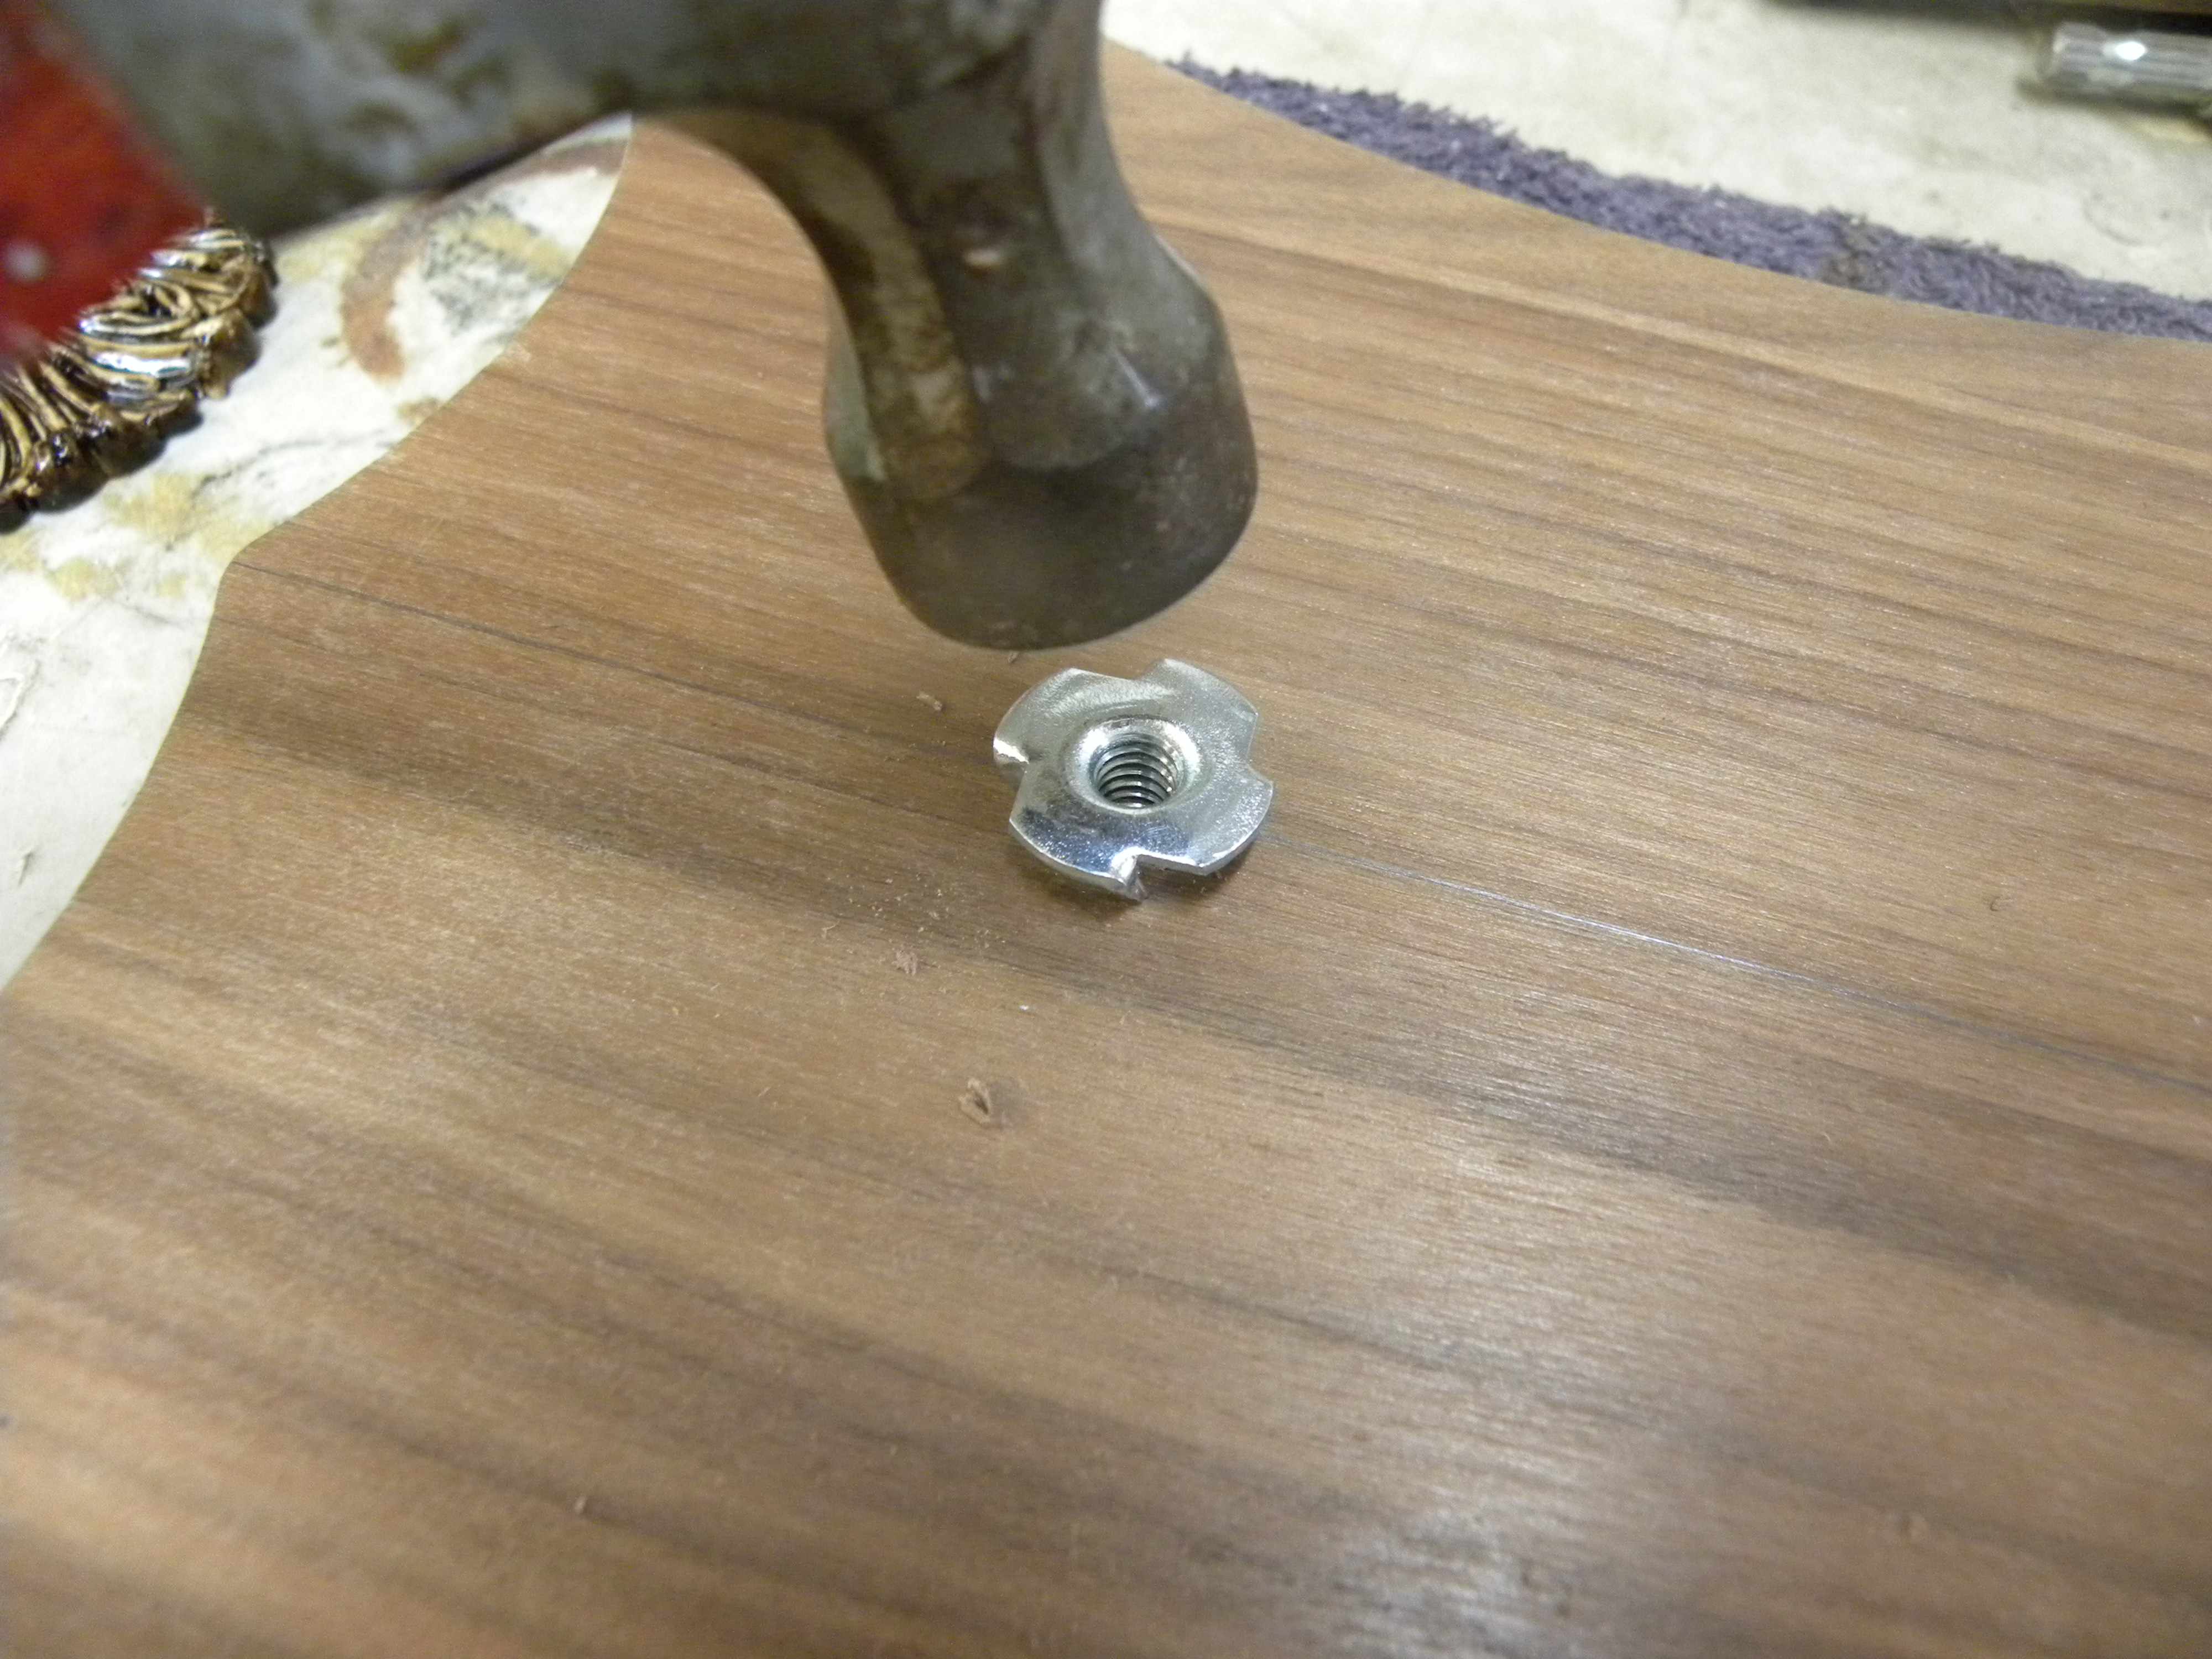
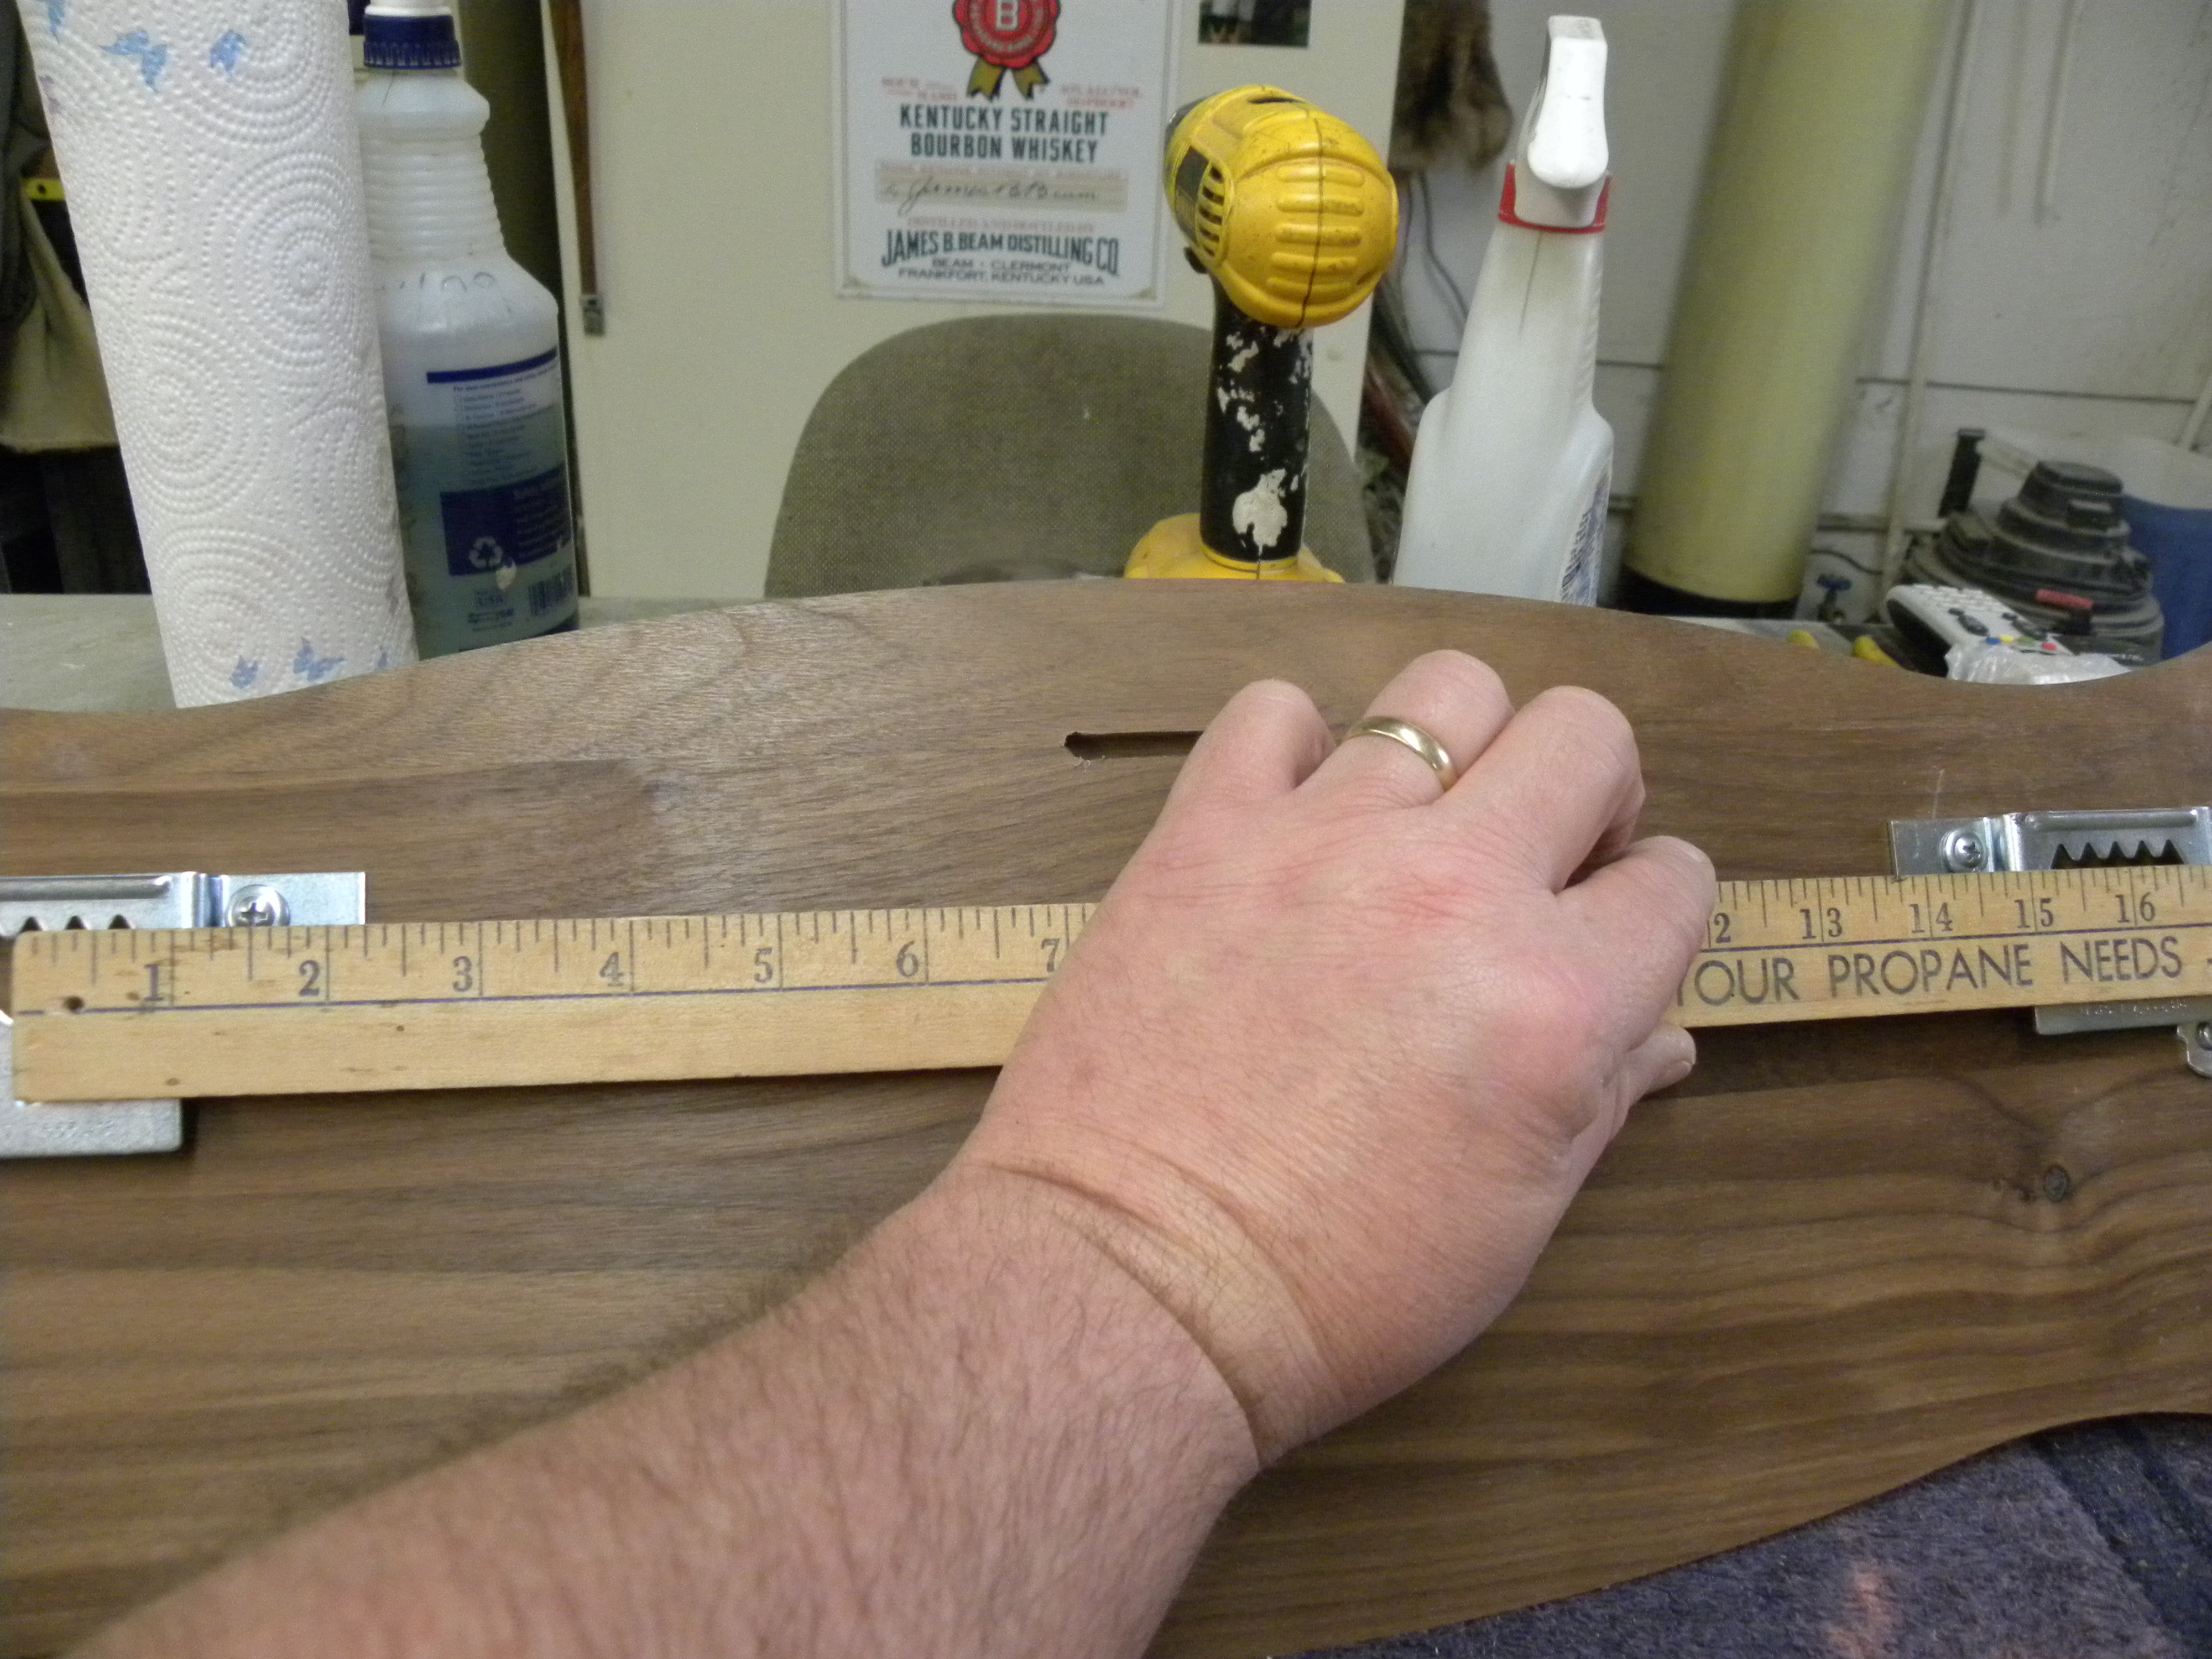
Once everything has dried, trim off the excess skin that was left for shrinkage purposes. Also make sure the threads of the rod are clean from glue and clay so the Tee Nut spins on smoothly. On this particular project I used solid wood panels from Walnut Creek Hardwood. Whichever panels you decide to use, mark your desired location. Drill a hole to receive the Tee Nut and hammer it into the backside of the panel.
I prefer to use ferrules to dress up the ends of the legs, the ones I am using in this article are simulated wood ferrules from Van Dykes. Again they are inexpensive but really make the final product pop. Slide the ferrules over the threaded rod and screw the rod through the front side of the panel into the Tee Nut. Be very careful not to over tighten. Always make sure to use heavy duty hangers. The last thing you want is for a client’s gun to fall off the wall due to a cheap hanger. Also, do your client a favor and place the hangers to align with two studs, 16” on center is the national standard for most residential walls.
This concludes this article; I hope you can take something away that will help you in your everyday work.
DP


")


