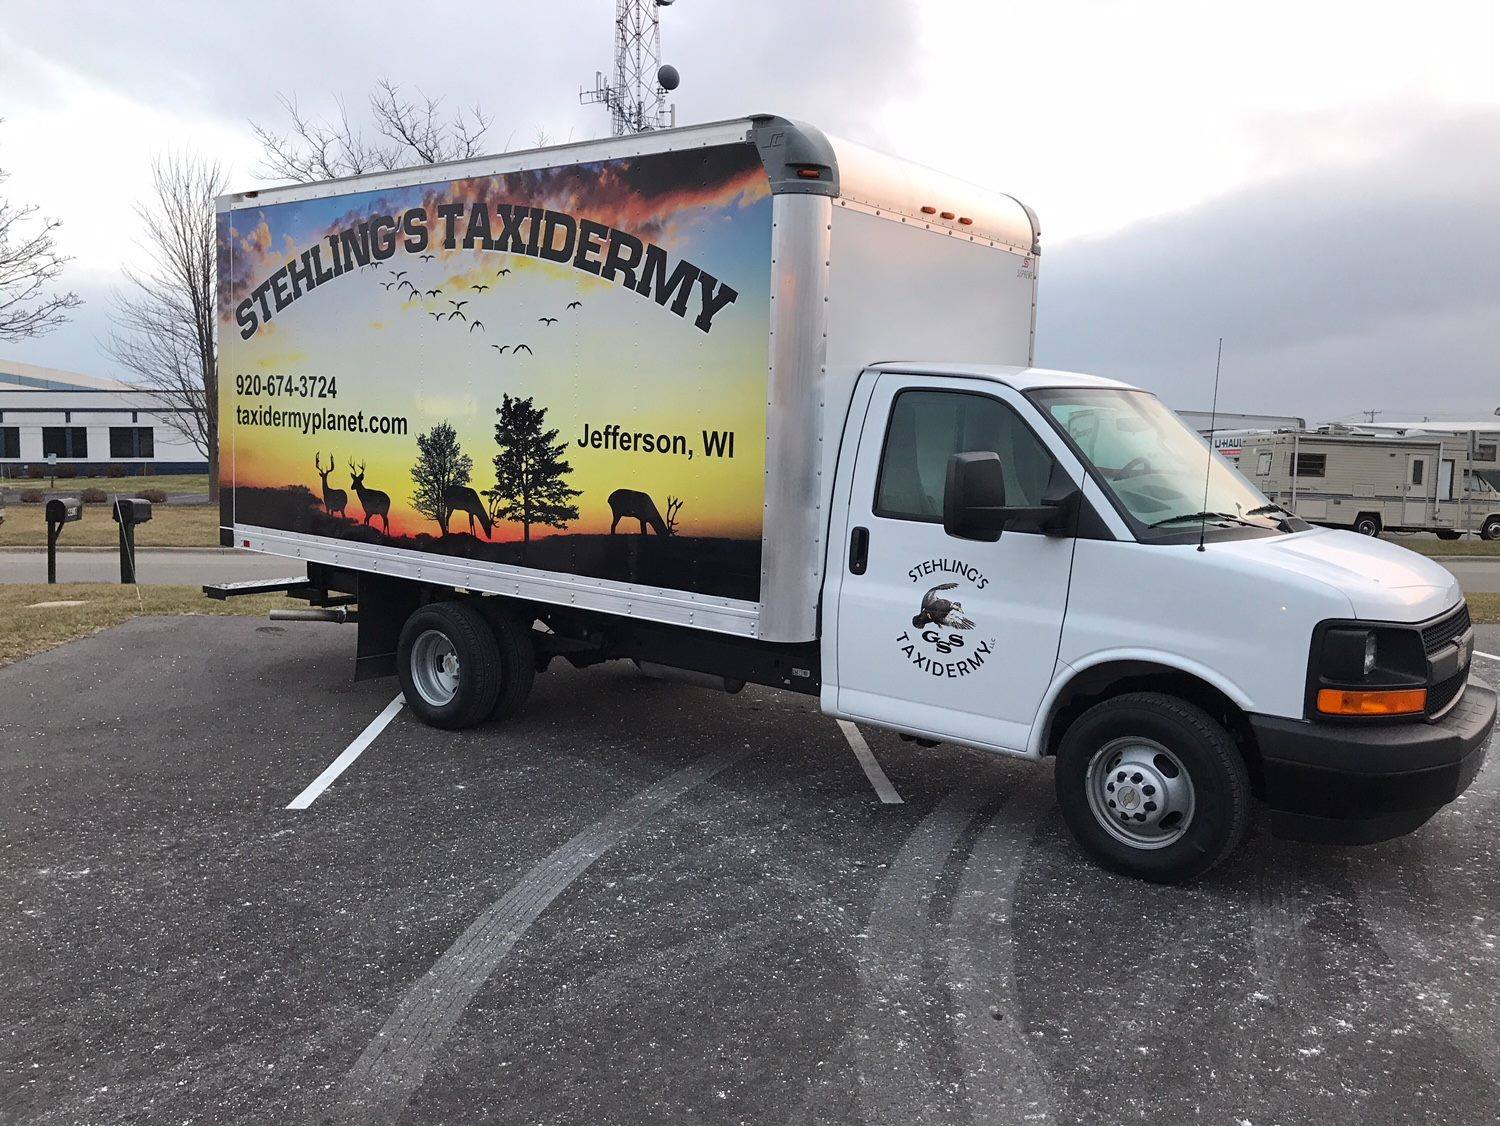
Home Blog Page 3

Sealing Fish Fins 101

0
sealing fish fins

True story, many years ago before I knew better I bought some fin backing cream from a reputable taxidermy supplier for sealing fish fins. It arrived in a caulking tube and had its own label with the suppliers name on it. One day by accident I dropped the tube in a bucket of water and the label peeled right off. Underneath the real manufactures name and product was revealed. It was then I learned, all I had bought was a relabeled tube of acrylic caulk that was sold in any Home Depot or Lowes for 3X the amount I could have gotten it for locally.

I’m sure you’ve heard the saying that there are a million ways to skin a cat. Whoever came up with that quote and why is beyond me, or why a cat was used in that analogy. Nonetheless that quote applies day in, day and day out in the world of taxidermy. Pun intended I guess if you think about it.

Taxidermy and skinning is like bread and butter, but you wouldn’t think sealing fish fins and caulk would fall into the same adage. But like the old legendary quote goes, there are a million ways to skin a cat so let’s get going here.

If you’re an old school fish taxidermist you’re most likely still using the real fins on your fish. Modern day methods have pushed towards artificial reproduction fins which are usually molded and cast from the original fish.  When this method is used there is no need for sealing fish fins for protection.

When our fish fins dry out after mounting, they become very brittle and fragile. They will break, bend and tear with little force. The edges of our fins are most vulnerable to damage. Sealing fish fins prevents this and adds life back into our fins.

For this article I need you to forget all you have learned or read over the years on sealing fish fins. My approach to sealing fish fins is not what they taught you in taxidermy school. I never played well with the thought, that you must use a taxidermy grade fin sealer bought from a taxidermy supplier. And here is something else I’m still trying to wrap my head around and that is those backing their fins with material like silk span. I guess you can claim its done for fin repair, but I have done hundreds of fin repairs without ever using a backing. If your spiny dorsal fin was missing some of its soft rays, I’ll give you the backing to rebuild, but for other holes and tears you just don’t need it.

All of my fish fins done over the years which would number thousands of fins, whether fresh water or salt water, have been sealed using Ace’s brand of their clear acrylic caulk. It comes in a tube and comes out white, so make sure you pick up a caulking gun. When dried it is as clear as any fish fin cream I have seen sold. This caulk has very good adhesive properties and builds up the fins very nicely. Giving your fish fins that meaty look when dried.

When completely dried the fins are strong and durable with flexibility. I have also never had a problem with any water color or lacquer airbrush paint adhering to the fins during the painting process.  In 20 years I have never had one customer ever complain or call back because they had fin issues with their mount.

Over the years I have had conversations with other fish taxidermists who show concern over using clear acrylic caulk. Mostly other brand types have been the topic and the most complaint heard is that it doesn’t dry totally clear. I have yet to meet or talk to anyone who is using Ace’s line of clear acrylic caulk and I’m telling you now it dries clear as anything I have seen come out of the taxidermy supply houses.

The fins pictured in this article show the process and results. I normally give my fins at least 2 coats sometimes three. The warmer it is in your studio the quicker it dries. For best results wet your paint brush prior to spreading out the caulk. This will make cleanup of the brush much easier when done. A wet brush will also spread out the caulk evenly and smoother then a dry brush. Wipe your brush off in-between fins so you don’t get excessive build up between the bristles. Both sides of the fins get hit with the caulk and any holes or tears will be filled in easily. Do not apply too heavy on the fins edge and I recommend not trimming the fins edge. Natural looking fins are best left alone. There is just something about trimmed fins that irk me.

Painting a Largemouth Bass Fish Eye

0
Painting a Largemouth Bass Fish Eye

The advantage of painting a largemouth bass fish eye is that you can look at reference and paint accordingly to what your reference is telling you. However commercial fish eyes are just fine for taxidermy and are the industry standard for taxidermy studios across the country. But when painting a largemouth bass fish eye you are able to change pupil sizes along with color variations depending on your fish you are mounting. Having the flexibility and total control of how your fish eye looks is what sets you apart from the rest of the fish taxidermists of the world. Before you can even start you will need to buy Jeff Lumsden’s Still Life Eyes from McKenzie Taxidermy. When buying lenses, buy multiple sizes so you will be stocked up and ready to go no matter what fish is delivered to your taxidermy shop for fish taxidermy. You will never ever have to wait for a fish eye order to come in again, because you will be stocked up on fish eye blanks.

Before we start painting a largemouth bass fish eye go to Google Image search and search for largemouth bass pictures. Look for pictures that focus in on the head and eye. You may have to play around with the search query to find exactly what you’re looking for. When you click on a good reference pic as I have described, Google will show you similar pictures to the one you just clicked on. Click on the view more link below the file name. A new page of Google Images will be shown and most if not all will resemble your original reference picture of choice. Pick out four of the best pictures that give you a good reference of a largemouth bass eye. Download them to your tablet, phone, PC or whatever you are using in the shop to aid you in taxidermy reference pictures. If you have a Wi-Fi printer in the shop or home, print them out and then laminate them. This way you will be set for life, and be able to pull those pics out anytime you paint a largemouth bass eye. Another way to get good reference pictures is to go out and go fishing. Take close up pics of the bass you catch and transfer the pictures to your iPad or tablet.

Largemouth Bas Reference

With all that out of the way and our reference pictures in hand let’s get to painting a largemouth bass eye.

Step 1: Draw a crosshair on the outside of the eye with a thin Sharpie black marker. The crosshairs should cross each other dead center of the eye, which will be the center of our pupil. Next by looking at our reference, draw a pupil shape on the same side of the eye. Pupils in a fish eye are not round. Some are a soft almond shape forward with a soft round curve in the rear. Some are more defined forward. If you’re unhappy with your pupil shape wipe off the marker with some rubbing alcohol and repeat this step until you get it right.  Never use any harsh chemicals on the lenses. Alcohol or Windex will be enough. An important step here is not to oversize the pupil. The pupil should be no more then 1/3 in size to relation to the iris.

Step 1 Painting a Largemouth Bass Fish Eye

Step 2: We will now take a paint marker and trace the pupil on the inside of the eye. In other words trace over the Sharpie you drew on the outside of the eye, but do this on the inside of the eye. If all looks good then remove the marker from the outside of the eye. Do this by using a paper towel and rubbing alcohol.

Step 3: Go ahead and fill in the rest of the pupil using your paint marker. Again we are painting the inside of the eye. If you go outside of the traced pupil edge with the paint, don’t freak out just yet. Yes our pupil should exhibit a clean and crisp edge all the way around. When the paint is dry you can use a tooth pick to clean up the edge. Or if you prefer you can use a Q-Tip with some alcohol. Either way works. We must have a clean sharp edged pupil before we can go forward. So let’s be sure we are there before going forward.

Step 2&3 Painting a Largemouth Bass Fish Eye

Step 4:  Before we move forward, we need to secure our eye so we don’t handle it as we proceed. To do this you can buy some double sided tape, or just use a plain piece of duct tape rolled into a loop.  Get a piece of cardboard and stick the tape to it. Now stick your eye to the tape so the inside of the eye is facing up. Next take some sealer, in our case lacquer sealer, and seal down the pupil. We will then dry the sealer with a hair dryer.

Painting a Largemouth Bass Fish Eye

Step 5: If we look at our largemouth bass reference pictures we will see that the pupil has a gold ring around it. We will recreate this gold ring by using a gold metallic fine tipped paint pen. Again we are looking for a crisp clean ring around the pupil. The key here is that we want our gold ring to be thin as in our reference pictures. If you have to clean the edge you can do so with a sharp tooth pick, like we did with our pupil. Once complete go ahead and seal it with your lacquer sealer followed with drying.

Now we are at the part where we start to add all of the rest of our color variants and depths. If you look at your references you will know that most largemouth bass eyes vary in color. It may depend on the region where the fish was caught, the water temperature and time of year caught. Every bass eye will have variations and depths of browns, including metallic browns and gold’s. So with that in mind there really is no universal way of painting a largemouth bass eye. The bottom line is, go with your reference that you downloaded. Better yet, ask the angler that caught the fish if they have any close up pics of the fish, particularly the head. This way you are sure to get it right when painting the eye.

From here forward we will be using dry powders to complete our largemouth bass eye. Pearl Ex and Neuberg Ebel powders are what we use here in our taxidermy lab to get the job done. The following procedure that’s about to be offered is not set in stone. It is just a guideline on how we achieve the results we are after in painting a largemouth bass eye. Some taxidermists will actually airbrush a good portion on the eye and do well at accomplishing the same effects.

Step 6: Going by our largemouth bass eye reference we have chosen Pearl Ex Antique Bronze #660 as our base color. This is applied dry, straight from the jar with a small artist brush. We will put this color over the pupil and completely inside the base (flat part) of the eye known as the iris. We will once again seal the eye with our lacquer before heading to the next step.

Step 7:  By going over the Antique Bronze blotch in some Pearl Ex Super Bronze #664. Don’t overdo this step. We just want to add some depth and charter to the Antique Bronze. To get the full effect of your work remove the eye from the tape, flip the eye over and lay on a white background. If you hold the eye up to a light, it will be transparent and probably not very attractive. But give it a drop back and the eye comes to life. How does it look so far?

The next step will most likely be the last step for most of us. However if your bass eye reference exhibits any of the gold’s or silver that can at times be found in a bass eye don’t hesitate to add them in.  For example we have seen some bass eyes show a hint of silver in the lower 1/3 front. However we would have added this color first before the antique bronze. Any gold can be added after the bronze. Just be sure to seal in-between colors.

Step 8: We will now shadow the rim of the iris to the edge of the lens by brushing in some Neuberg Ebel Statutory Bronze #47. If your eye is still secure to the tape hold it sideways and rotate while powdering the rim. Seal it down with your lacquer.  When done remove the eye from the tape, and place the eye onto a white background. Now watch as your custom painted bass eye comes to life.

Congratulations you have just painted your first bass eye. The featured image at the the top of this page shows our completed bass eye.

The all new 8800 Series Pedestals from Reasearch Mannikins !

0

The all new 8800 Series Pedestal Whitetail from Bill Lancaster are now
available from Research Mannikins, Jim Allred, and Trufitt. The 8800
Pedestal has the same alert and forward look as the 8500 Series
Semi-Sneaks, 8600 Uprights, and 8700 Wall Pedestals. All of these are
shipped from Illinois, North Carolina, and Utah at an affordable cost.                         Featured pedestals range in cost from $52.70 – $60.45. Priced significantly
lower than other Pedestals.

How To Break In A Deer Hide

0
How To Break In A Deer Hide

There are many ways one could break in a deer hide for softness. You will find a ton of information on the net on just how to do it. There is no secret on how to break in a deer hide. The bottom line is that work is involved and some elbow grease goes a long way.

In this video I show you one method that can be done without having to bend over on a beam while you break in a deer hide. If you have a large enough table you won’t even have to handle the hide by trying to hold it off the ground.

The deer hide in this video is completely tanned and has been oiled. It is in the drying stages. You will always want to break in a deer hide while it is in the drying stages, and not when it is fully dried. You will repeat the steps shown in the video several times over several times, until your deer hide is fully dried. The mission here is to soften and break the fiber structure to keep the skin flexible and pliable. The more you work it the better it will come out.


Turkey Taxidermy Is Coming- Are You Ready?

0
Turkey Taxidermy

Get ready because the 2017 spring turkey season is a coming, but if you’re a southern boy or girl, it’s already here. Turkey taxidermy is here so as a taxidermist what are your duties right about now? What should you be thinking about? Planning on? The answer is simple, advertise and more advertise, and then advertise some more. Let your local community know you’re in business to mount their gobbler of a lifetime.

In today’s day and age the best way to advertise your turkey taxidermy services is digitally across the World Wide Web. The days of newspaper print ads our fathers and grand dads use to do are over folks.  Facebook is by far the best ways to advertise (promoted post) because they target your audience in a unique kind of way..  By what I mean, is that if your turkey taxidermy shop operates in Smith Town USA, Facebook will expose your ad to any and all turkey hunters living in the Smith Town zip code.  Trust me when I say that Facebooks algorithm program already knows who hunts and don’t hunt within a geographical area. So don’t worry, the actual percentage of non-targeted audience reach is minimal. If you want to spend more money, target the next town over too. You can also just target people who already LIKE your page and their friends too that don’t LIKE your page just yet. Your opportunities are endless when it comes to advertising on social media.

In order for your advertising on Facebook to work you will need to have a Facebook Page set up for your taxidermy business. Not a group but a page which is not the same as a Facebook profile, as neither of those Facebook options allow for targeted advertising.

Be sure to add pictures of your work in your turkey taxidermy ad as well as a great description of exactly what you’re offering. Include prices if you’d like, business hours, contact info, etc. Run the ad for at least seven days and if you can swing it, for the entire turkey season would be better. You will reach thousands upon thousands of potential clients, but the truth is only 50% will actually read your promoted advertisement. That is just the nature of the beast, but if you add an eye catching slogan or perhaps picture/video to your promoted post could go higher in the view department, not to mention engage with your ad.

Your goal in advertising with a Facebook promoted post is to get people to engage either by reacting to the turkey taxidermy promoted post and or commenting on the post. The more reaction to the promoted post the higher the views, the farther the reach. When people react and engage to your promoted post, people on their friends list will see it via their news feed, people who Facebook may have not initially targeted for one reason or another. That right there is free advertising and could land you a new client.

If your one of the few taxidermists who do not provide turkey taxidermy because you just don’t have the confidence in mounting birds, or your too busy with deer and fish, there’s an answer. It’s called wholesale turkey taxidermy. Believe it or not there are qualified and experienced taxidermists out there that provide turkey taxidermy to other taxidermists at a wholesale price. Meaning you still get to offer your customers high quality turkey taxidermy, without the headaches and frustrations of mounting a turkey at a profitable price. It is more common than you think and year in year out thousands of turkey’s are shipped across the country from taxidermy shop to shop, from taxidermy shop to client.

If you operate anywhere in the mid-west or the northeast of the United States and are in need of turkey taxidermy, two names come to mind. For you mid westerns and west coasters, Stehling’s Taxidermy provides some of the best turkey taxidermy found anywhere in North America. For those who operate in the northeast or east coast Cliffords Taxidermy would be worth looking at for your turkey taxidermy needs. Both of these outfits receive and ship turkeys for taxidermy purposes.

Good luck and may your freezer be full of feathers this spring turkey season.

Keeping Your Magic Sculpt Soft

0
Magic Sculpt

Magic Sculpt is pretty much a god send for the taxidermist. It has many different uses in the industry and is used every day in taxidermy shops around the world. No matter what you specialize in, whether it is fish, birds are deer you will most likely have a kit of Magic Sculpt on the shelf somewhere in the shop.

The biggest complaint I hear from fellow constituents involved in taxidermy is that the hardener goes bad and is unusable. It happens to all of us and the older the Magic Sculpt is the worse it gets.  What is happening is that the Hardener is drying out and is almost impossible to get out of the container to mix with the resin. It can get to a point that the hardener crystallizes to the point that it is useless. Well never fear again of opening a container of Magic Sculpt to only find out that it has dried out. This video will explain the secret to keeping your Magic Sculpt soft and usable 24/7.

https://youtu.be/jkIIMEdl-6k


Removing Horns from Cores

0

Hello everyone, this is my first article contribution to the site.  As the title suggests I will be explaining how to remove animal horns from the bone cores and why this is important.  The following are some items that you will need for this task.

  • A large pot
  • Propane Burner and Propane
  • Drill with no larger than a ¼” drill bit
  • Water
  • Arm and Hammer Liquid Laundry detergent
  • Rubber Mallet
  • Knife or Scalpel
  • Something to mix the water and detergent with ( a paint stir stick works well)
  • Metal Tongs
  • Good Quality Gloves that are waterproof and chemical resistant
  • Eye protection
  • Waterproof Apron

This first thing you will have to do is to fill the pot about ¾ of the way full with water. Next you will get the propane and burner set up.  Once the pot is on the burner and the burner is going add about half of a cap full of the detergent to the water and stir it up.  Depending on how large your pot is you may need less than a half of a cap full of detergent or you may need more. I wouldn’t put more than one (1) full cap in though.  Let the water start to boil and submerge half of the set of horns in the pot.  Leave the horn in there for about 15-20 minutes. Then carefully remove horns and try to wiggle them.  When doing this grab the horn about 4 inches up from the base.  If it doesn’t start to move or wiggle take you knife or scalpel and carefully work it around the base of the horn.  You want to make sure not to cut the actual horn because it will become very soft during this process.  You will work the knife between the horn and the meat/tissue that holds the horn to the core. Then place the same horn back into the pot of boiling water.  Repeat this process until the horn comes off of the core.  If after several tries the core still isn’t starting to loosen try to hit the base of the horn with a rubber mallet. You can hit it fairly firm but be careful not to crack the horn because that will just create more work for you later.  If the horn still is not loosening you can drill three (3) or four (4) small holes in the back of the horn.  Start slightly above the bottom of the horn and drill a hole. Then move directly up from that and drill another hole and continue this until you get no more than four (4) holes.  Put the horn and core back into the boiling water and it should come off fairly easy.  This is the process that I use to remove all of my horns.

Another option is to bag the horns up (preferably in a black garbage bag) after you have caped and capped the animal.  Poke a decent amount of holes in the bag and hang it up in a tree or off the side of a building where it gets sunlight for a large portion of the day.  After hanging there for 3-4 weeks if it’s during the summer and maybe 6-8 weeks if it’s during the winter take the horns out of the bag and pull the horns off the cores.  A note about this is that you want it to be outside because as the tissue starts to break down it will start to smell pretty bad.  This process is less labor intensive but it doesn’t seem to work as well; at least not in my experience. Sometimes though after using this process you still need to do the first process that I outlined to get the horns off.

If you have any questions please feel free to email me or message me on here.  In next month’s article I will cover how to re-attach the horns for mounting them.


Tim Patton

President

Patton’s Taxidermy Shop LLC

Making Rocks

0

First, I cut a piece of rigid foam or use a piece of an old mannikin.

Next, I sand or scrape it to the shape I want, making sure to sand off all of the slick areas where mold release was used.

Next, I mix 50/50 Durabond powdered drywall plaster and Vermiculite ( I get it at plant stores or nurseries)

Next, I cover the entire foam piece with it, except the bottom, and let it set up for a few minutes.

Once it has set and firmed up a little, I use a damp paper towel and smooth down some of the pointy looking areas.

After this has set up ( about 20 minutes ), I mix about 5 parts water to 1 part powdered Tempra paint.

Using a 1 “ paint brush or a Tempra brush, I dab on the paint making sure it gets down in the cracks and crevices of the rock.
Next I dab the rock with a dry paper towel until I achieve the look that I am after. I used Black Tempra on this rock, but you can use any color you want, and even mix them.

Very simple and saves a lot of money if you need to add some rocks to your habitat base! I attach them with hot glue.

McKenzie Taxidermy: The Good The Bad & The Ugly

0
Mckenzie taxidermy

If you don’t know what or who McKenzie Taxidermy (McKenzie Sports Products, LLC) is, then you don’t know very much about taxidermy or should I say the Trump of taxidermy.  If any one supplier ever comes up for discussion on Taxidermy.net or anyone of the Facebook taxidermy groups it would be that of McKenzie Taxidermy.  It’s no secret McKenzie gets a bad rap in most of those discussions and if you ask me it’s always about their shipping department.

Before we get going you may look at this article as review of McKenzie or a plug for McKenzie but I am only speaking from experience. I do not work for McKenzie nor do I have any strong relationships with the company.  This article has not been endorsed by McKenzie and in no shape or form have I been contacted by anyone to write such an article.

Founded by Larry McKenzie thirty or so years ago, I do believe they are now the largest taxidermy supply company within North America which is headquartered in Salisbury, NC. In November 2010 the Triangle Capital Corporation invested $6.0 million dollars into McKenzie Taxidermy. In October 2016, McKenzie purchased the assets of Knoblochs Chemicals. Knoblochs Chemicals is a major player in the taxidermy field has been providing products to the taxidermy industry for decades. As of this date McKenzie Taxidermy now has 5 distribution centers strategically laid across the United States, Ogden Utah, Caldwell Texas, in Beloit Wisconsin, Camp Hill Pennsylvania and Salisbury North Carolina.

I could keep going on and on about the accomplishments McKenzie has achieved in the last 20 years, but I would need to write a book. Some the biggest business moves that come to my mind when I hear the name McKenzie is their acquired purchases of VanDykes and W.A.S.C.O. Those two companies are the ones that got me going into taxidermy decades ago. My first ever supply order was from VanDykes.  I had never heard of McKenzie until they had bought out those two major suppliers. McKenzie has kept their promise and to this day I’m still able to buy taxidermy products that were originally developed and branded by those two companies. So to this day you will still hear the names VanDykes and W.A.S.C.O. within the taxidermy community.

I have heard the argument amongst taxidermists, that McKenzie is becoming a monopoly. Yes it’s true the company has acquired many other taxidermy supply business which means there is less of a choice today then there was 10 or 15 years ago when ordering taxidermy manikins from different companies.  But I can tell you this; I bet there are at least a dozen catalogs that still sit on my desk. All from different taxidermy supply companies and all who are still in business today. So that theory or argument that McKenzie is taking over the world doesn’t hold water in my books. Last I checked they (McKenzie) are not stopping, discouraging, and or threating anybody with half a brain from starting up their own taxidermy supply business.

The biggest complaint I get from fellow taxidermists is that McKenzie charges too much to ship its products. About once a month sure as the sun sets there will be a new post or comment somewhere on the net that bashes McKenzie on their shipping practices. It’s getting so old now I don’t even pay attention or bother replying to those negative and misinformed threads. As far as I’m concerned their shipping and handling charges is spot on. I have never felt I have been overcharged or scammed on the shipping. If you didn’t already know you are in full control on who delivers your package.  McKenzie gives you that option during check out. Remember you’re not just paying for the actual costs of the shipping. That box and packaging material costs money too. They are not just going to give it to you. All that stuff, the boxes and packaging material like bubble wrap is recyclable, stuff that can be re-used at a later date.  If you’re a full time taxidermy shop, you’re just not receiving taxidermy, your also shipping it. In no time you will have a small supply of bubble wrap and boxes of all sizes if ordering on a weekly or monthly basis.

Shipping prices will continue to rise every year by all the major carriers. McKenzie runs a business and adjusts accordingly and you should too. Sure McKenzie gets discounted rates from the major carriers like UPS and FedEx and they should. If you feel they should pass down those discounts to their customers then I think you missed class on the day they taught business 101. Every year thousands of taxidermists attend local, state and national taxidermy shows, events and competitions. At almost all these events they are able to buy deer manikins directly from the manufactures and take them home. Not only do you as the taxidermist get to write off all expenses for the trip, but you also didn’t have to pay any shipping for those manikins you threw into the back seat for the trip home. So are you now going to lower your deer mount price for your customers because you saved a good chunk of money? I think not. If you are not adjusting your mounting prices to reflect increases in delivery of your taxidermy supply, then you will be out of business. Taxidermists are the worst business people on the face of the earth as far as I’m concerned and I see so many go out of business for this exact reason.  The guys and gals who are charging $600 to $800 to complete a deer mount get it and understand the dynamics of overhead costs and most importantly the shipping costs associated with taxidermy. It isn’t because their work is worth that much, it’s because it costs money to do a mount and their goal to come out ahead with a profit when all said and done.

My theory on those who complain about the high shipping charges attached to their McKenzie invoice, are those who take in way too many deer at a low ball price and or those who don’t have a clue on how to run a business in the first place.  If you’re placing a small order, like for eyes, have them shipped via USPS, not UPS, its common sense. On larger orders like deer manikins for me Fedex Ground is the cheapest rate. For others it might be UPS. The box you see pictured in this article held a wall pedestal manikin along with other goodies and was shipped via FedEx at a charge of $20.00 during the month of January 2017. I can live with that and for one second wouldn’t even give a double take on that shipping charge. Actually for 2017 that’s a good price since other suppliers have charged me $25 to $30 to ship one deer manikin.

If there is anything I love about McKenzie is the speed in their shipping. 90% of all my orders placed via the internet are here at my doorstep within 24 hours. When it started happening I thought it was just a once in a lifetime fluke. Then it kept happening and I do believe the credit goes to the Camp Hill, PA facility servicing the northeast sector of the US. No other taxidermy supply company has ever delivered to my shop with such speed and accuracy before. My boxes are also not crushed or ripped open upon arrival either. Whoever does the packing also knows how to pack an item properly and securely. I hope and pray that this type of service continues well into the future. Common sense will tell you though not everyone will get their supply order within 24 hours it’s just not going to happen for certain parts of the country.

Just like any other taxidermy supply company I have dealt with, there have been a few hiccups with McKenzie over the years. Not all transactions have been smooth, but then again I can give you the names of a few other big name supply houses that have screwed up more than once with my supply orders, including one nationally known taxidermy supply business that overcharged my account by a few hundred dollars. Small problems over the years with McKenzie I’ve had range from billing to missing items and a few other minor inconveniences. However there has not been one issue ever un-resolved with just a simple phone call.  They have a department called customer service, and I highly recommend calling it if an issue ever arises with your order. Remember the young lady on the other end of the line had absolutely nothing to do with shipping your box or deciding on how much to charge you for shipping. Cut them some slack and don’t go off the deep end when calling in a concern.

As far as products go, McKenzie Taxidermy has some of the best quality. Their deer, turkey and waterfowl manikins are some of the best out there. I’ve used them all and will continue to. Their library of DVD’s cover just about every subject related to taxidermy.  If you’re looking for a good whitetail mounting video I highly recommend A to Z by Rick Carter, an original W.A.S.C.O product now distributed by McKenzie Taxidermy. Their line taxidermy airbrush paints are the best of the best and all I actually use.

In closing I want to address that there are other supply companies you can deal with if you’re unhappy with McKenzie Taxidermy. It is what it is; they are here to stay and I suspect they will continue to grow in leaps and bounds. Love them, hate them, McKenzie Taxidermy is the Trump of taxidermy.

Tine Repair

0
I start by matching the length of the same tine on the opposite side of the rack. I then drill a hole into the broken tine and insert a 10 gauge wire and glue it into the base with super glue.
Next I sculpt the new tine with “ Fix It “ by Aves studio, white.
After drying ( I let it dry at least 12 hours), I use Yellow Ochre mixed with Burnt Sienna paint thinned down A LOT!!
I paint the tine with this wash, then wipe it with a dry brush to blend. If it gets too dark, you can use steel wool to remove the paint wash and redo it.
The paint wash will stay in the abnormalities of the sculpted tine.
Next I use a small brush to stipple Raw Umber onto the tine, then wipe it down with a dry brush.
I then make a very thinned down wash with Dark Brown, and paint the entire tine, and dry brush it again until I get the desired look.
and here it is in natural light outside
- Advertisement -

MOST POPULAR

HOT NEWS

Skip to toolbar